How to Build an Employee Information Form
Employee information forms are some of the most common data collection tools around. They’re a crucial part of onboarding workflows in just about every company in the world.
But, the majority of teams use dated tools, like spreadsheets, fillable PDFs, email chains, or even pen and paper, to gather details about new colleagues. This creates all sorts of problems, including inaccuracies, disorganization, and security issues.
Today, we’re diving deep into how to build a dedicated tool for capturing employee information.
Specifically, we’re going to show you how Budibase can be used to build advanced, custom forms on top of just about any data source.
But first, let’s get a little bit of context.
Why do we need an employee information form?
When we hire a new colleague, several teams, including IT, finance, HR, and the hiree’s own department, need to carry out various admin tasks. These make up a huge proportion of the wider onboarding process.
For example, setting up payroll or creating accounts within internal systems.
These all rely on teams having access to the right information. So, how we gather data during employee onboarding is a huge potential pinch point.
Building a dedicated form application achieves the following:
- Improving the efficiency of data collection.
- Reducing the scope for errors and inaccuracies.
- Centralizing information.
- Enabling us to implement existing business logic and workflows within forms.
For example, in the case of an employee information form, there’s a good chance that several different stakeholders are going to need to input specific fields. This is manageable on a small scale with spreadsheets or other manual tools.
But, in the majority of cases, we’re going to want more sophisticated ways to govern how users interact with our forms and data.
So…
What are we building?
We’re going to build a simple workflow form for creating new records in our employee database.
The internal process for doing so will consist of two parts:
- An admin creates an initial record with basic information about the new hire.
- The new hire then completes the record by submitting their other details.
To achieve this, we’re going to use two separate form UIs alongside Budibase’s built-in role-based access control.
We’re also going to add an admin screen for internal users to view and edit existing colleagues’ details.
With Budibase, we have the option of connecting to a huge range of external data sources - along with our internal DB. For the purposes of this tutorial, we’re going to use an existing MySQL table to store our employees’ information.
We could then use the data captured using our form app within a whole host of other workflows and tools, using our employee database as a single source of truth.
How to build an employee information form in 6 steps
If you haven’t already, start by signing up for a free Budibase account.
1. Connect your database
The first thing we’ll do is create a new Budibase application. We have the option of using a template or importing an existing app file. Today, though, we’re starting from scratch. When we choose this option, we’ll be prompted to give our app a name:
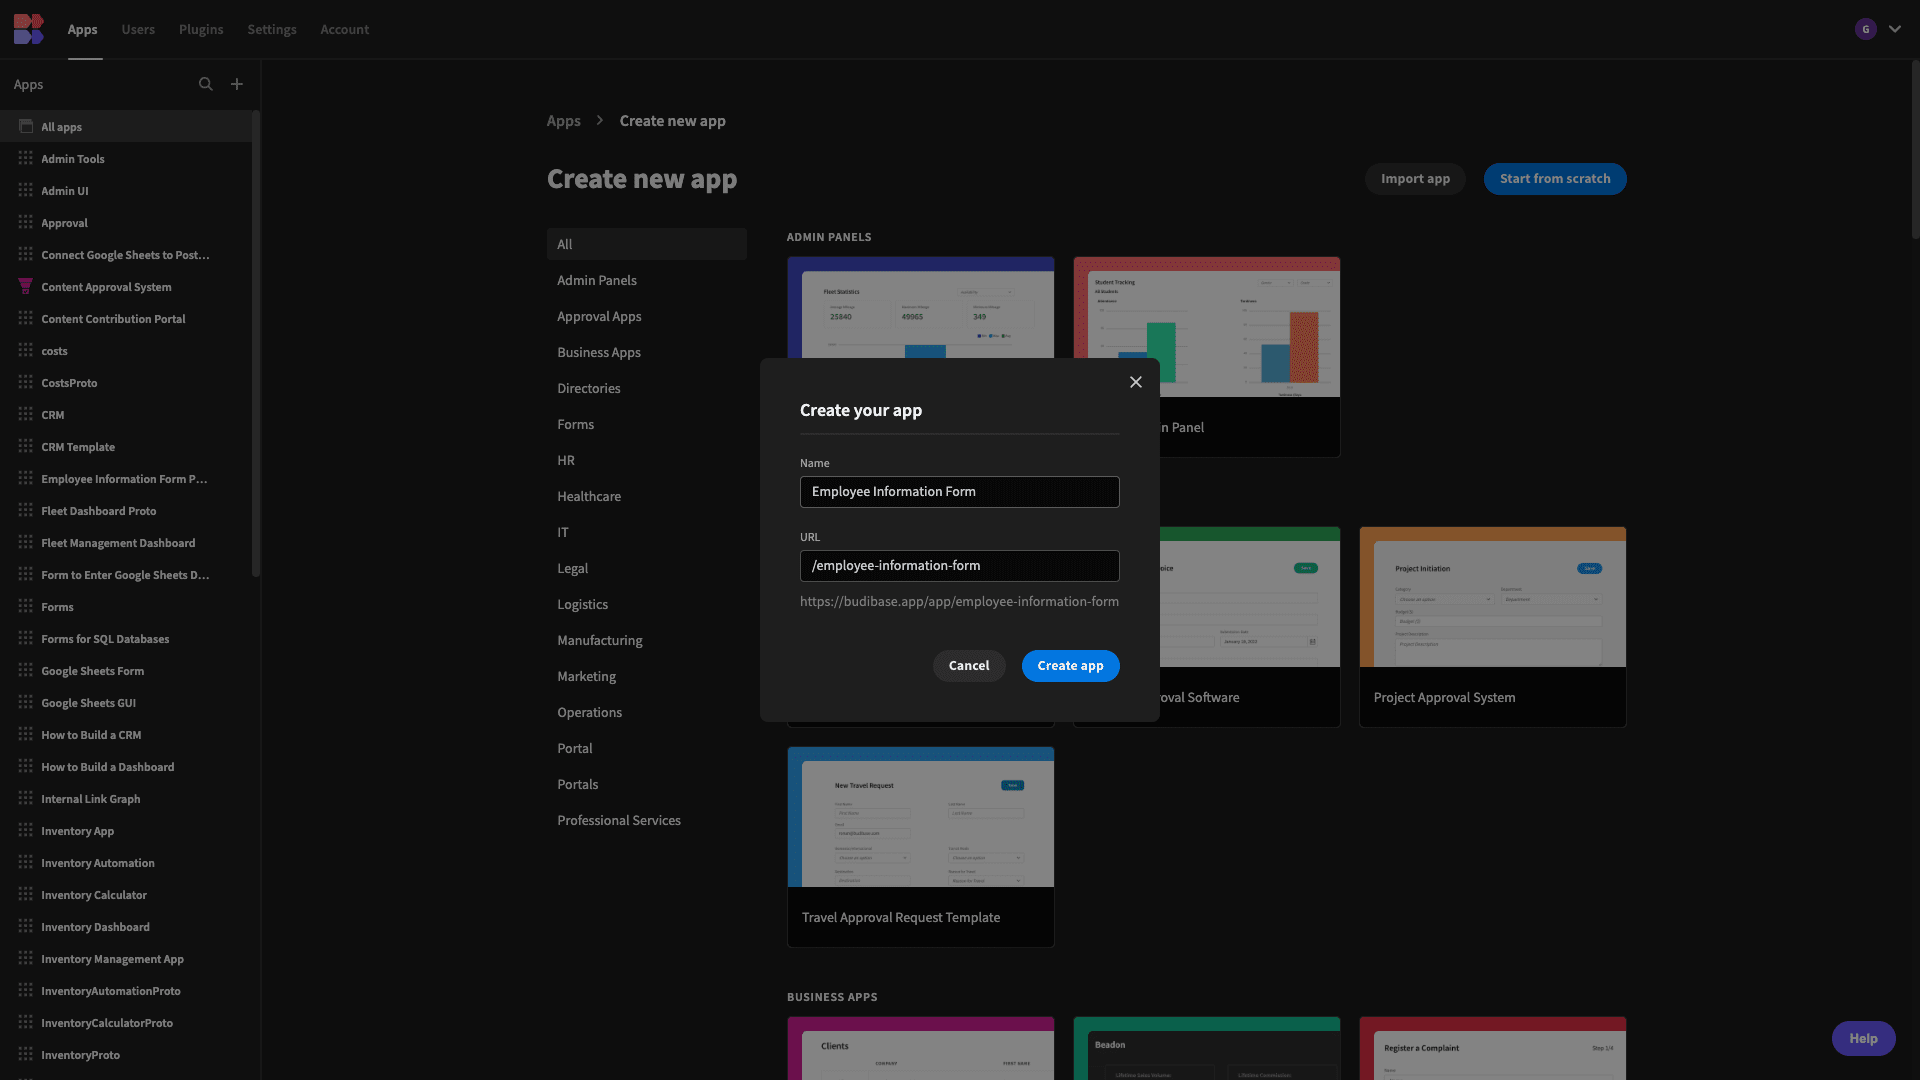
By default, this will also be used to generate our app’s URL path.
Next, we can choose which type of data we’d like to connect to first. We’ll also have the option of adding additional data sources later.
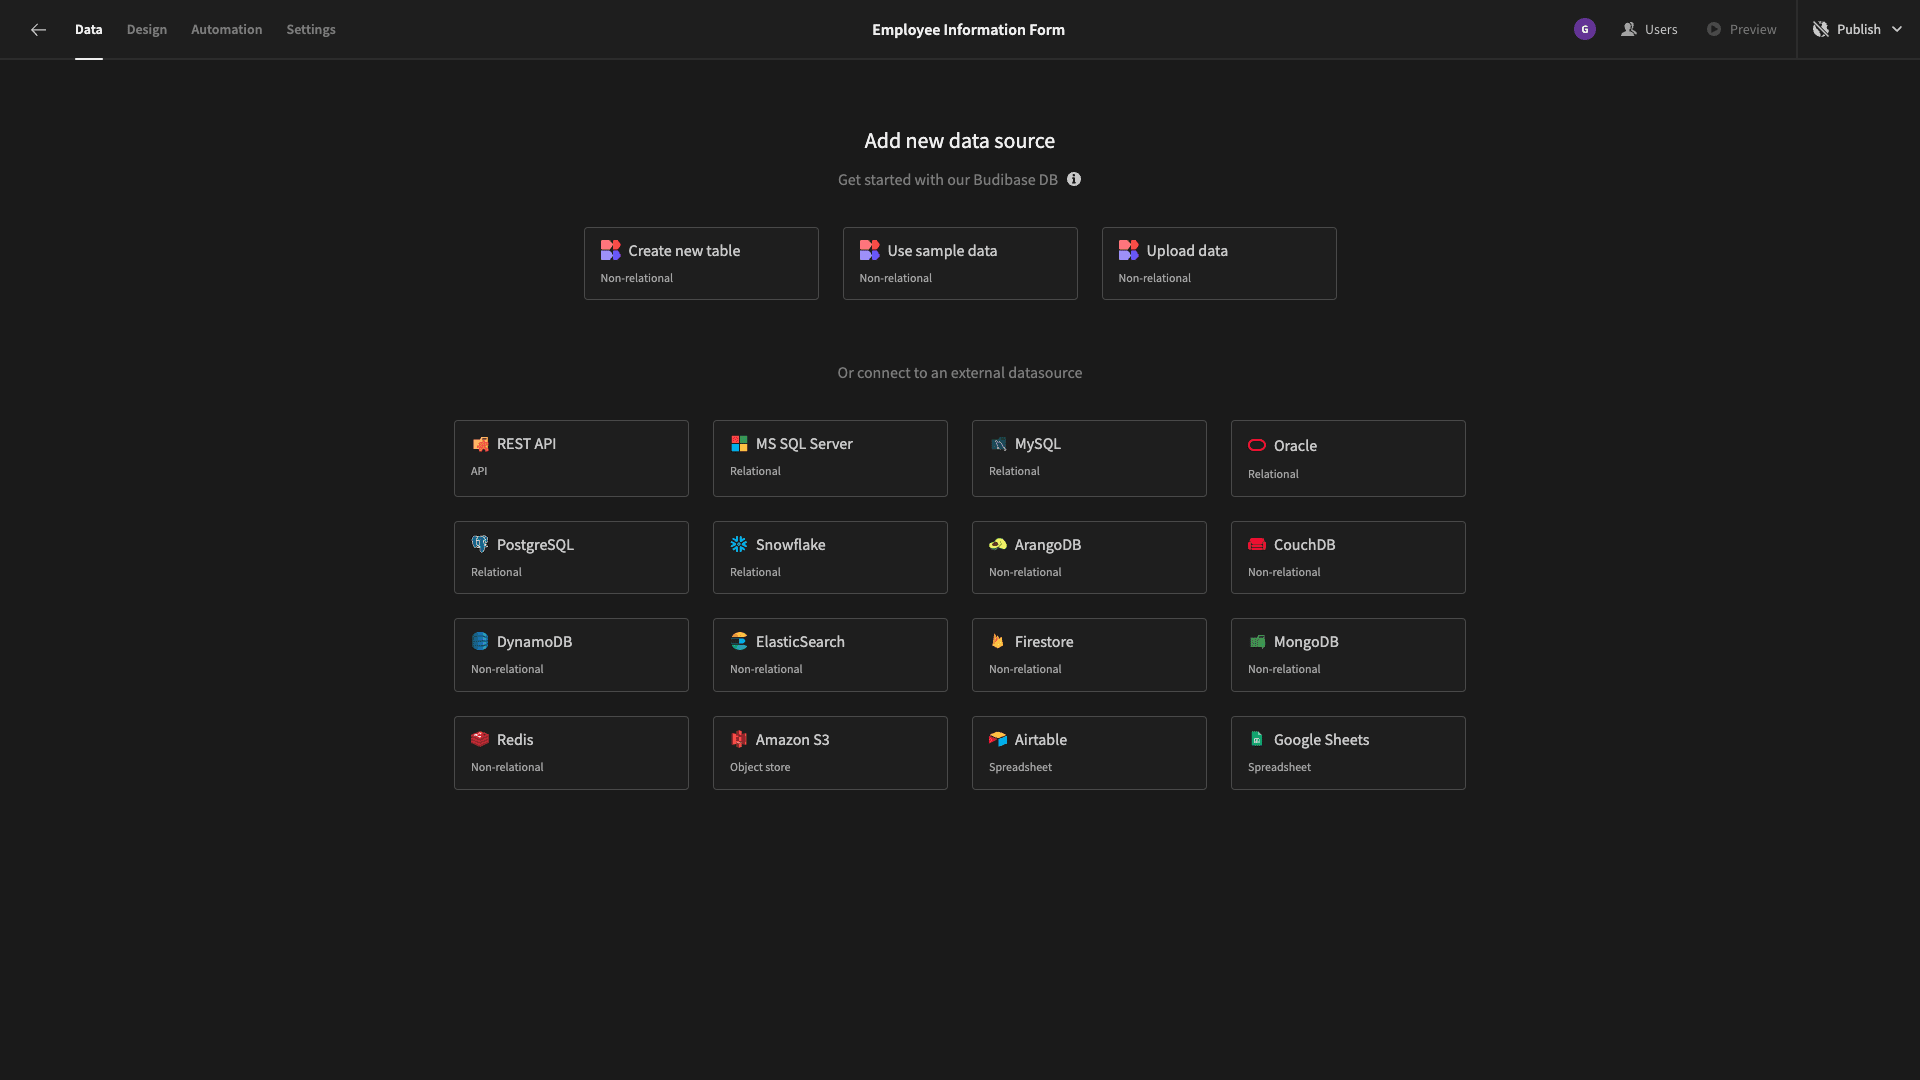
Budibase offers dedicated connectors for a range of SQL and NoSQL databases, as well as REST APIs, Google Sheets, Airtable, and BudibaseDB.
As we said earlier, we’re using an existing MySQL database. So, when we choose MySQL, we need to add our configuration details:
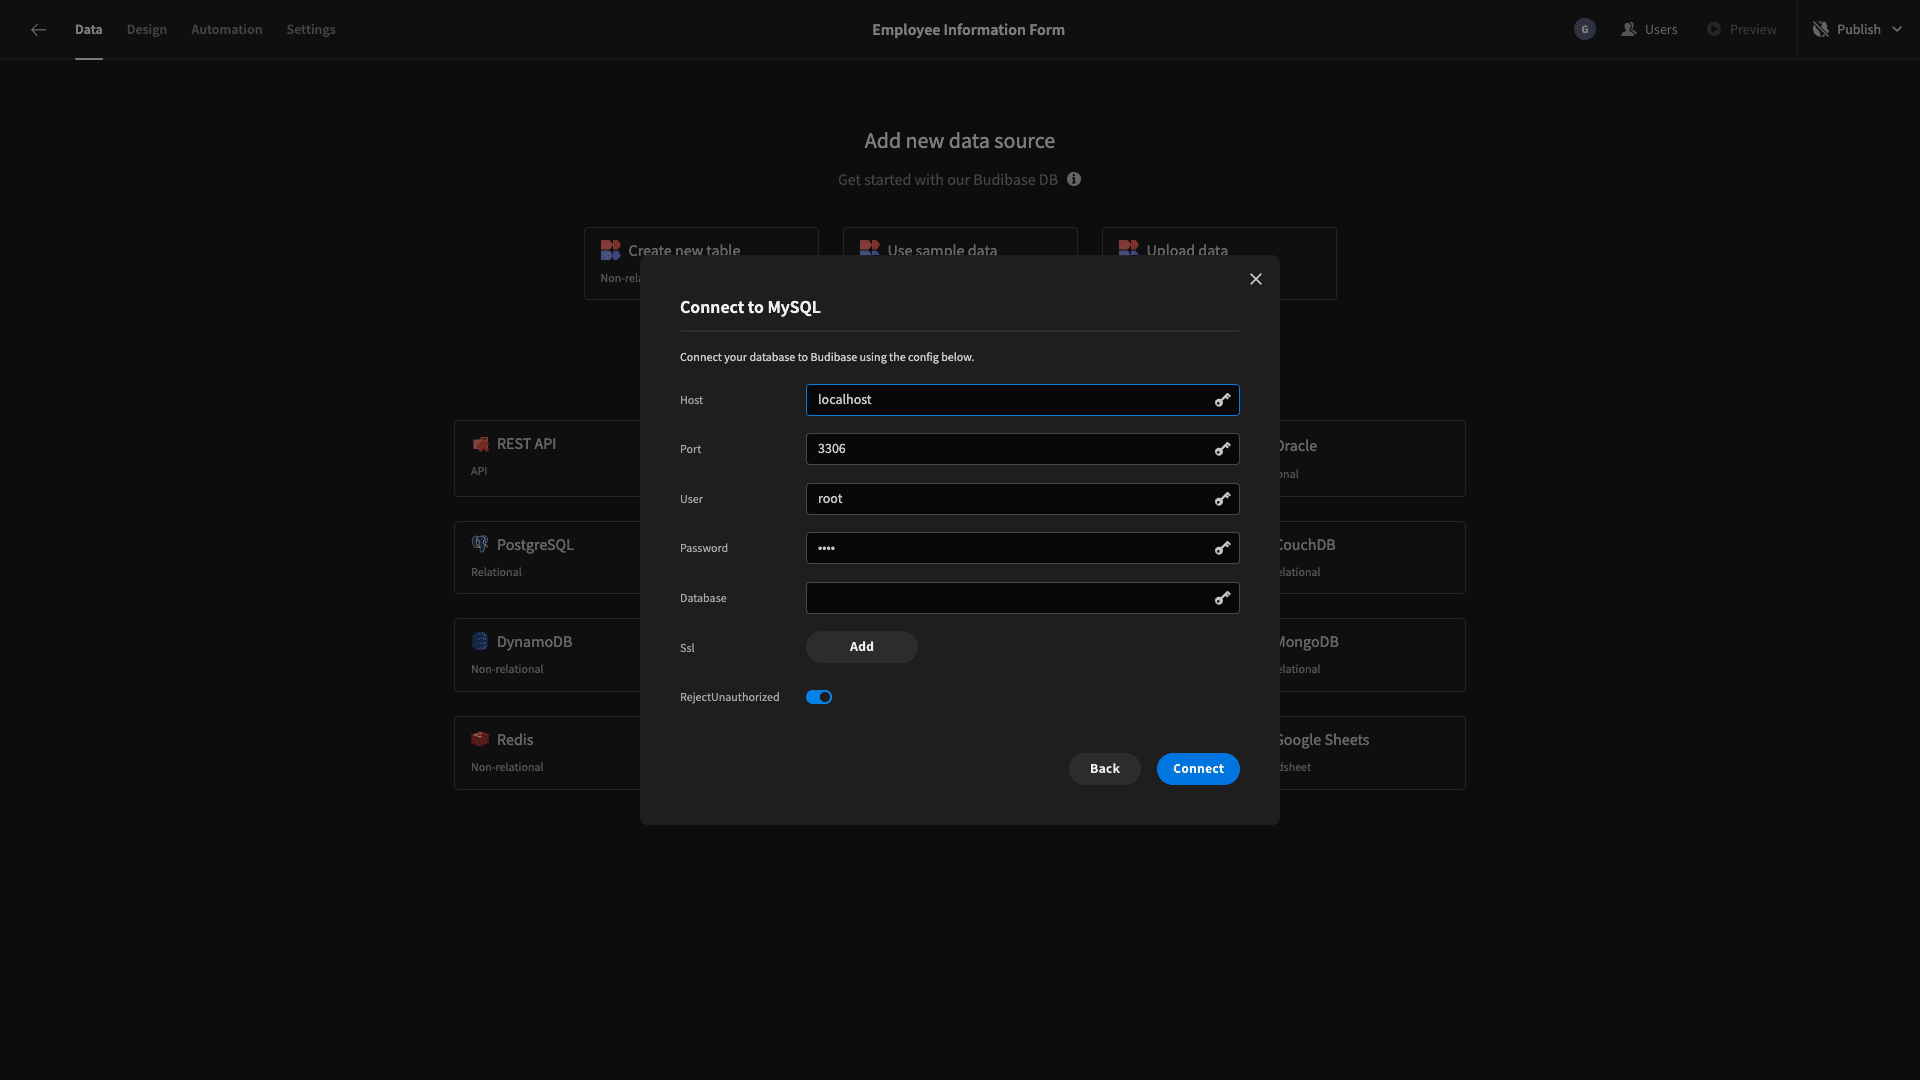
We can also use Budibase’s environment variables to securely store database credentials, so we don’t need to manually enter these each time we create a new application.
We’re then asked to choose which tables we want to fetch, allowing us to manipulate them from within Budibase.
Our database only has one table, called employees.
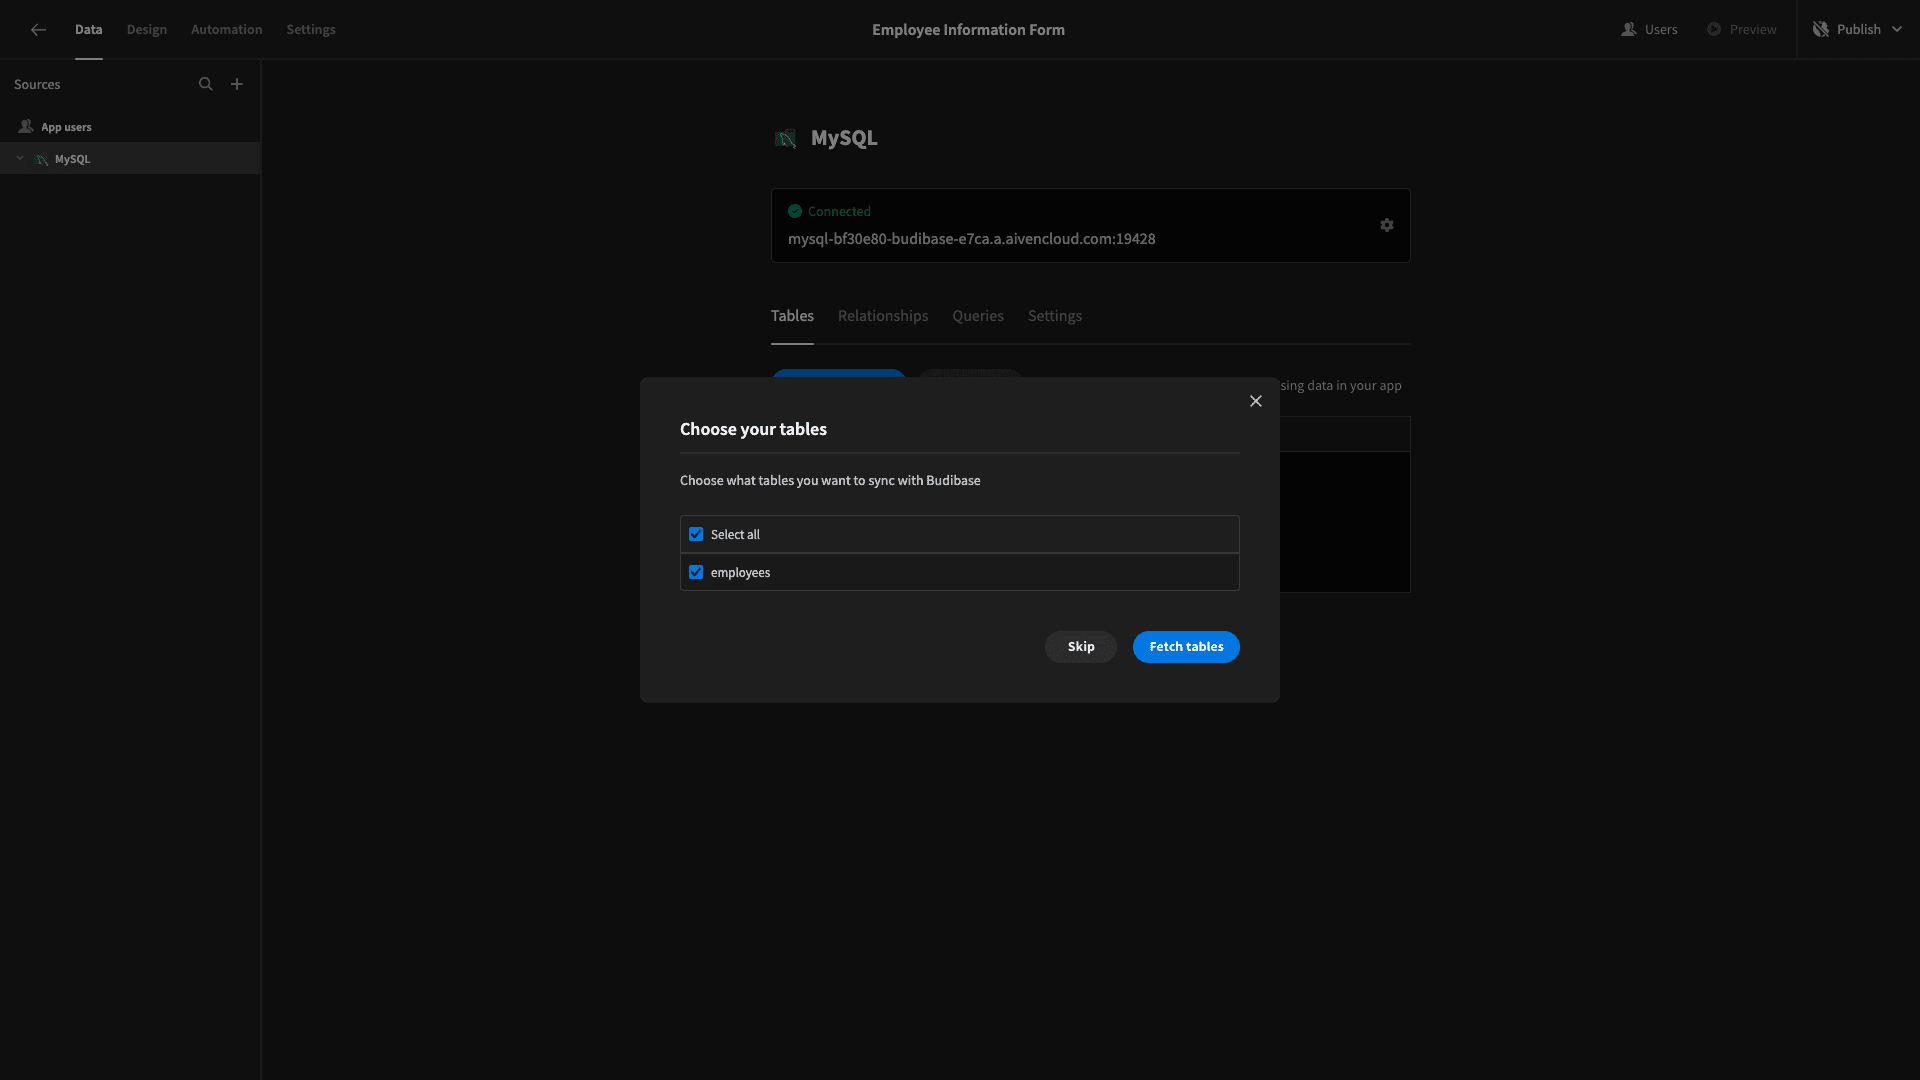
Now we can edit our data and schema in the backend of Budibase:
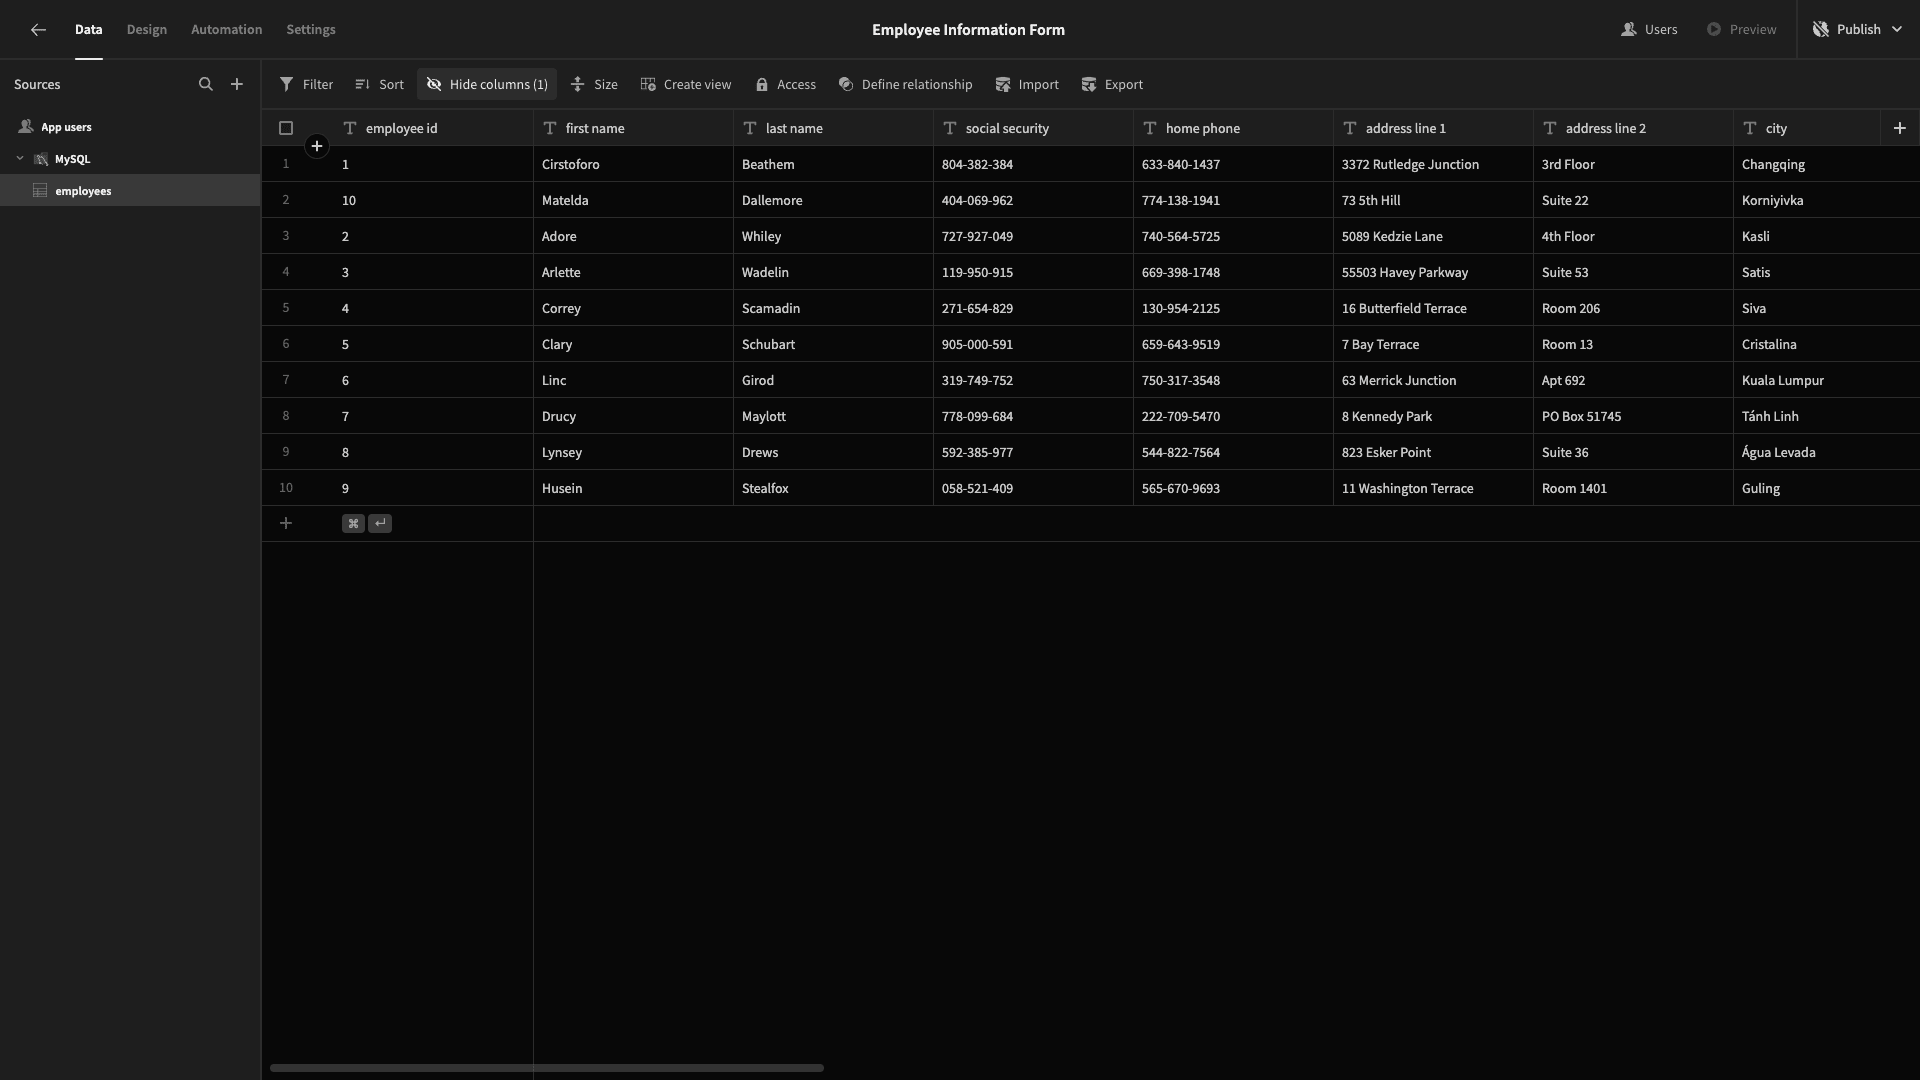
But, if we want to roll this out to users, we’re going to need to start building some UIs.
2. Autogenerate a CRUD screen
The first thing we’re going to build is the admin section of our app, where certain users will be able to view and update existing records. With Budibase, we can easily create a working CRUD UI in just a few clicks.
Head to the Design tab. Here, you’ll see three options. We can start from scratch or use one of Budibase’s autogenerate screens.
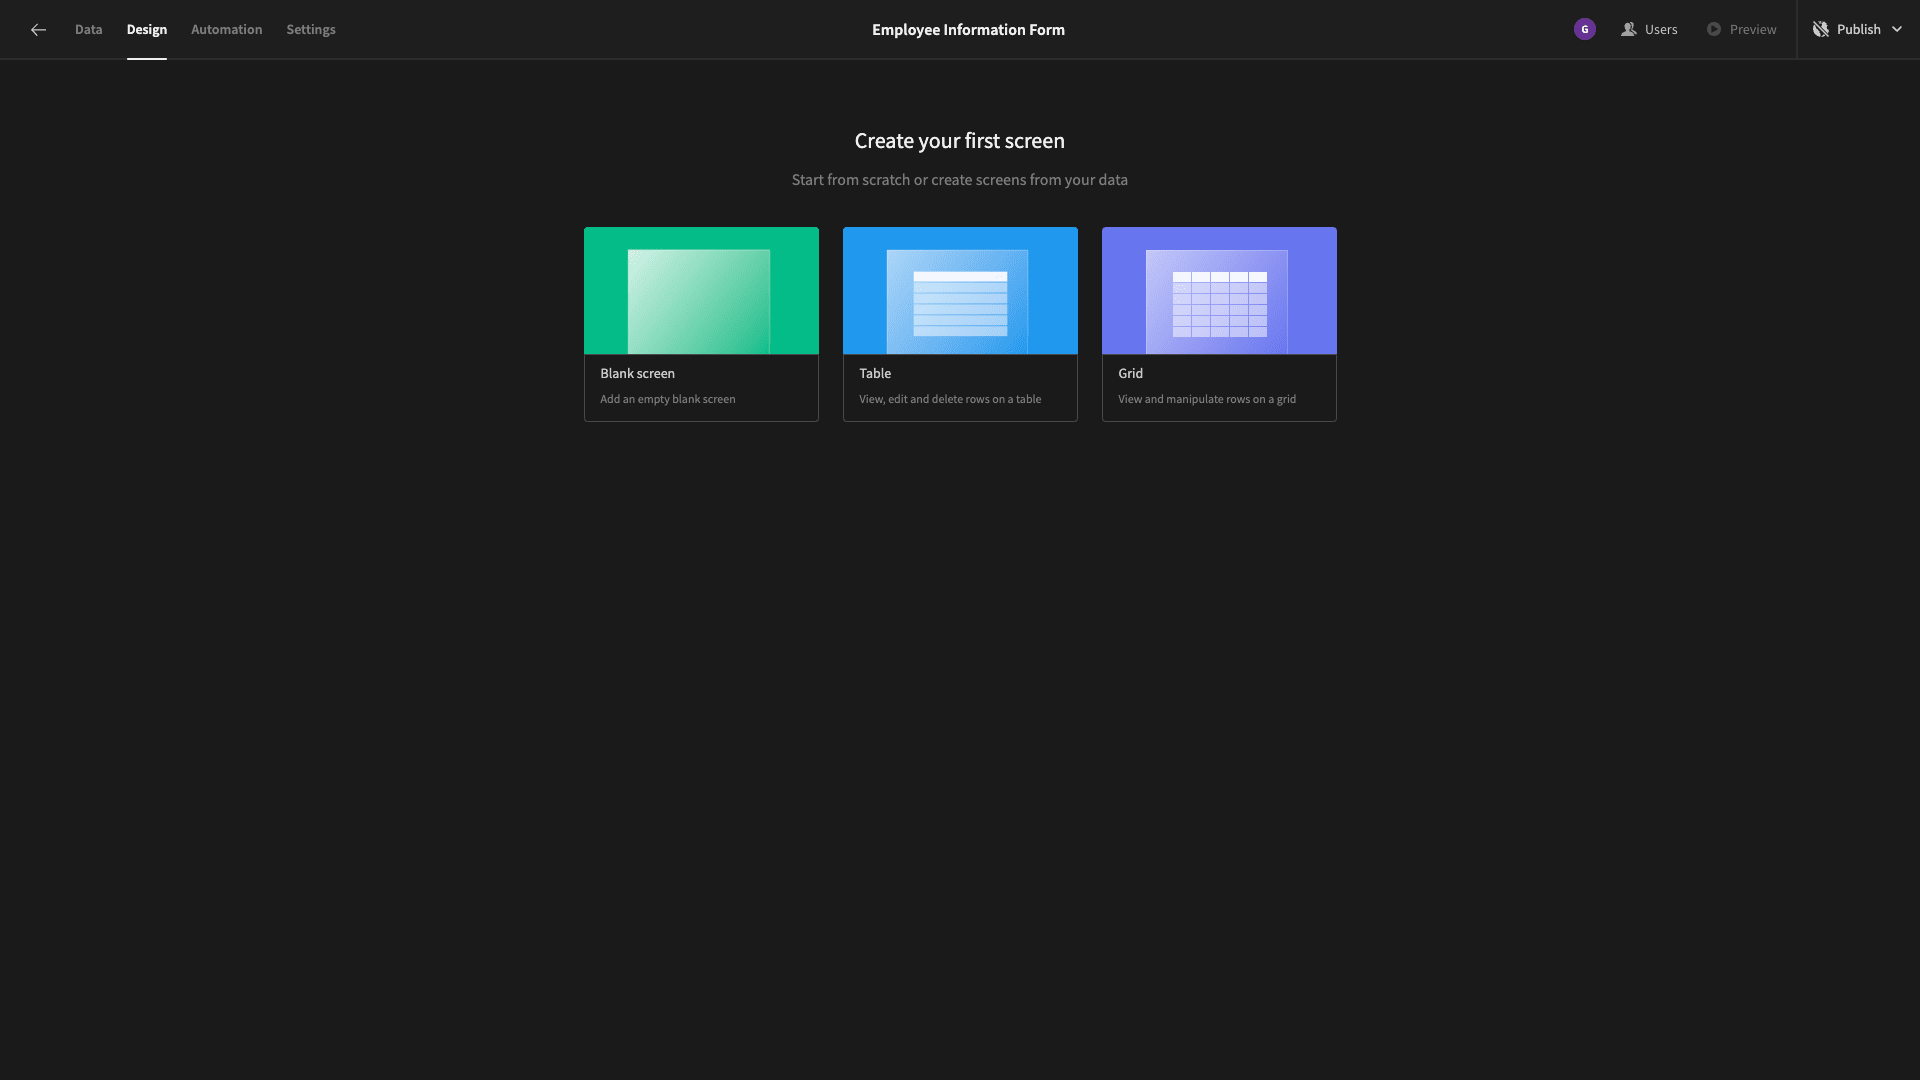
We’re choosing ‘table’. Again, we need to choose which of our connected tables we want to point this at - but we only have one in our application:
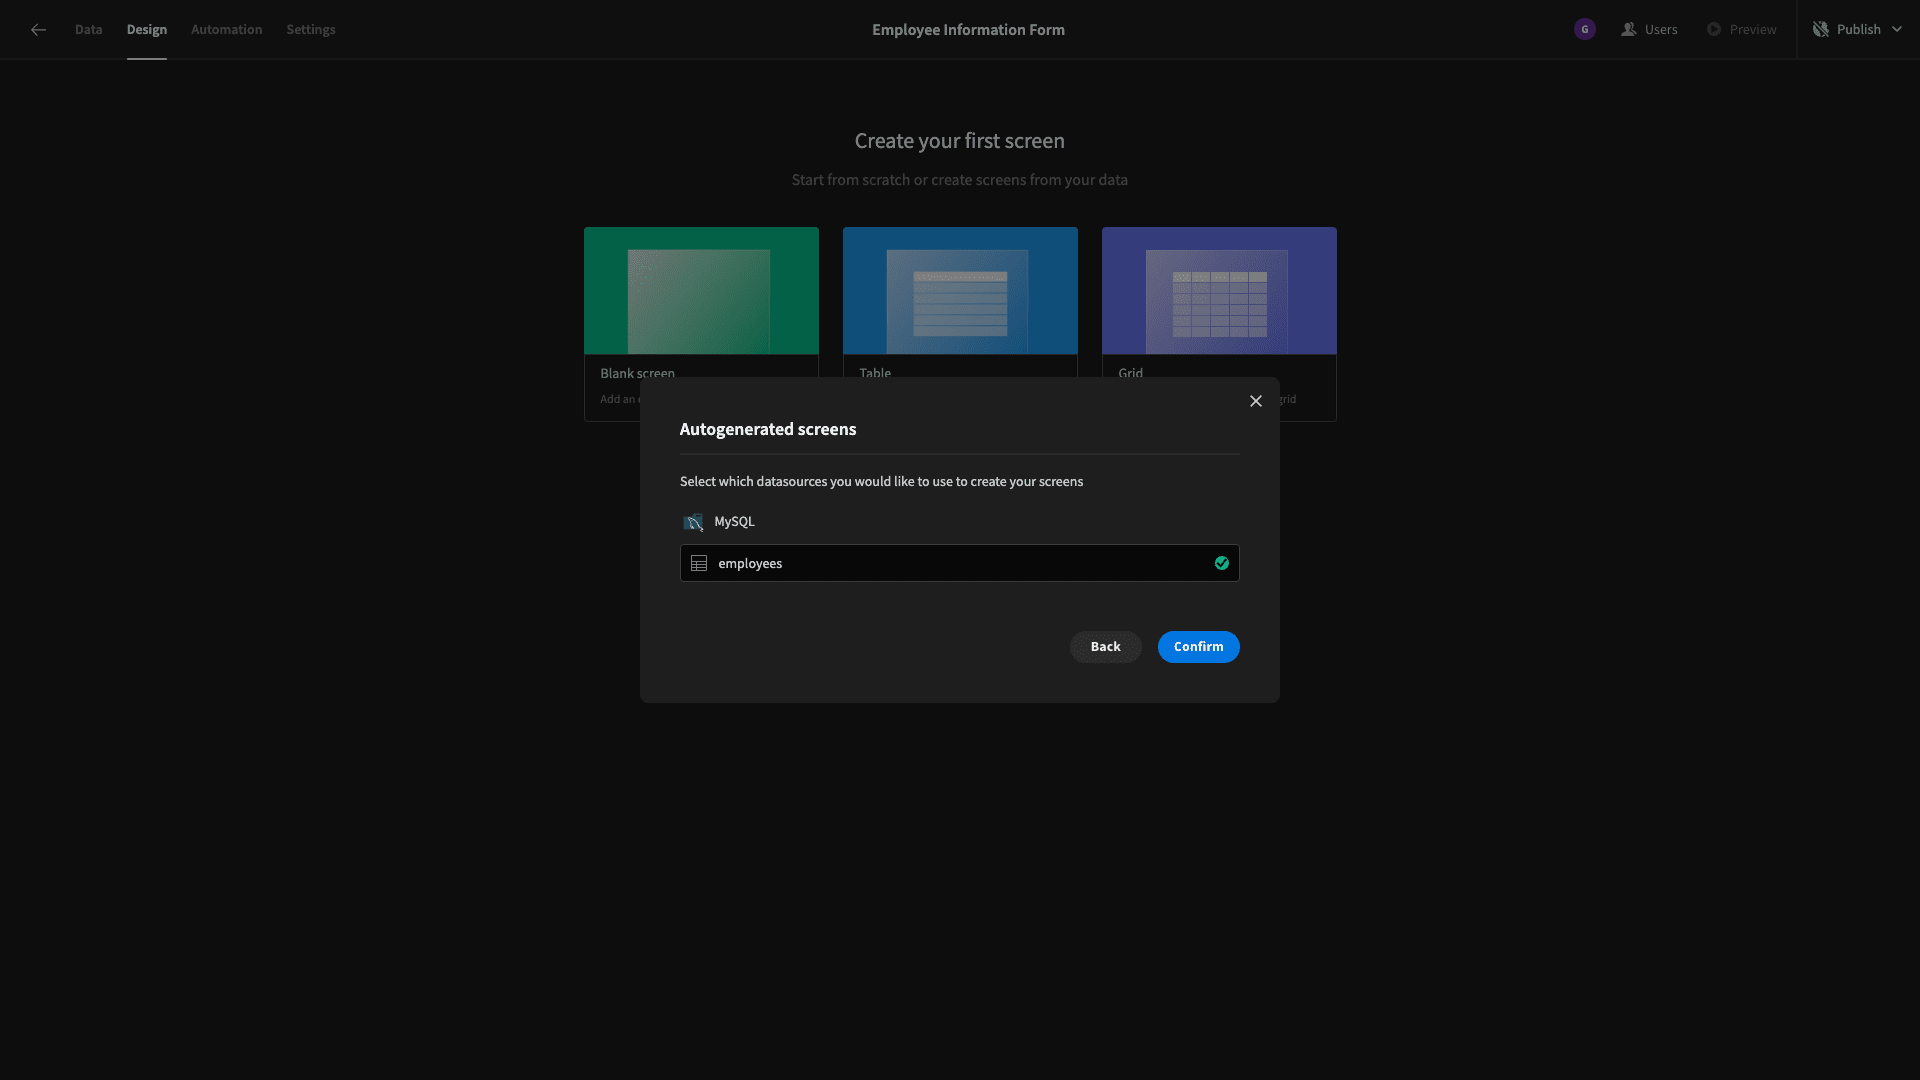
We’re also prompted to choose a minimum access role for this screen, but we’ll leave this as the default setting for the time being.
Here’s what this looks like:
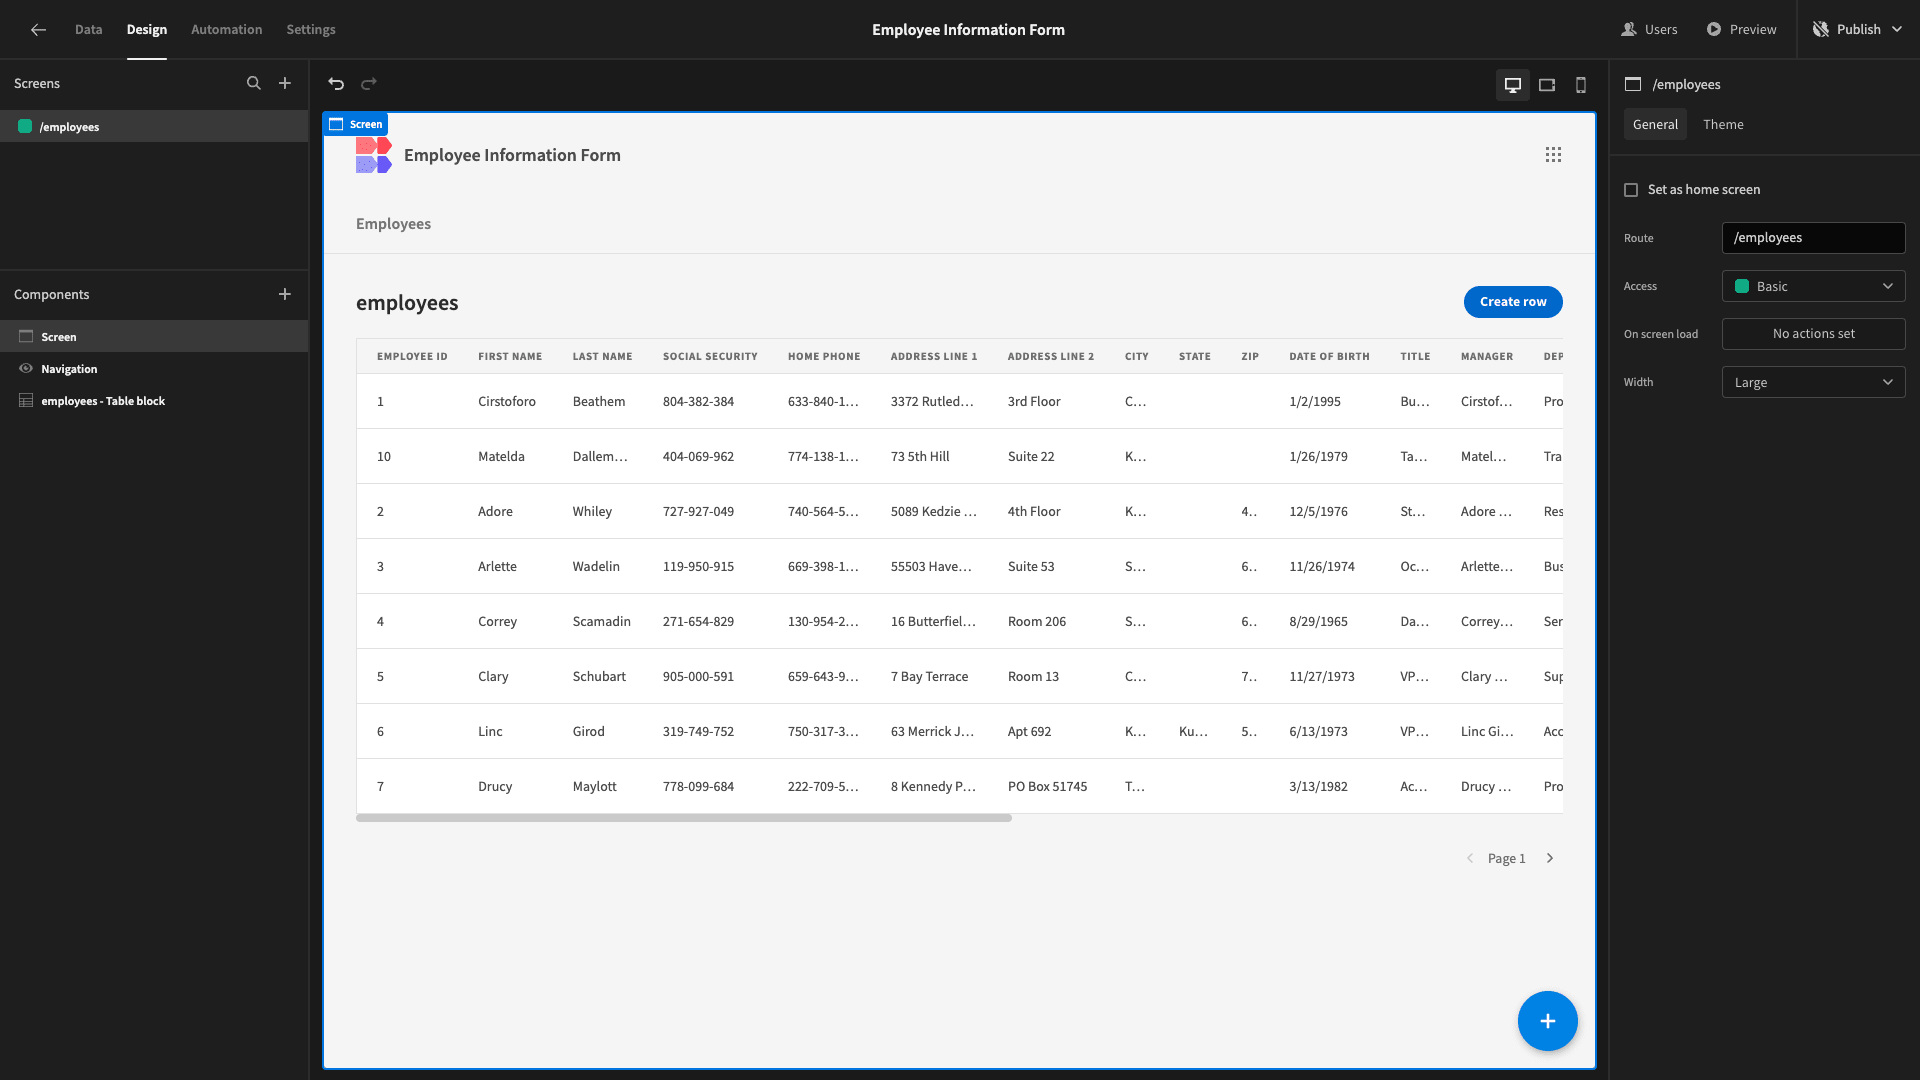
We also have side panels for adding entries or updating existing ones:
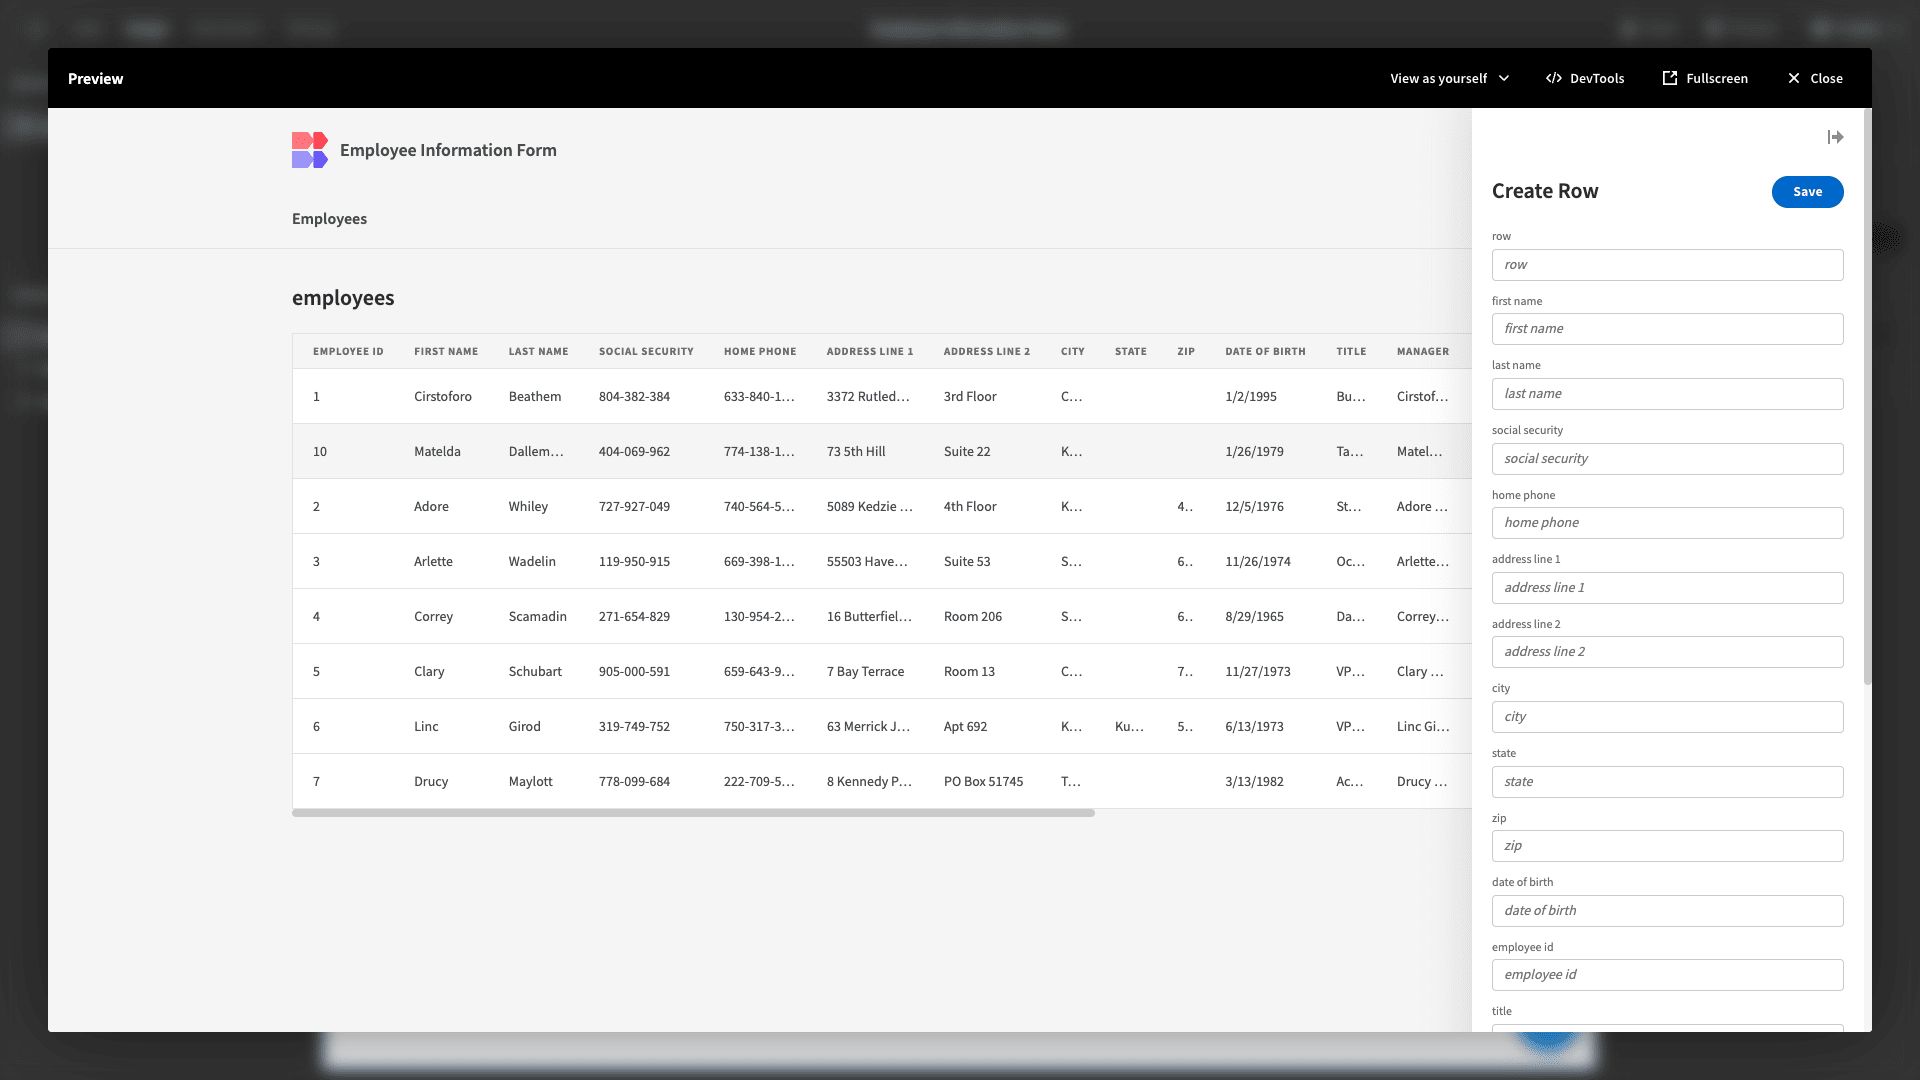
But, our employees table contains quite a large number of attributes, so things are a bit of a mess.
We can easily tidy things up though.
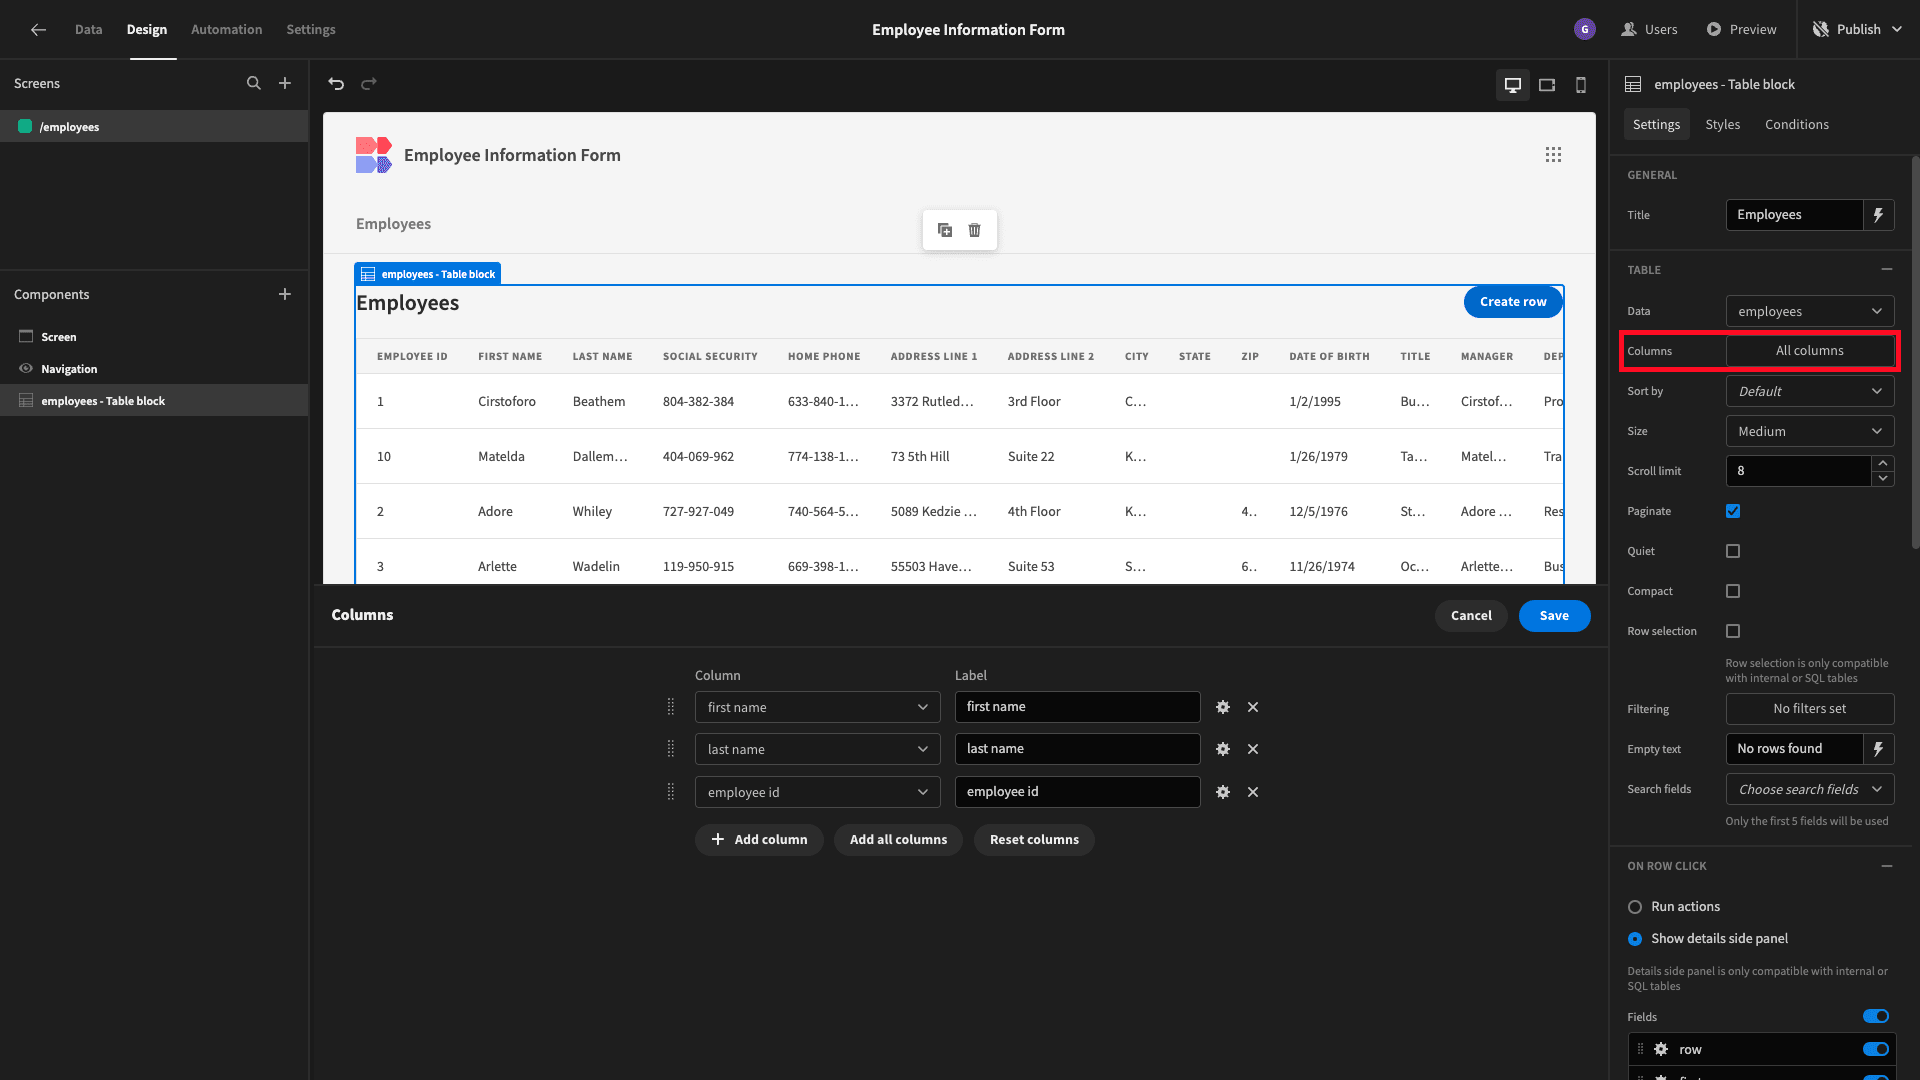
First, let’s open the columns drawer and configure our tale to only display each employee’s name and ID.
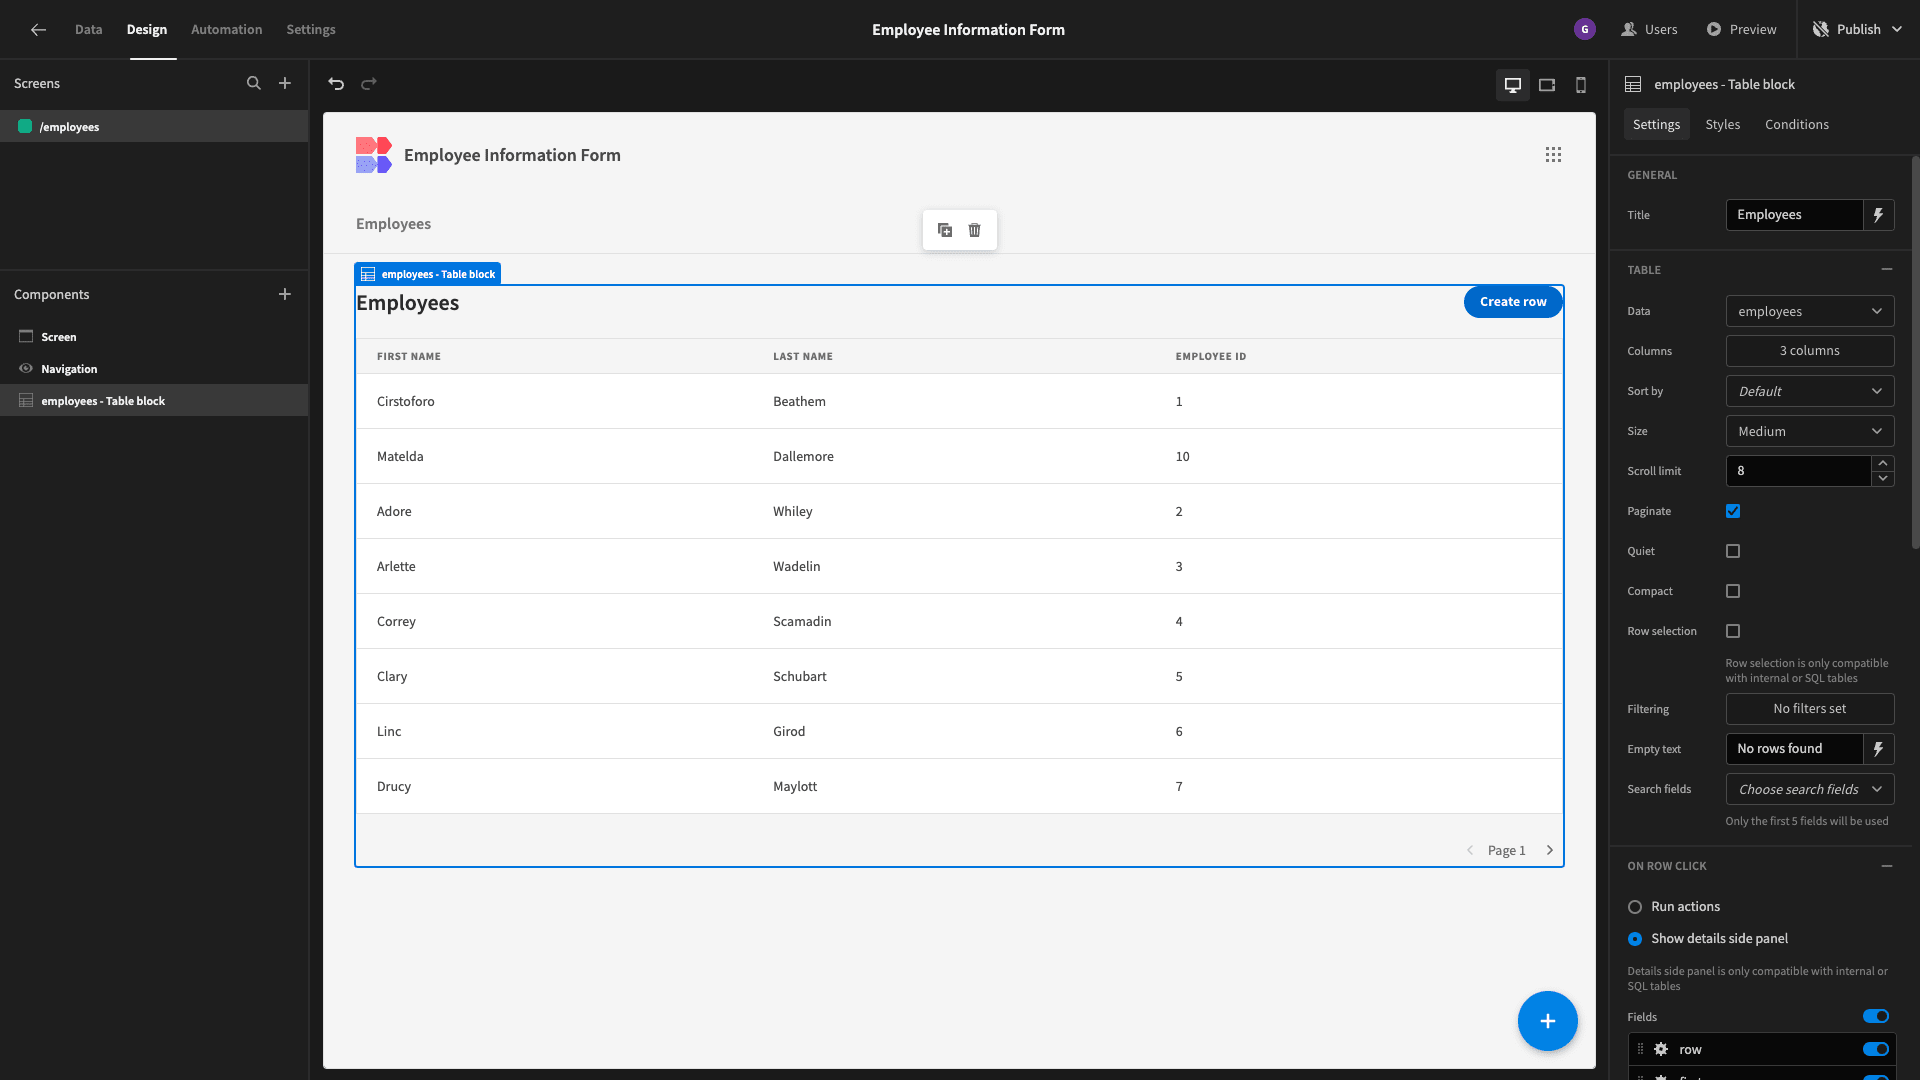
We’ve also capitalized the title. No everything looks a bit cleaner:
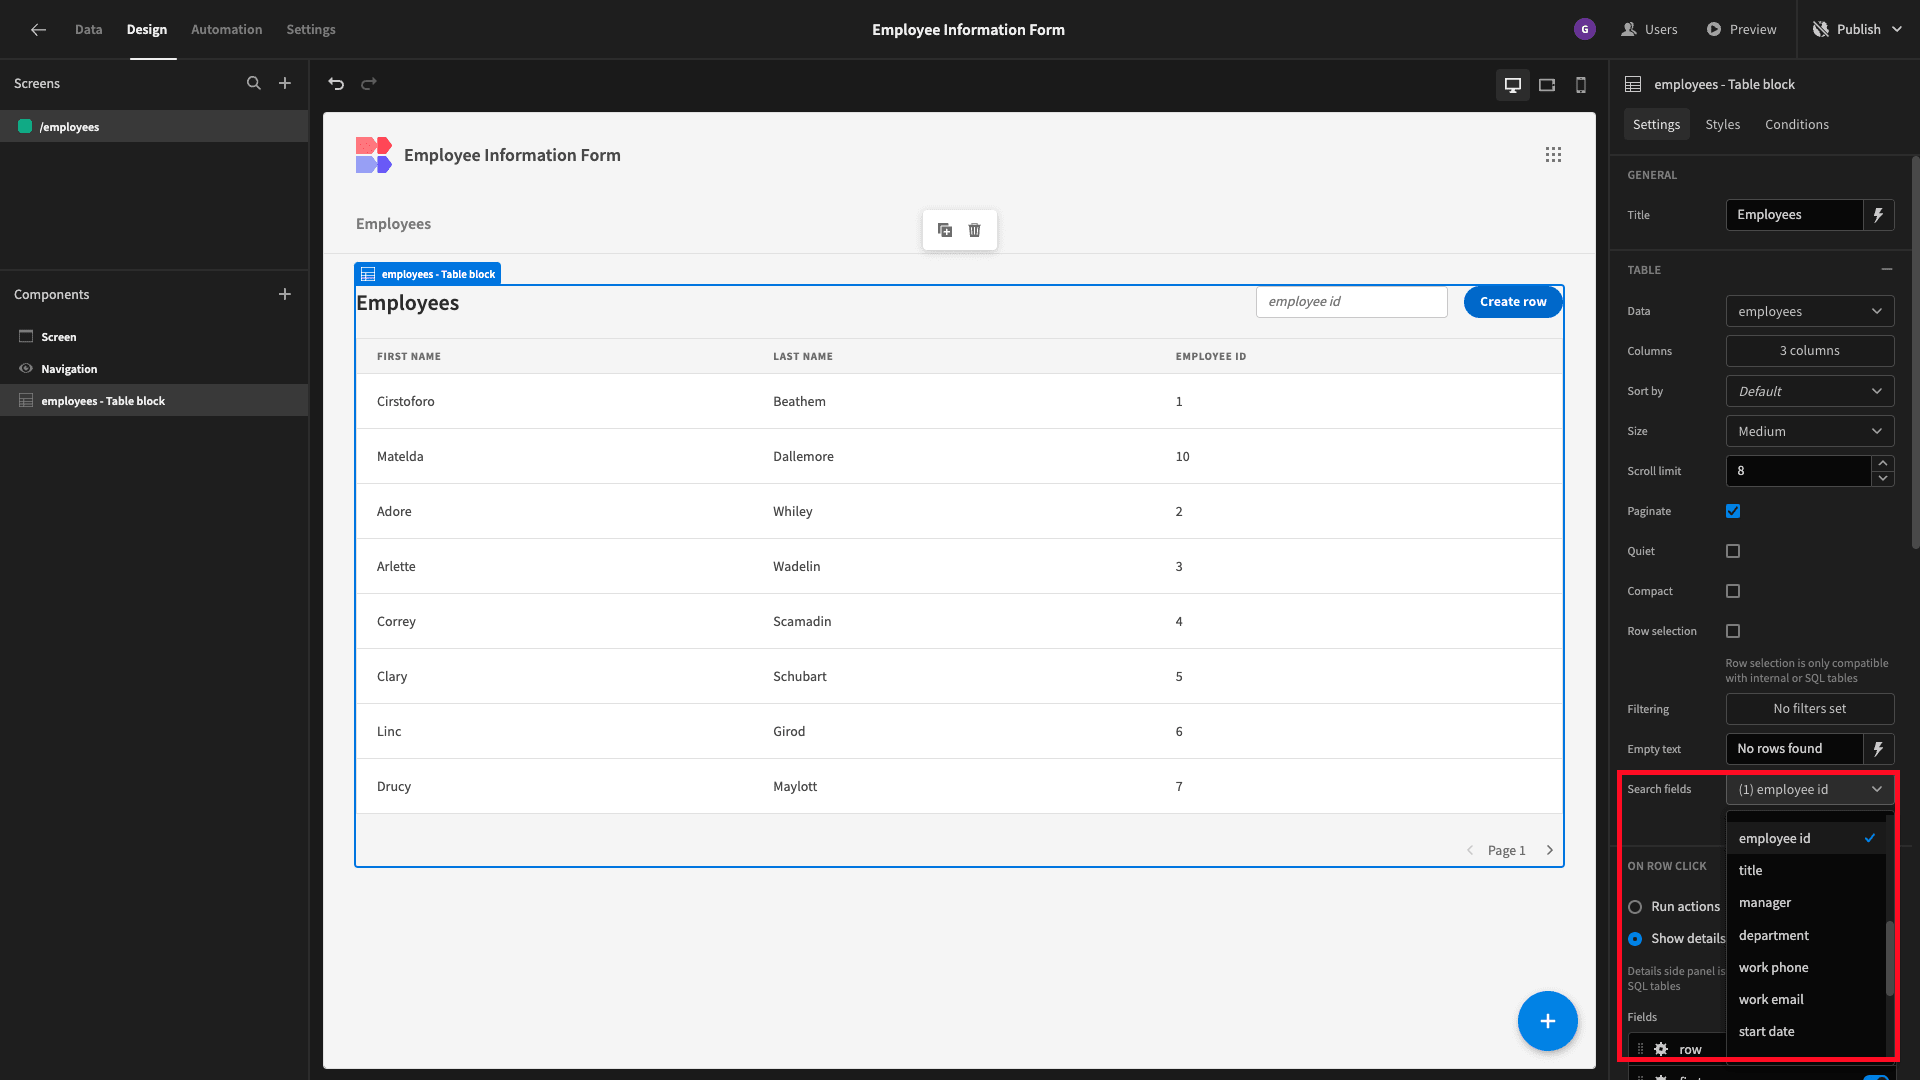
With the table block in Budibase, we can also choose up to five search fields for finding specific rows.
We’re going to add a field for users to search for entries by their employee ID.
Our data model for this app is probably a little bit too complex for side-panel forms to be the most effective UI.
So, our next task is to build out some dedicated employee information form screens.
Remember, we want two separate forms. The first will be used by admins to create new records with employees’ basic details. The second will be used by new hires to fill in their remaining information.
Let’s take each one in turn.
3. Create a data entry form
First, we need a form for admins to create new entries in our employees tables with a subset of fields from our schema. Specifically, they’ll be required to input the new employee’s name, professional contact details, and basic information about their role.
We don’t need to include anything else.
We’ll start by adding a new blank screen, which we’ll call /employees/new.
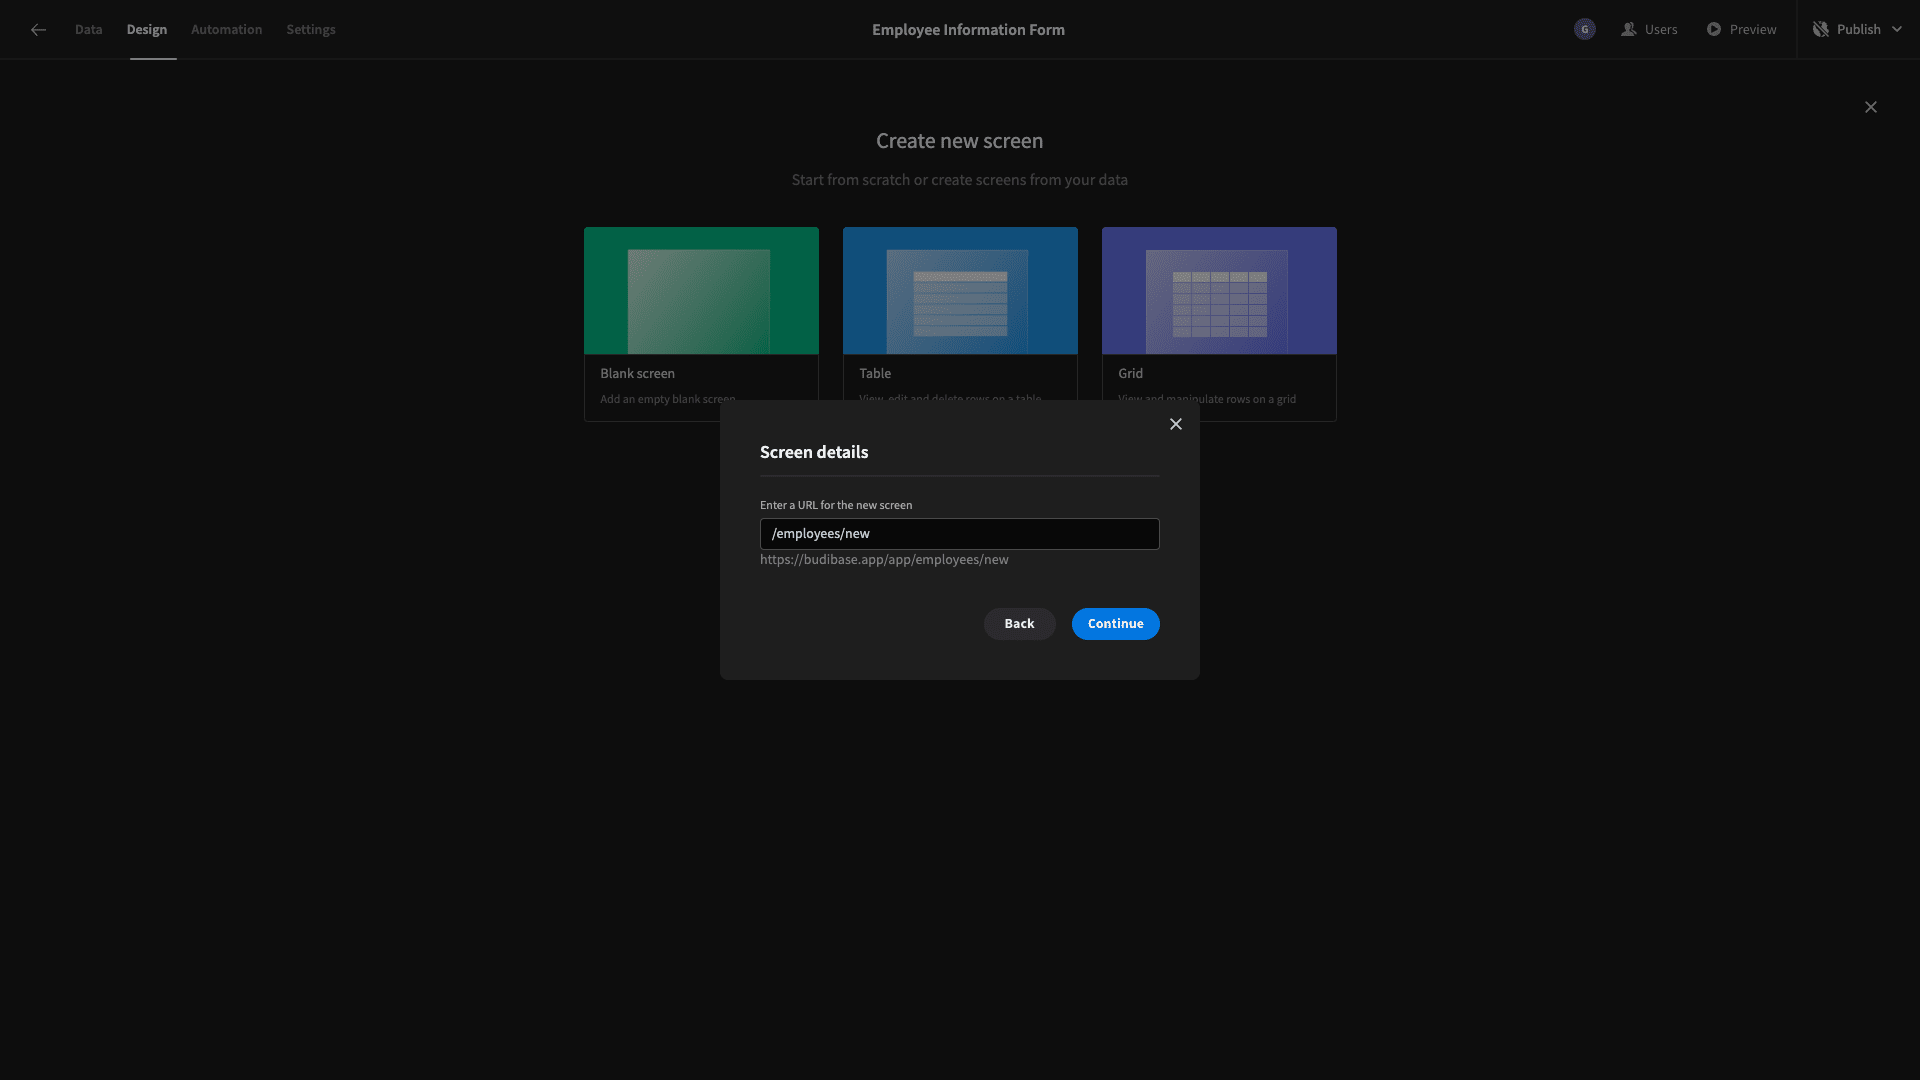
Here’s what this looks like:
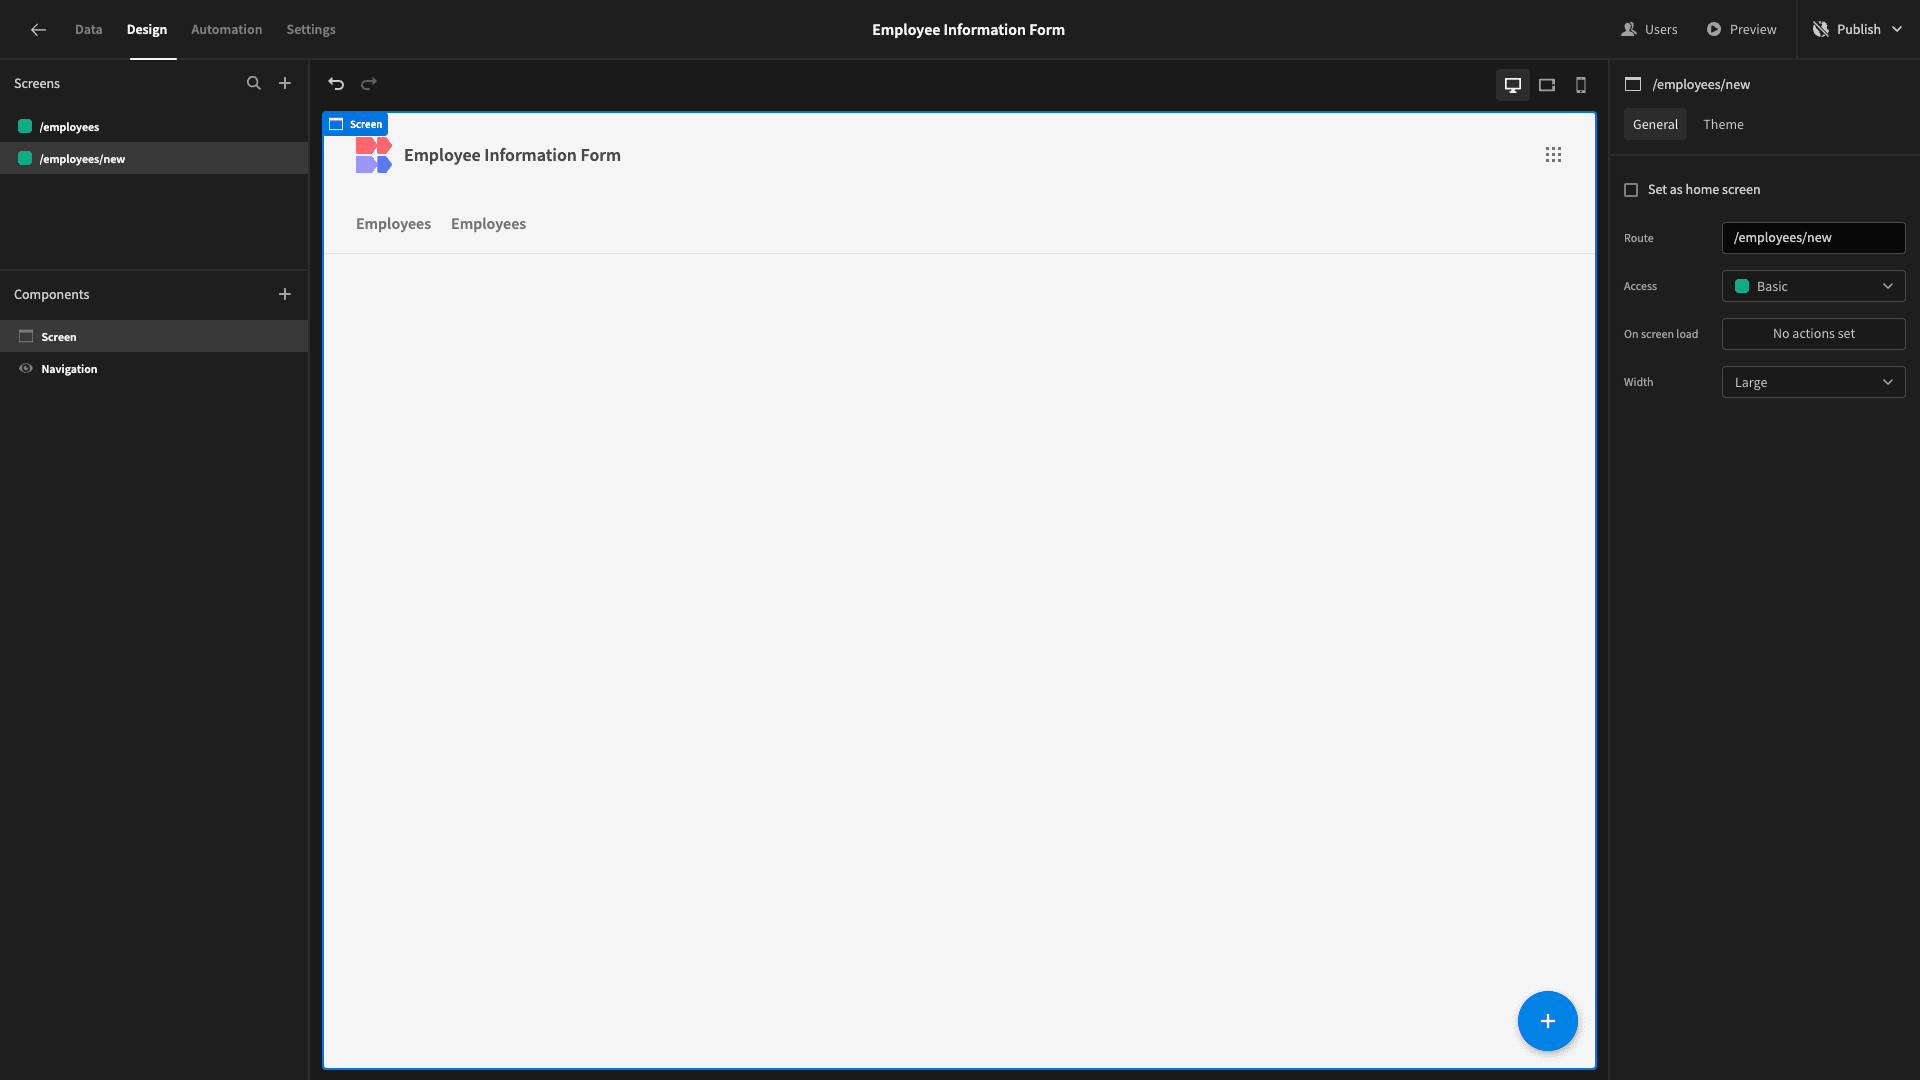
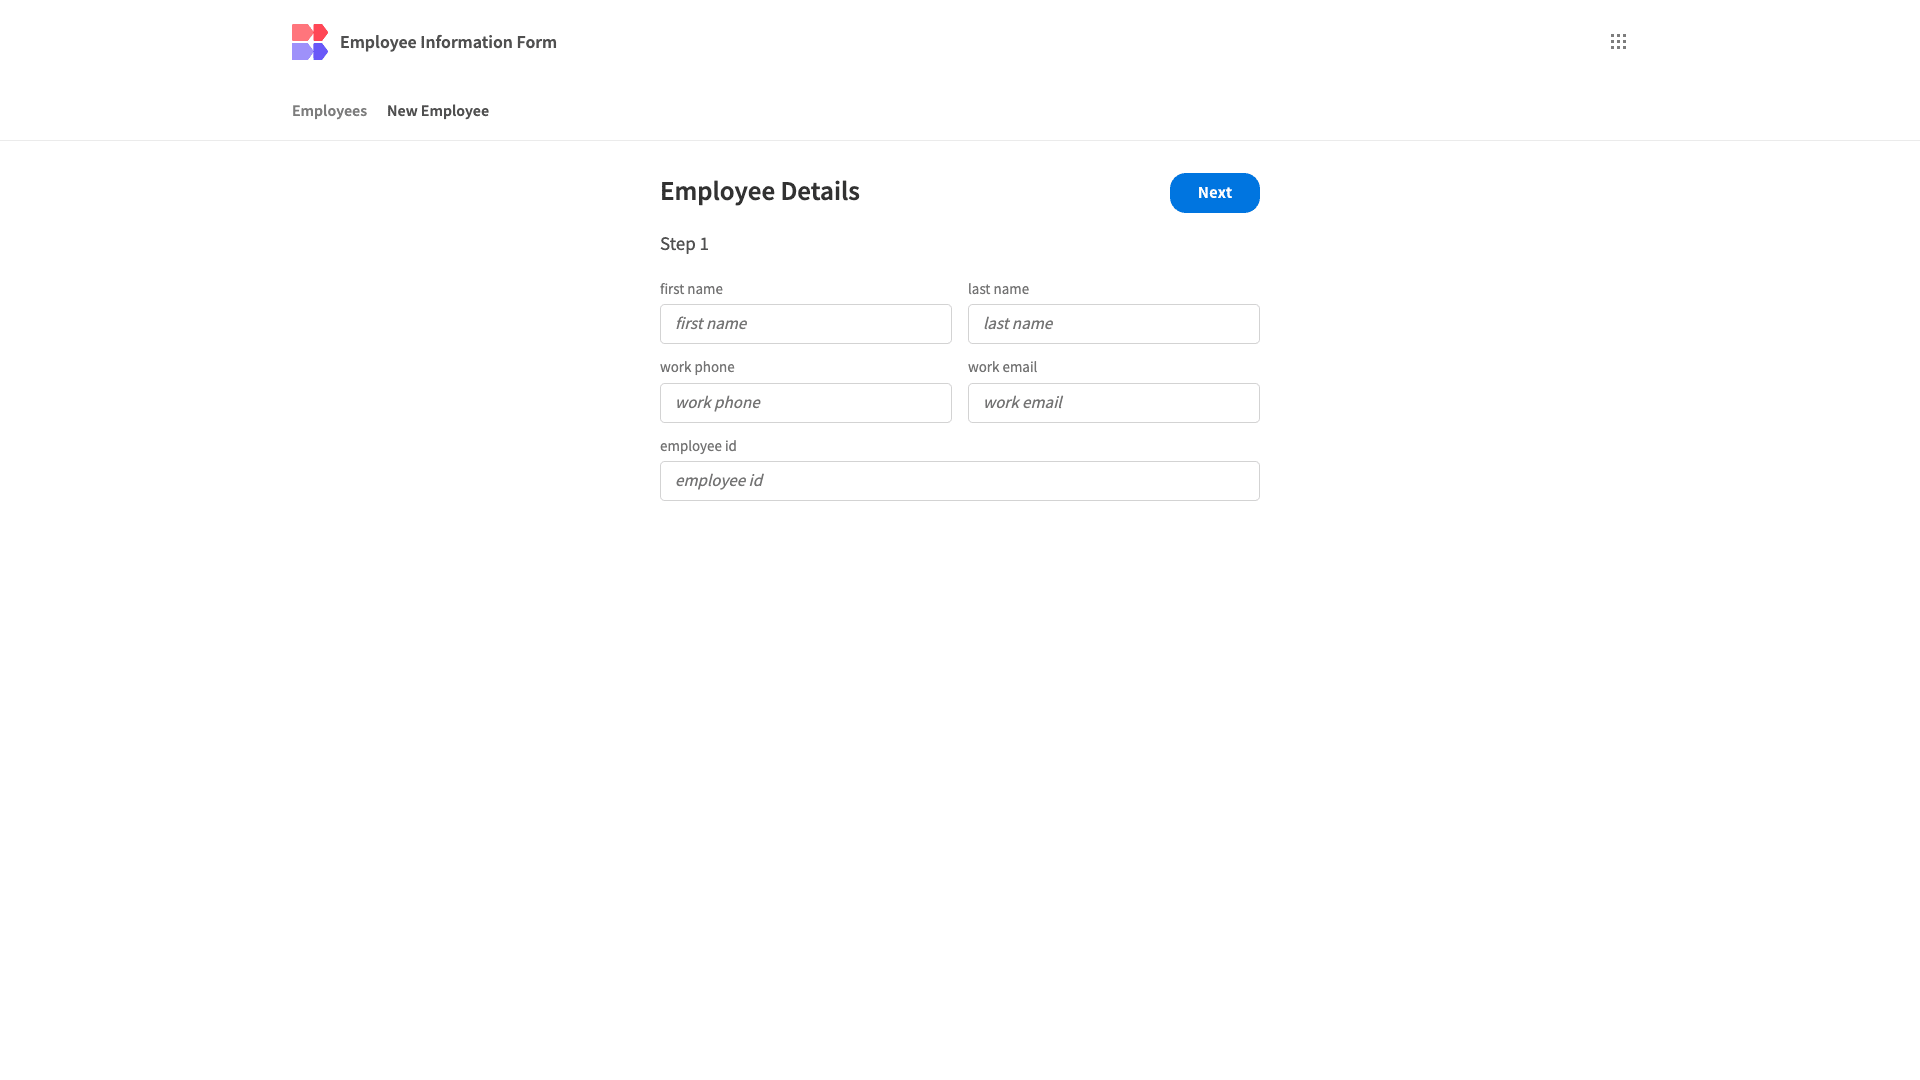
We’re going to use a multi-step form block as the basis of our UI. This is a pre-built set of components that inherits the schema from supported data sources to output a working form UI.
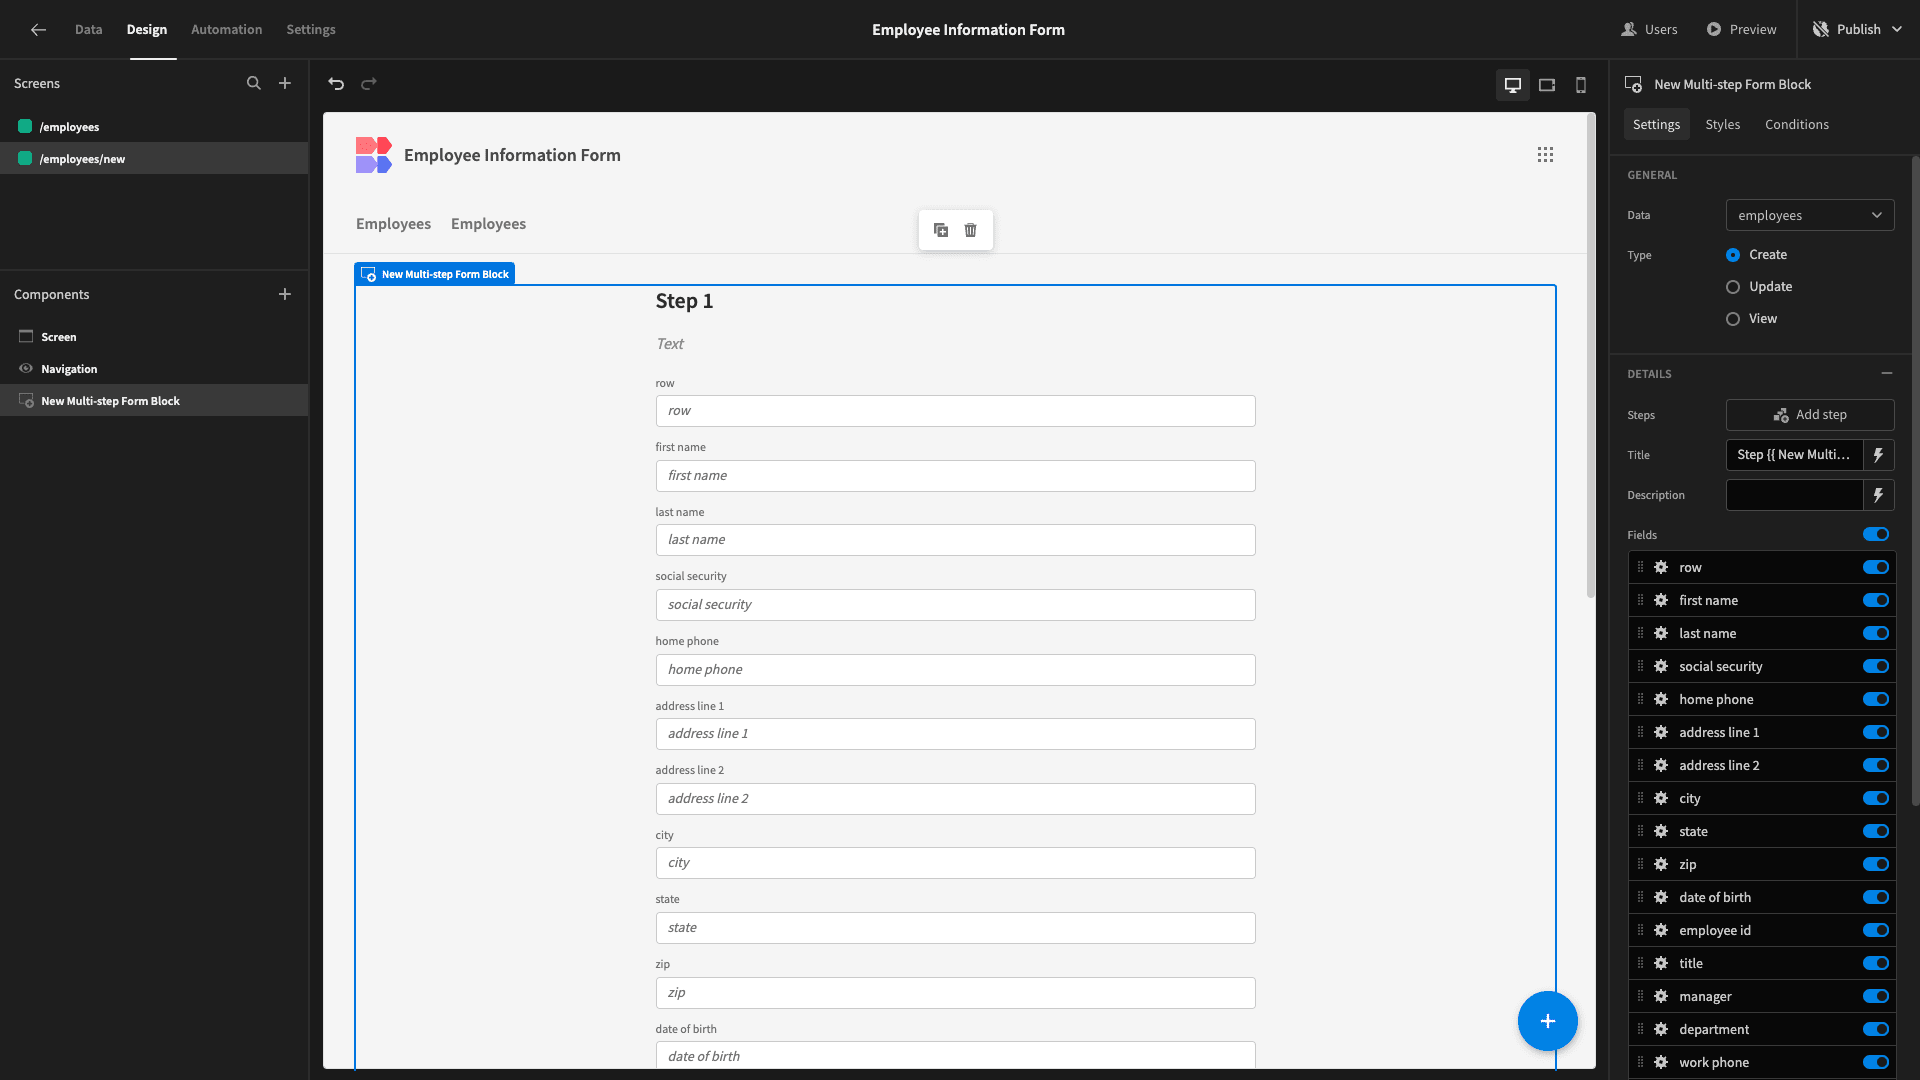
We want this form to contain two steps. The first will concern the new hire’s basic information. The second will be for details about their new role.
At the moment, our form only has one step. So, we’ll start by disabling everything except the following fields:
- First name,
- Last name,
- Work email,
- Work phone,
- Employee id.
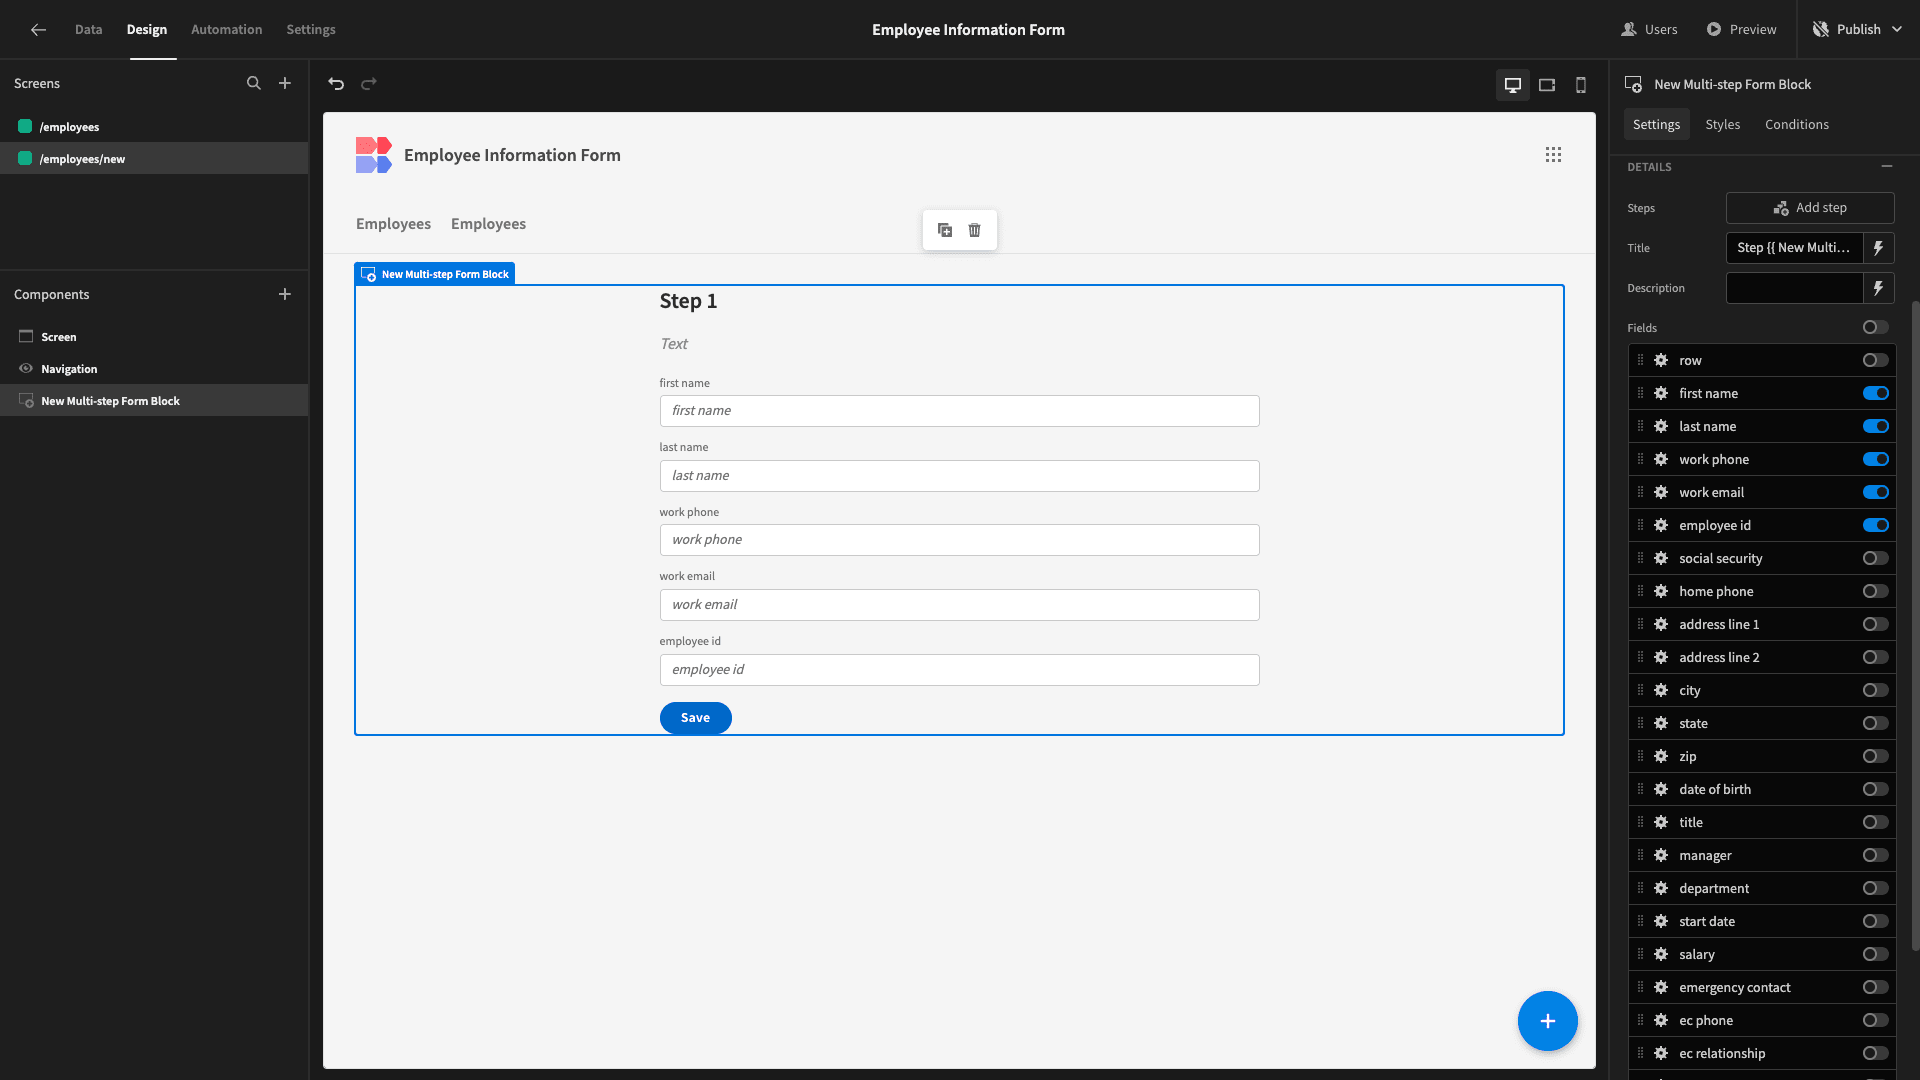
Each field has a layout attribute, which we can use to arrange them into columns:
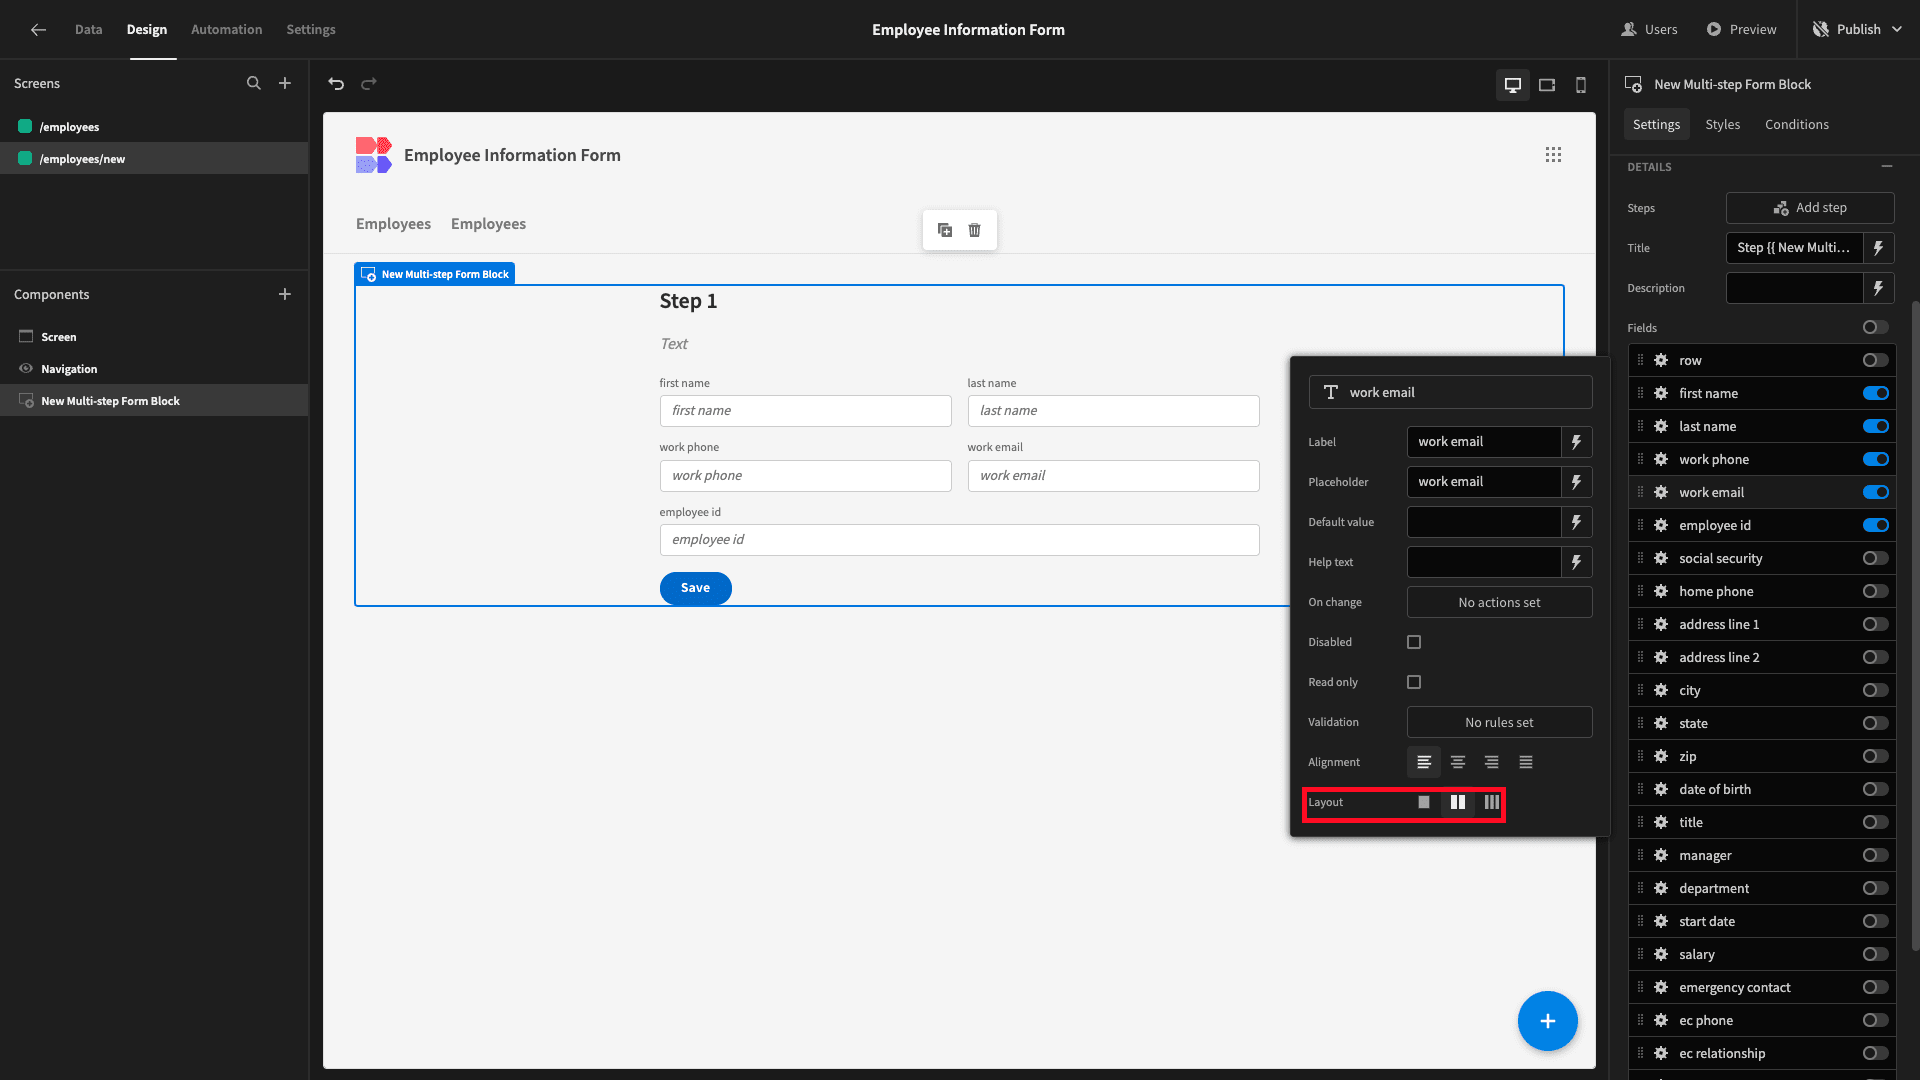
We’ll move the default title text to the description field and give our form step a more descriptive title:
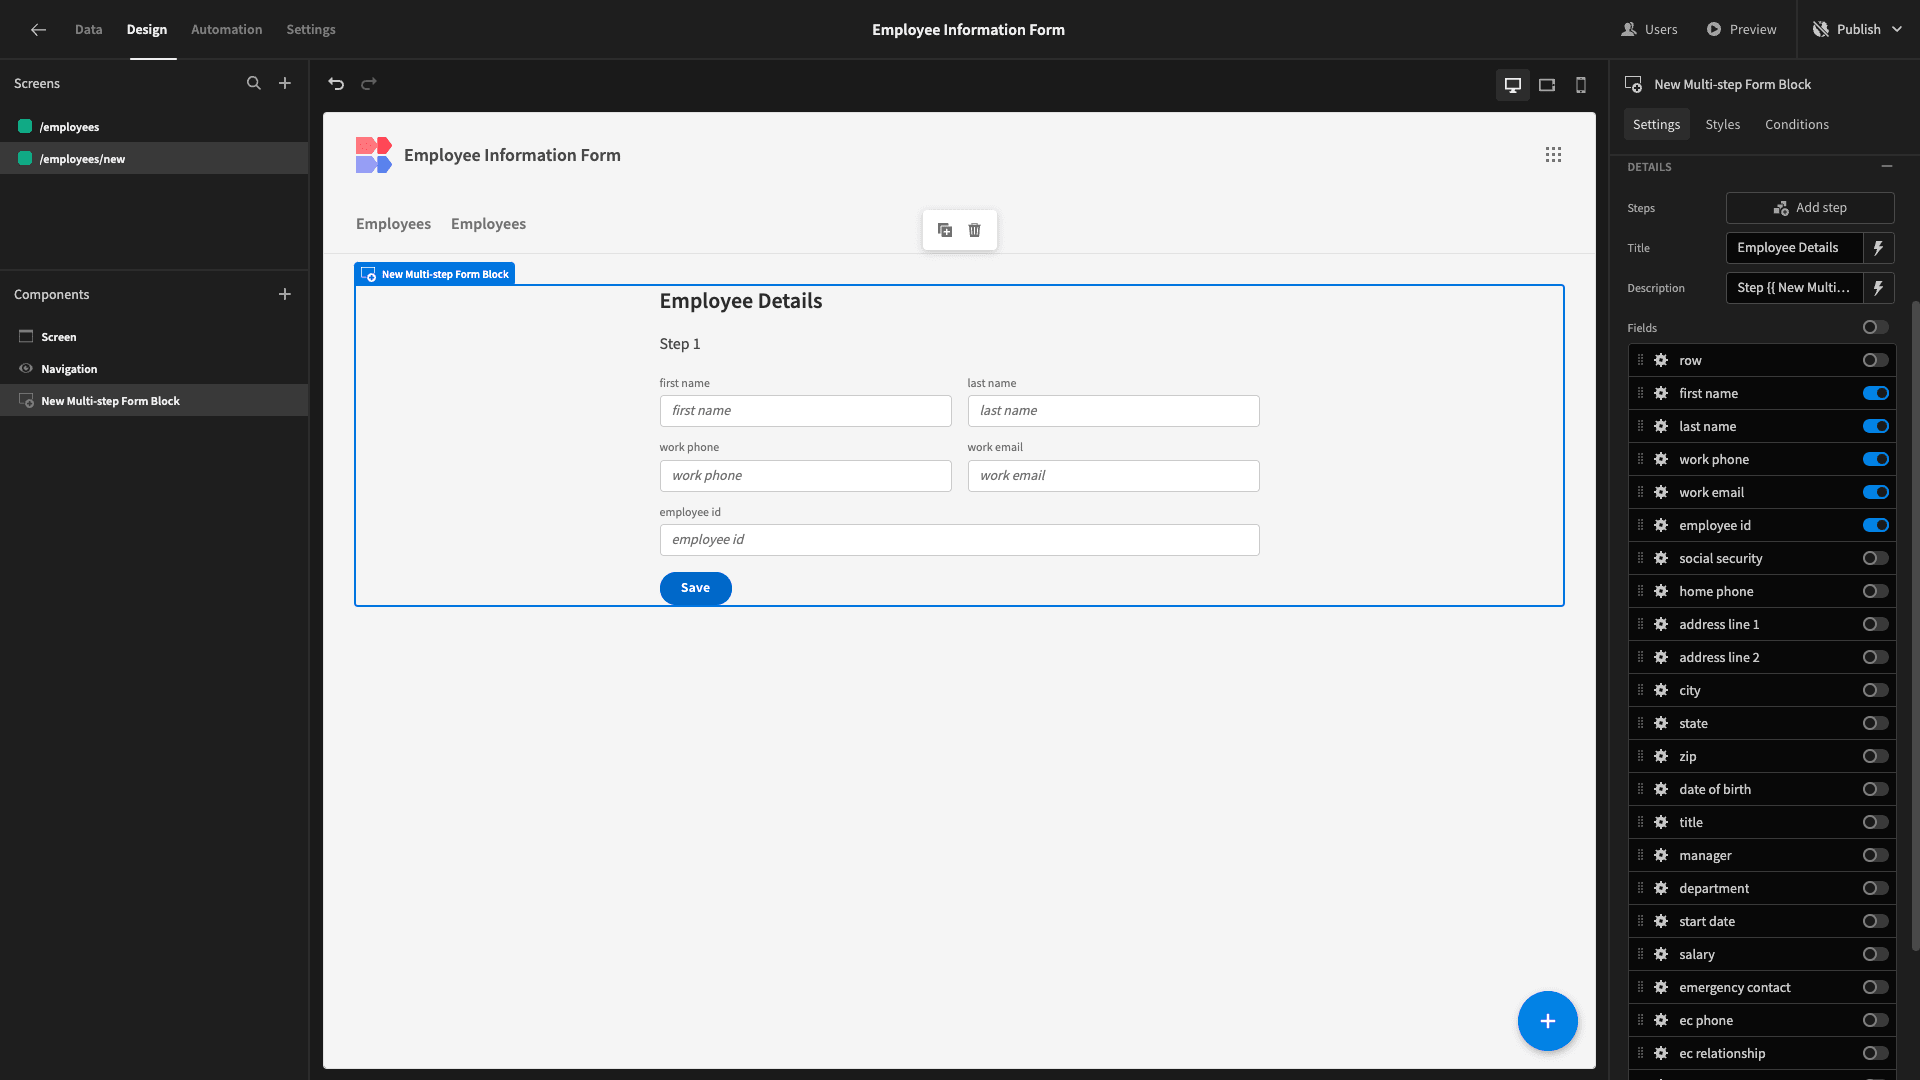
That’s our first step done. Next, hit add step:
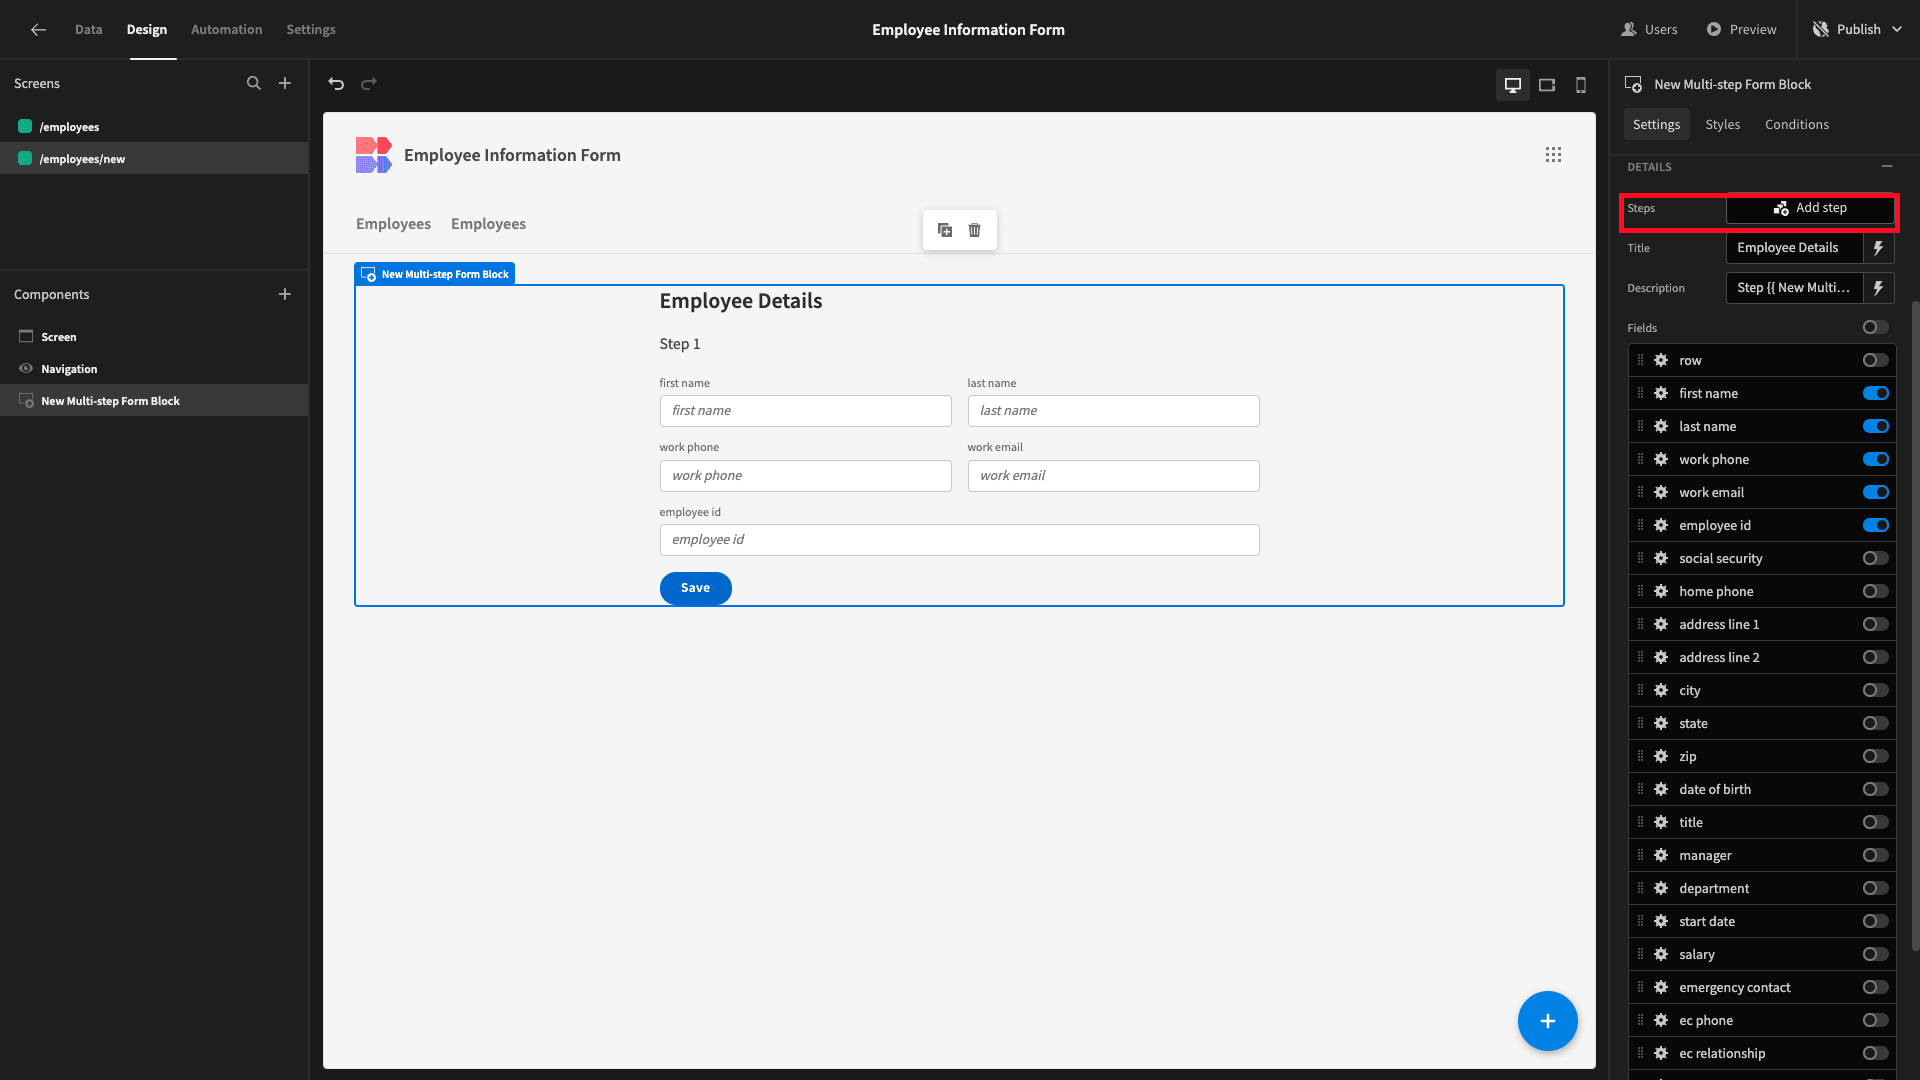
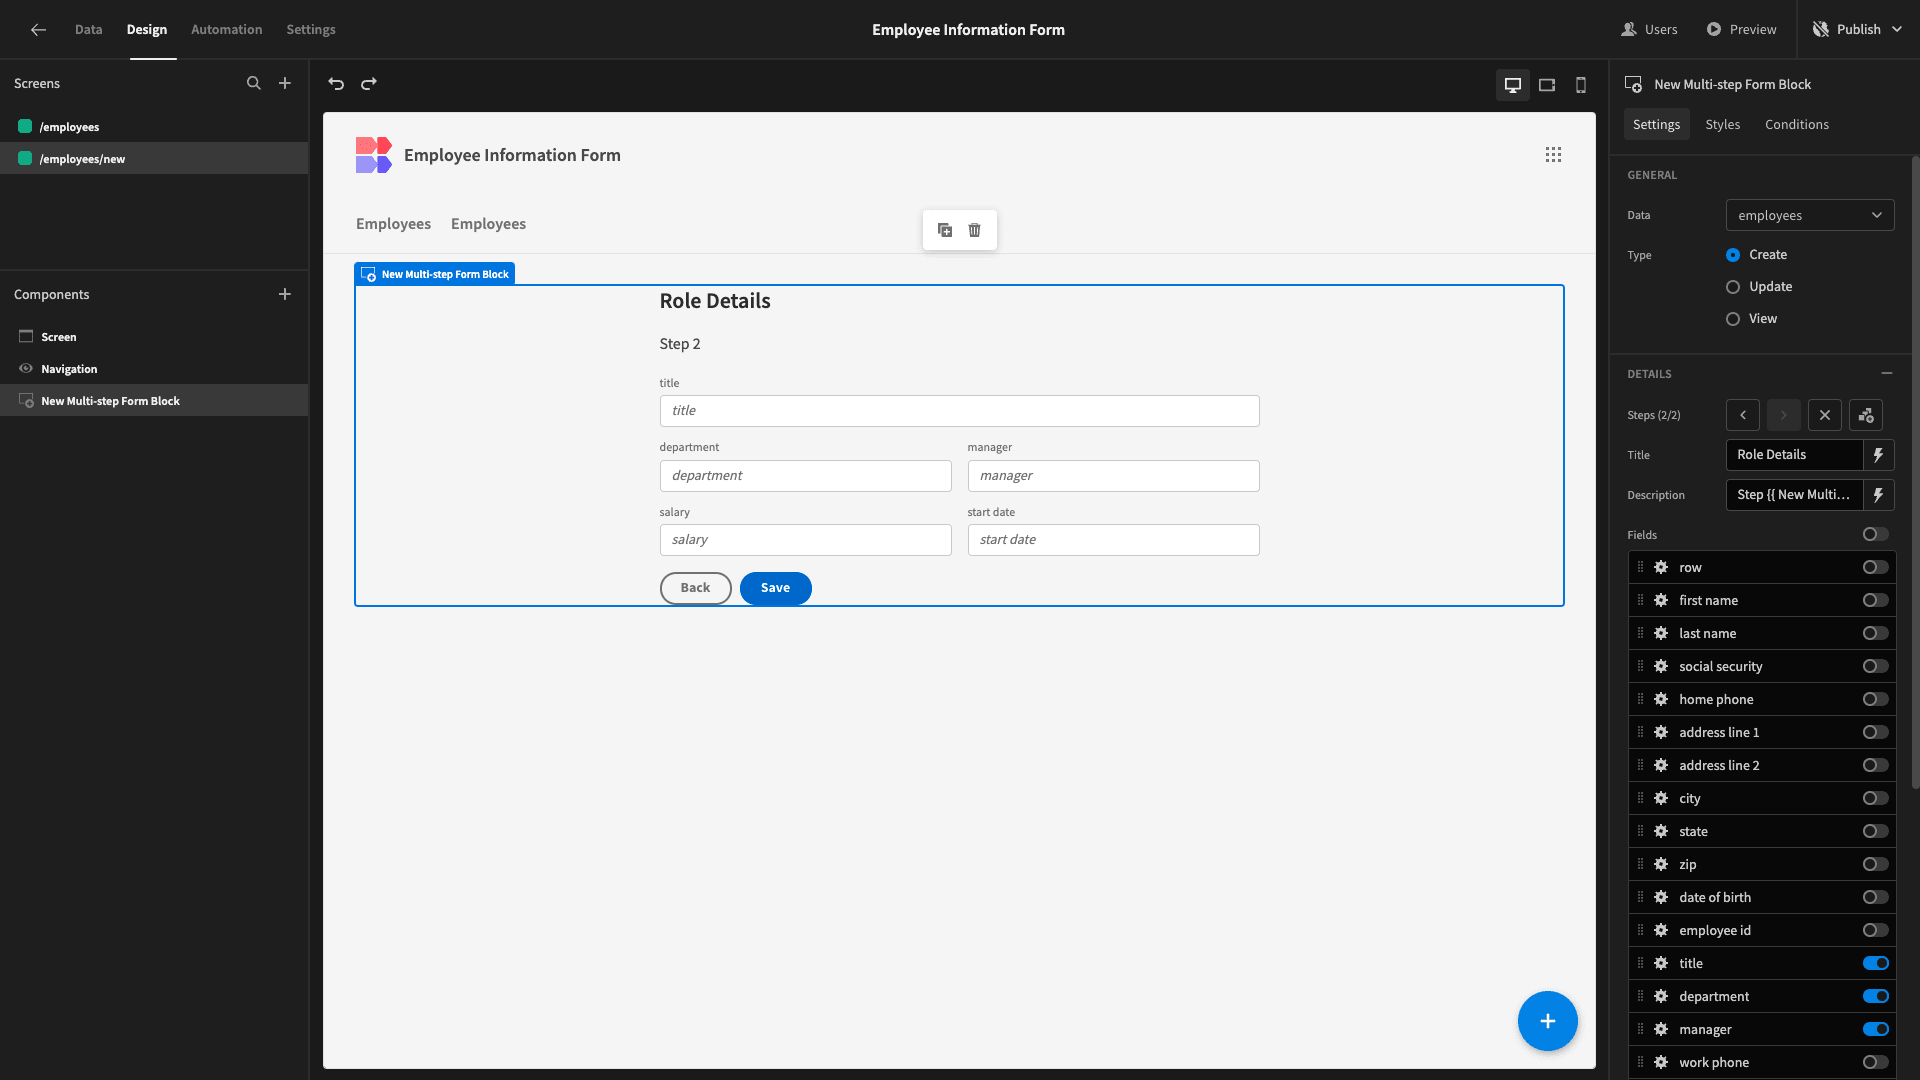
Again, by default, this will include all of the fields from our data schema. This time, we’re going to deselect everything except:
- Title,
- Department,
- Manager,
- Salary,
- Start date.
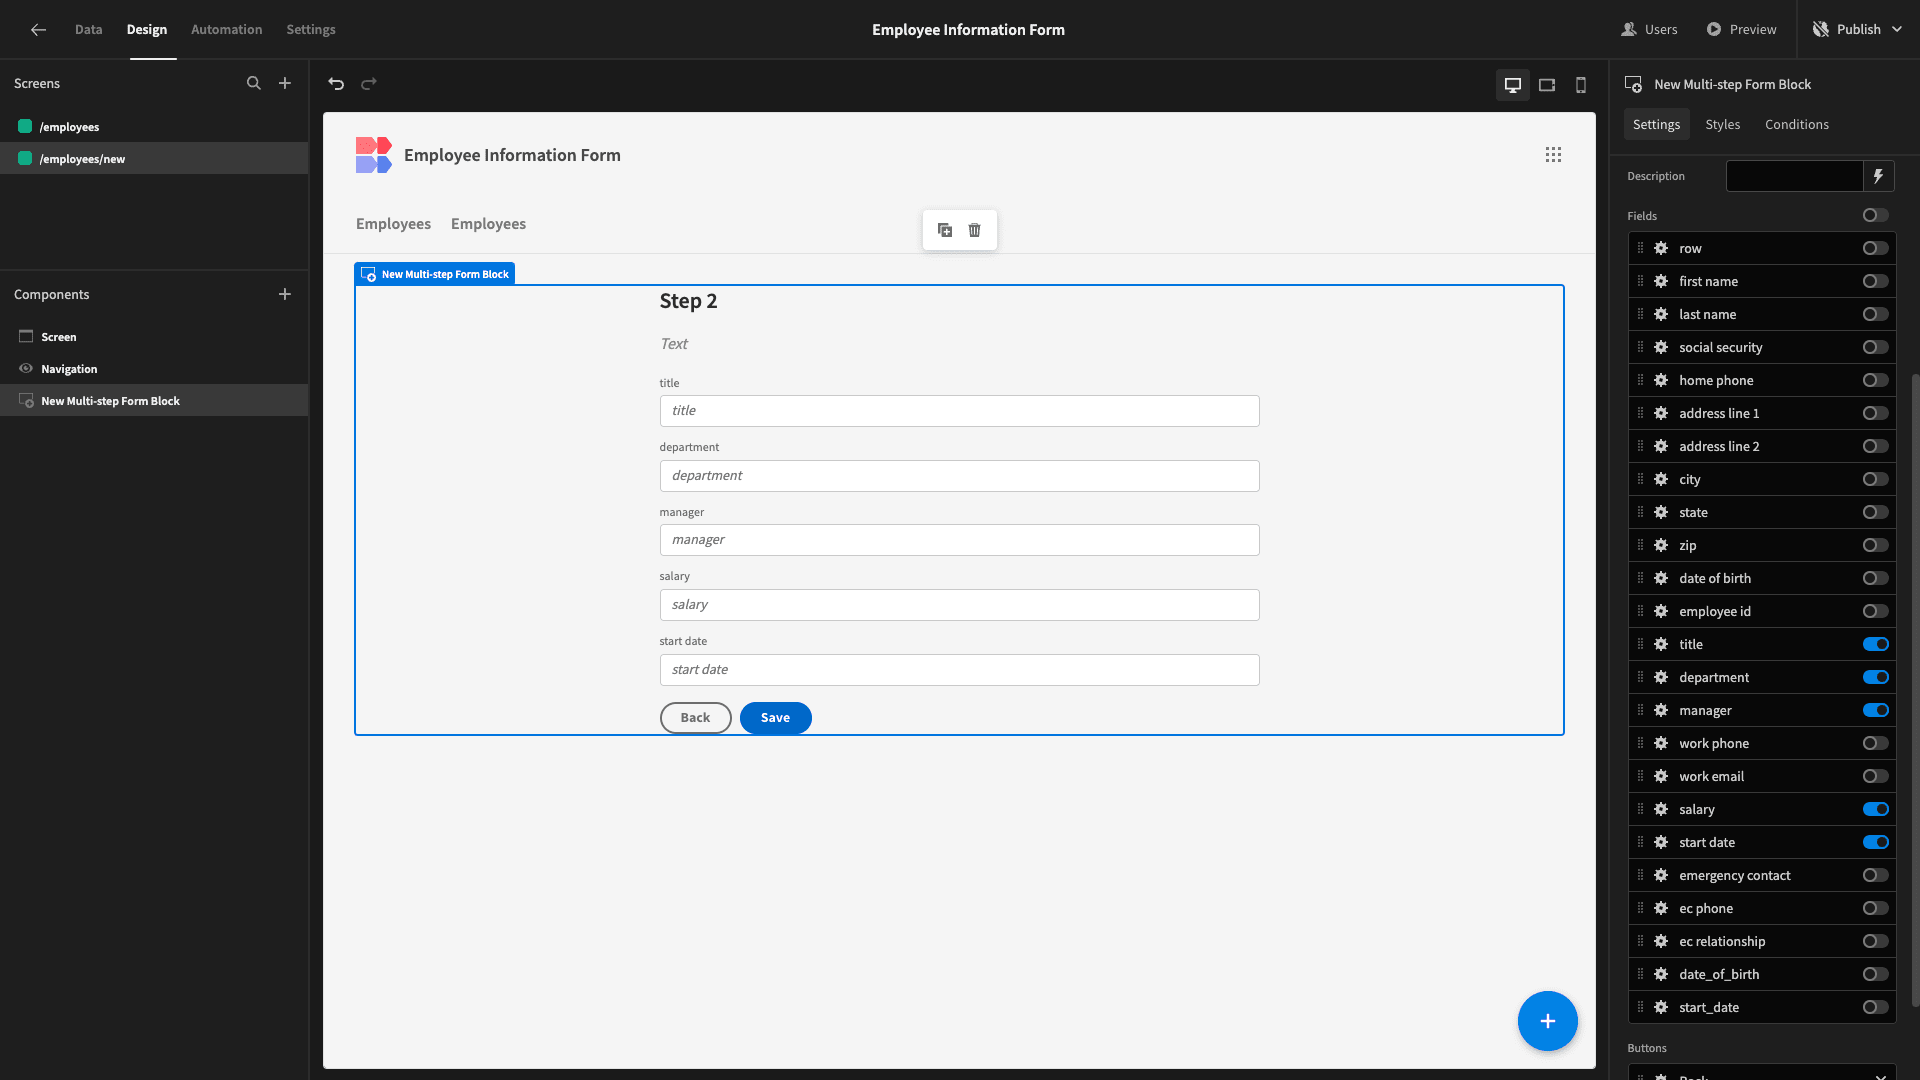
Again, we’ll arrange our fields into columns and update the display text.
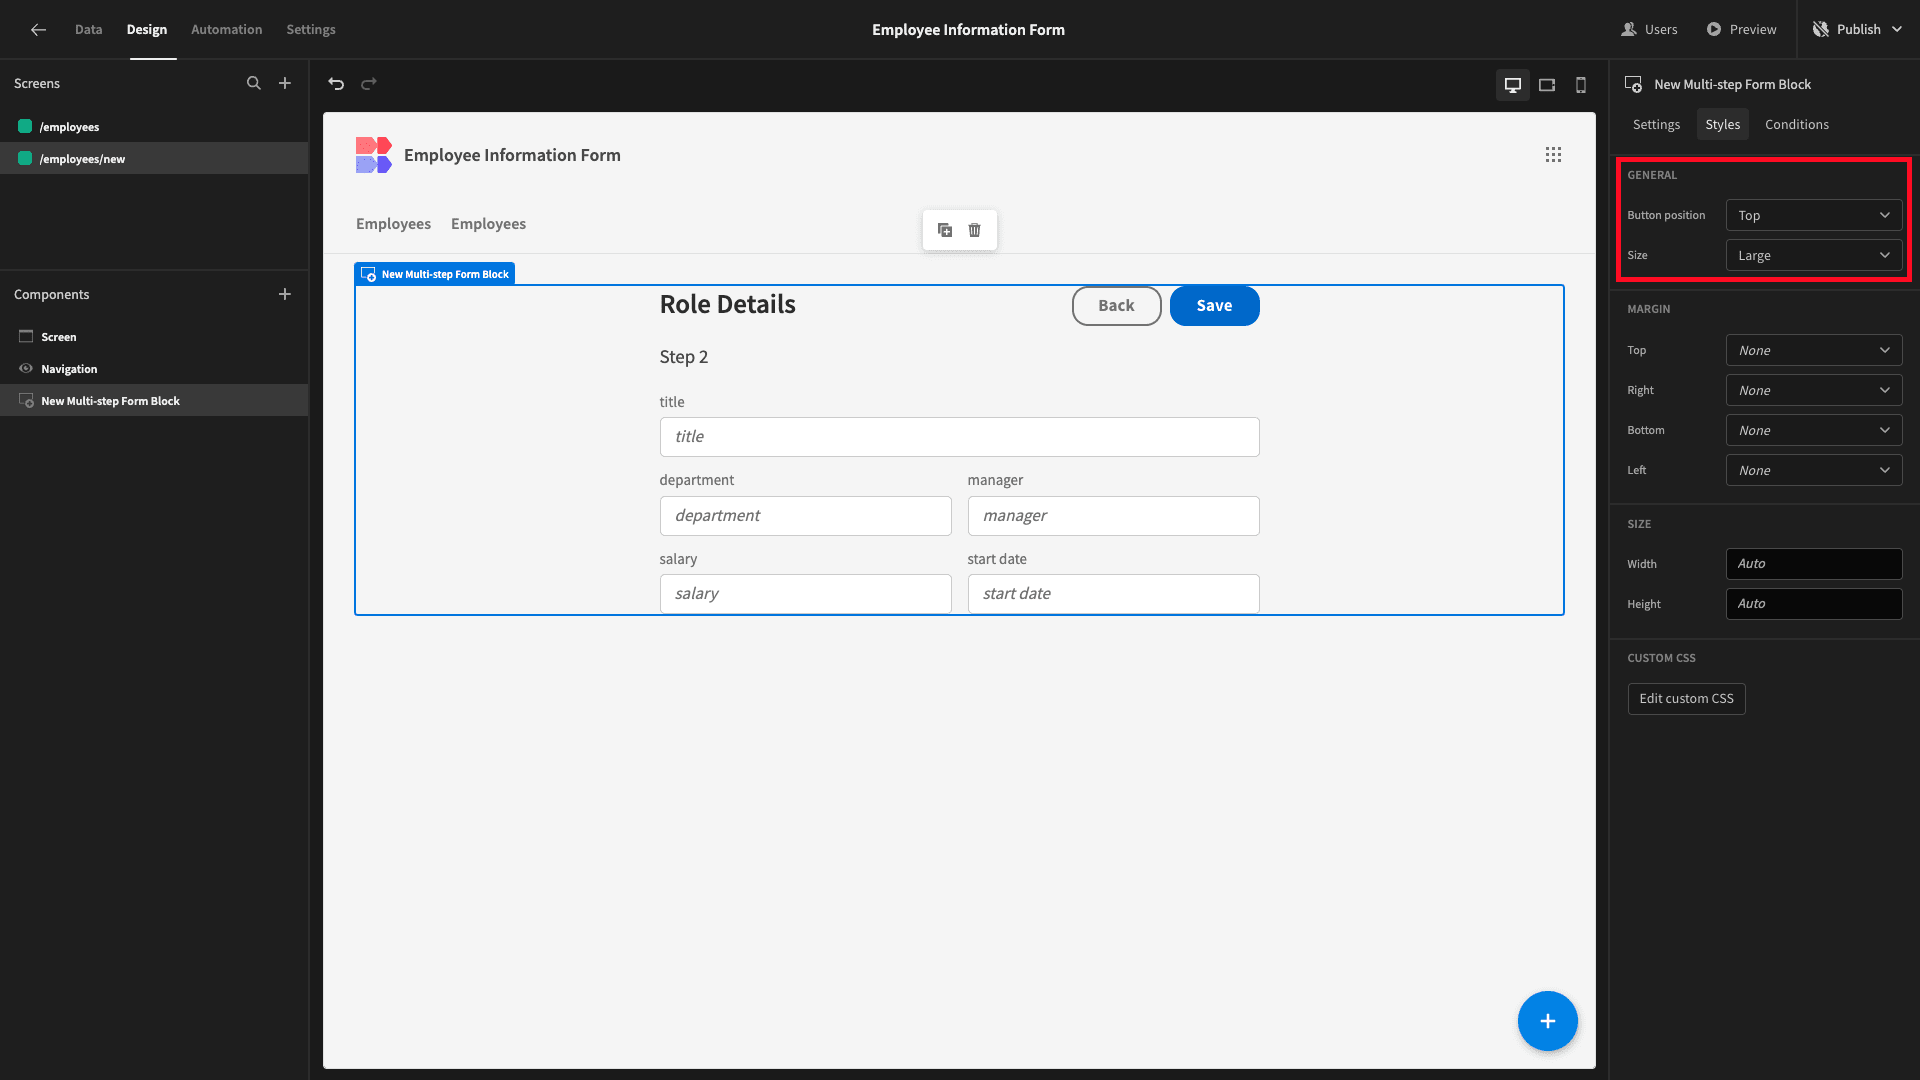
To finish off our first form, we’ll just make a couple of little design tweaks. Under the Styles tab, we’ll set the Size attribute to large and position our buttons at the top of the form:
That’s it!
4. Build an update form
We’ll use a similar approach to build our second form - with a couple of additional steps.
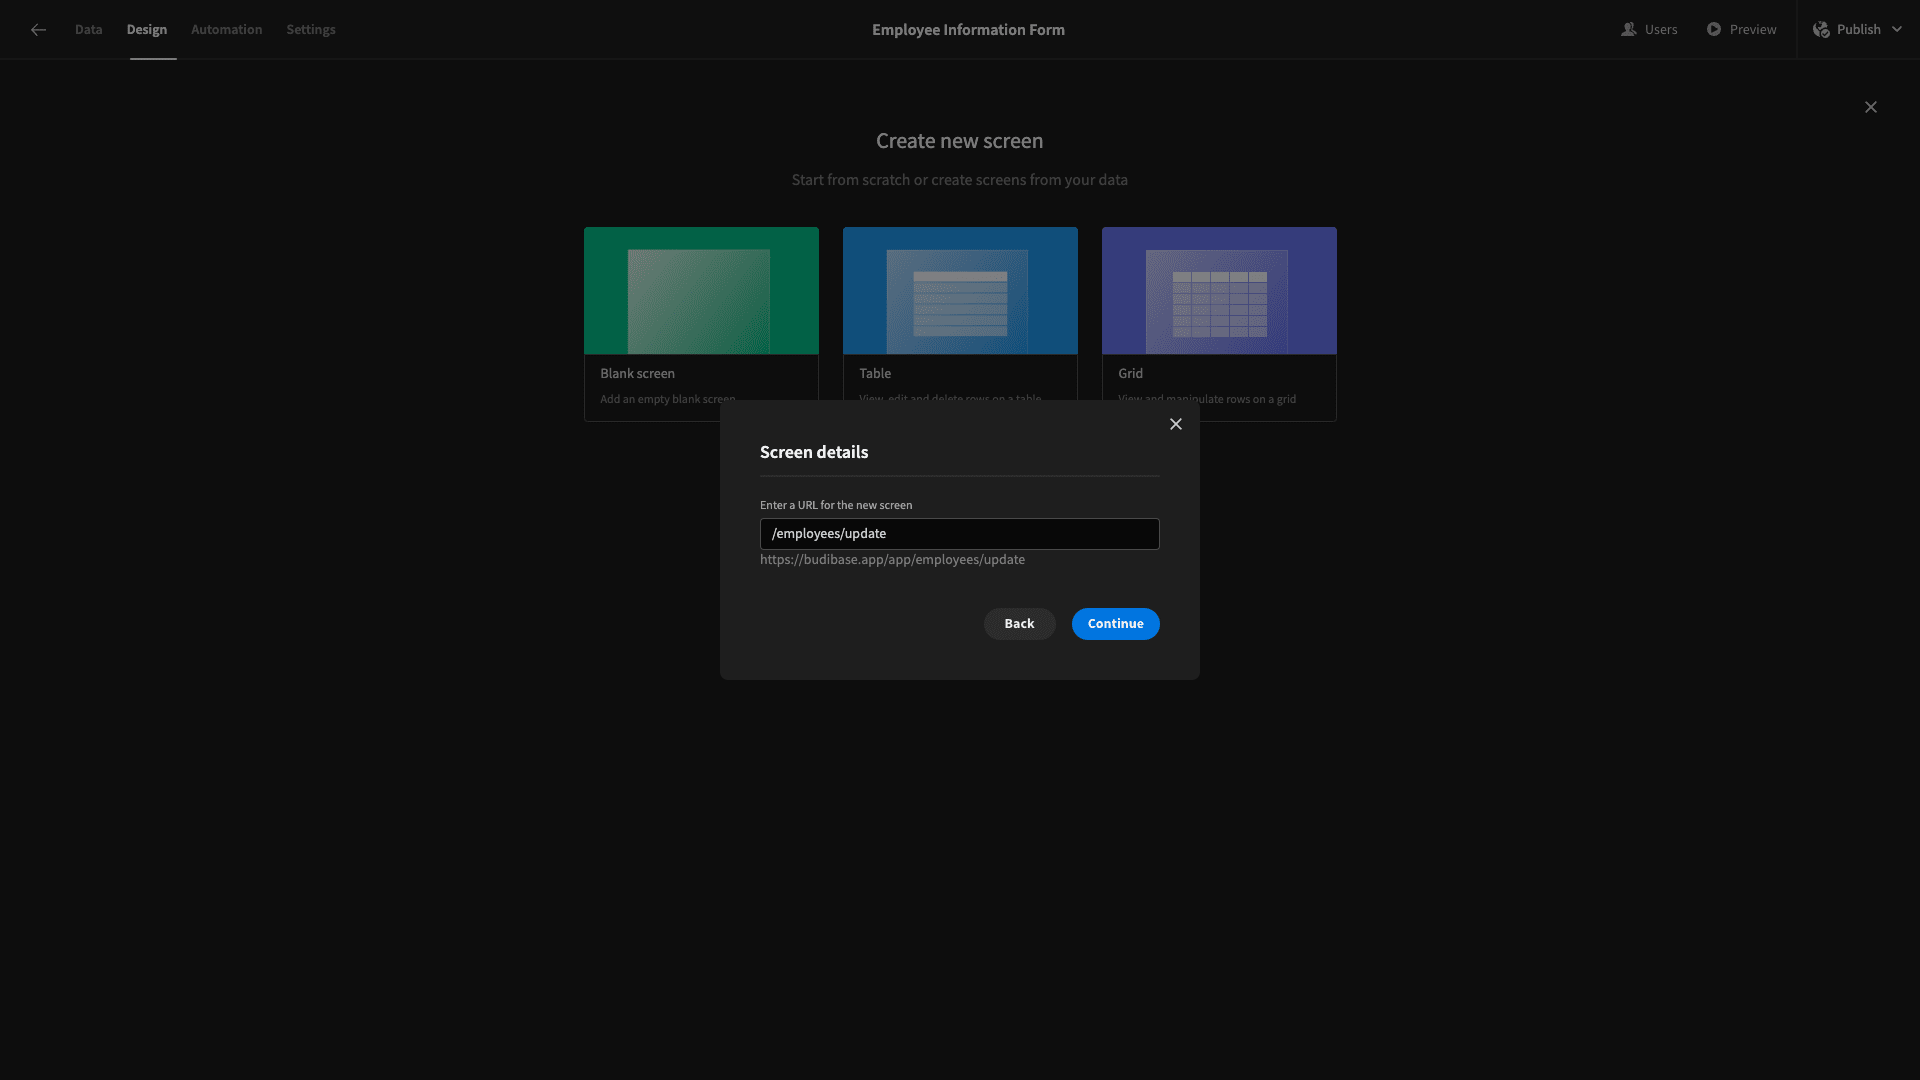
Again, we’ll start by adding a new blank screen. This time though, our URL path is /employees/update.
Again, we’re starting with a multi-step form block, but this time we’ve set its Type to Update:
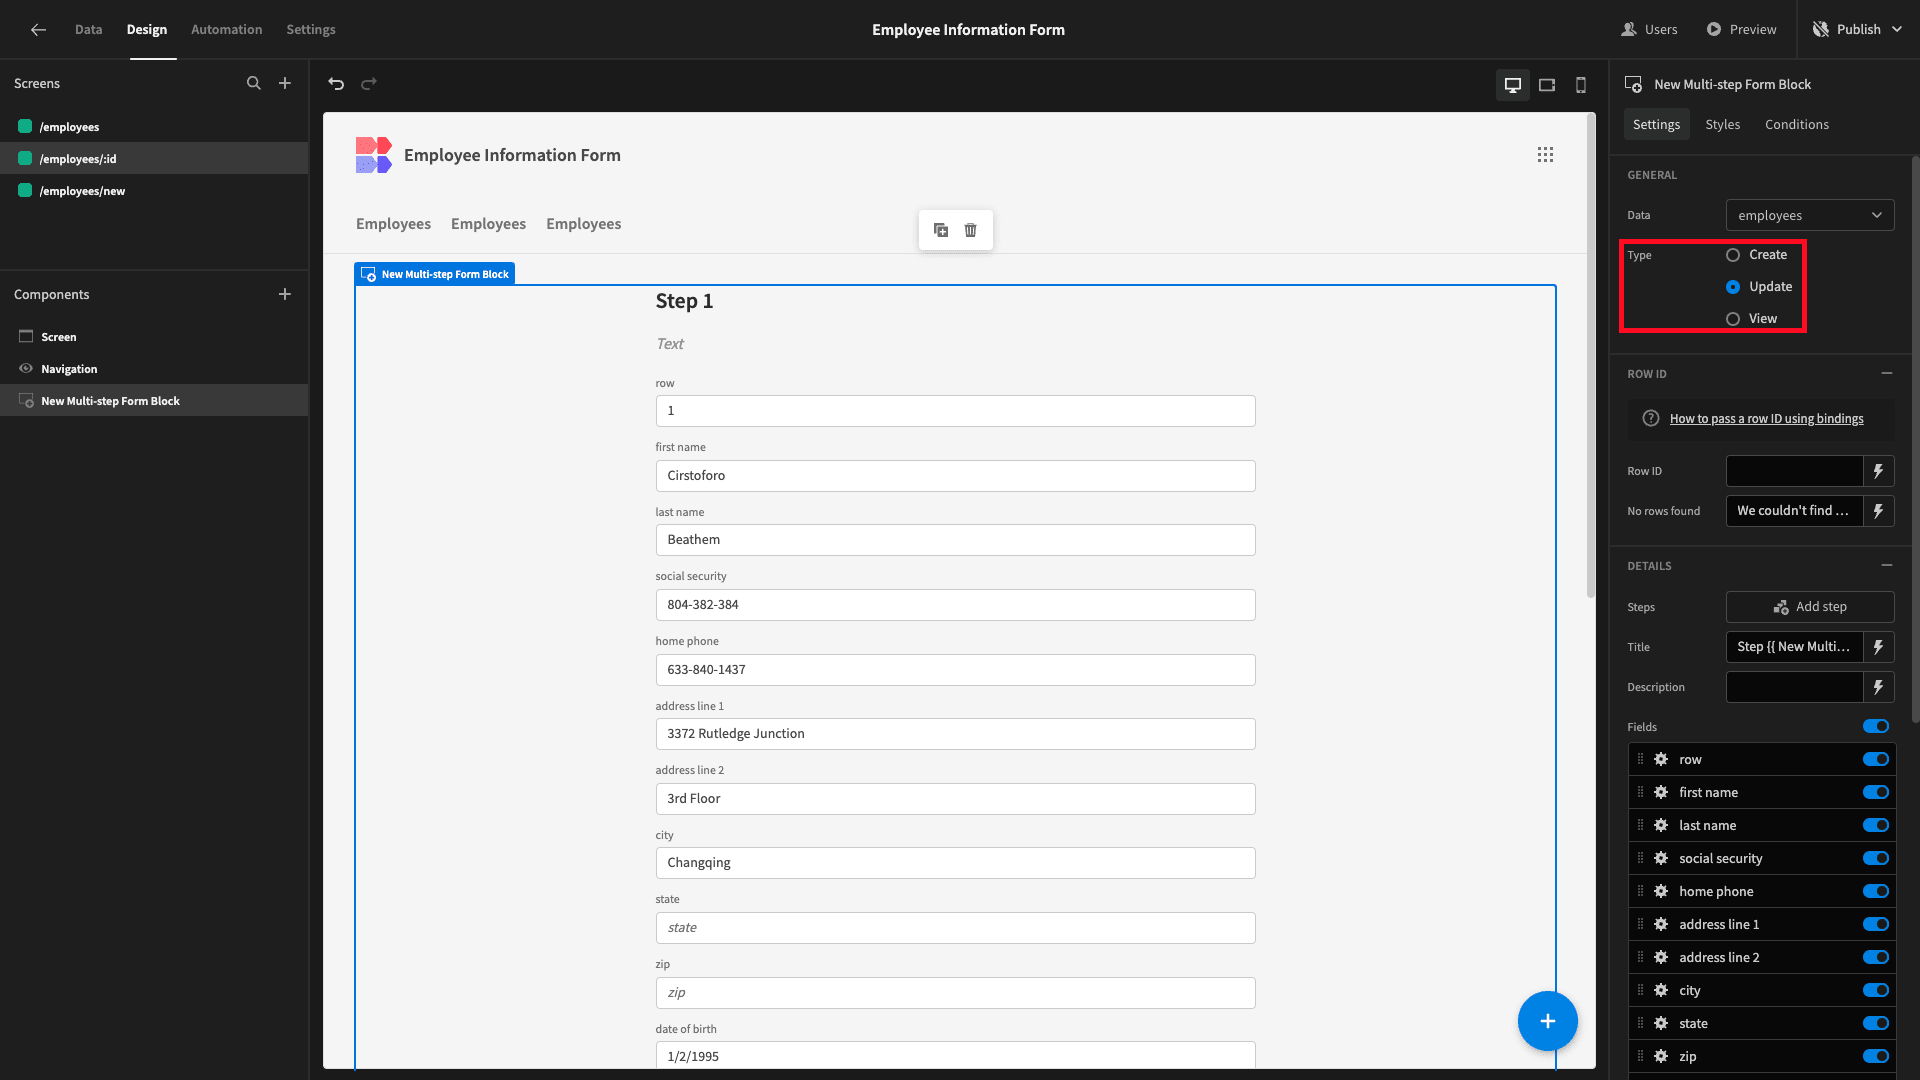
This exposes an option called Row ID - where we can specify the row we want to direct our update form at.
We’ll cover how we’re going to pass a value to the URL in the next section.
First, though, let’s finish building our form.
We’ll start by replicating the first step from other form, but this time adding two extra fields - social security and date of birth:
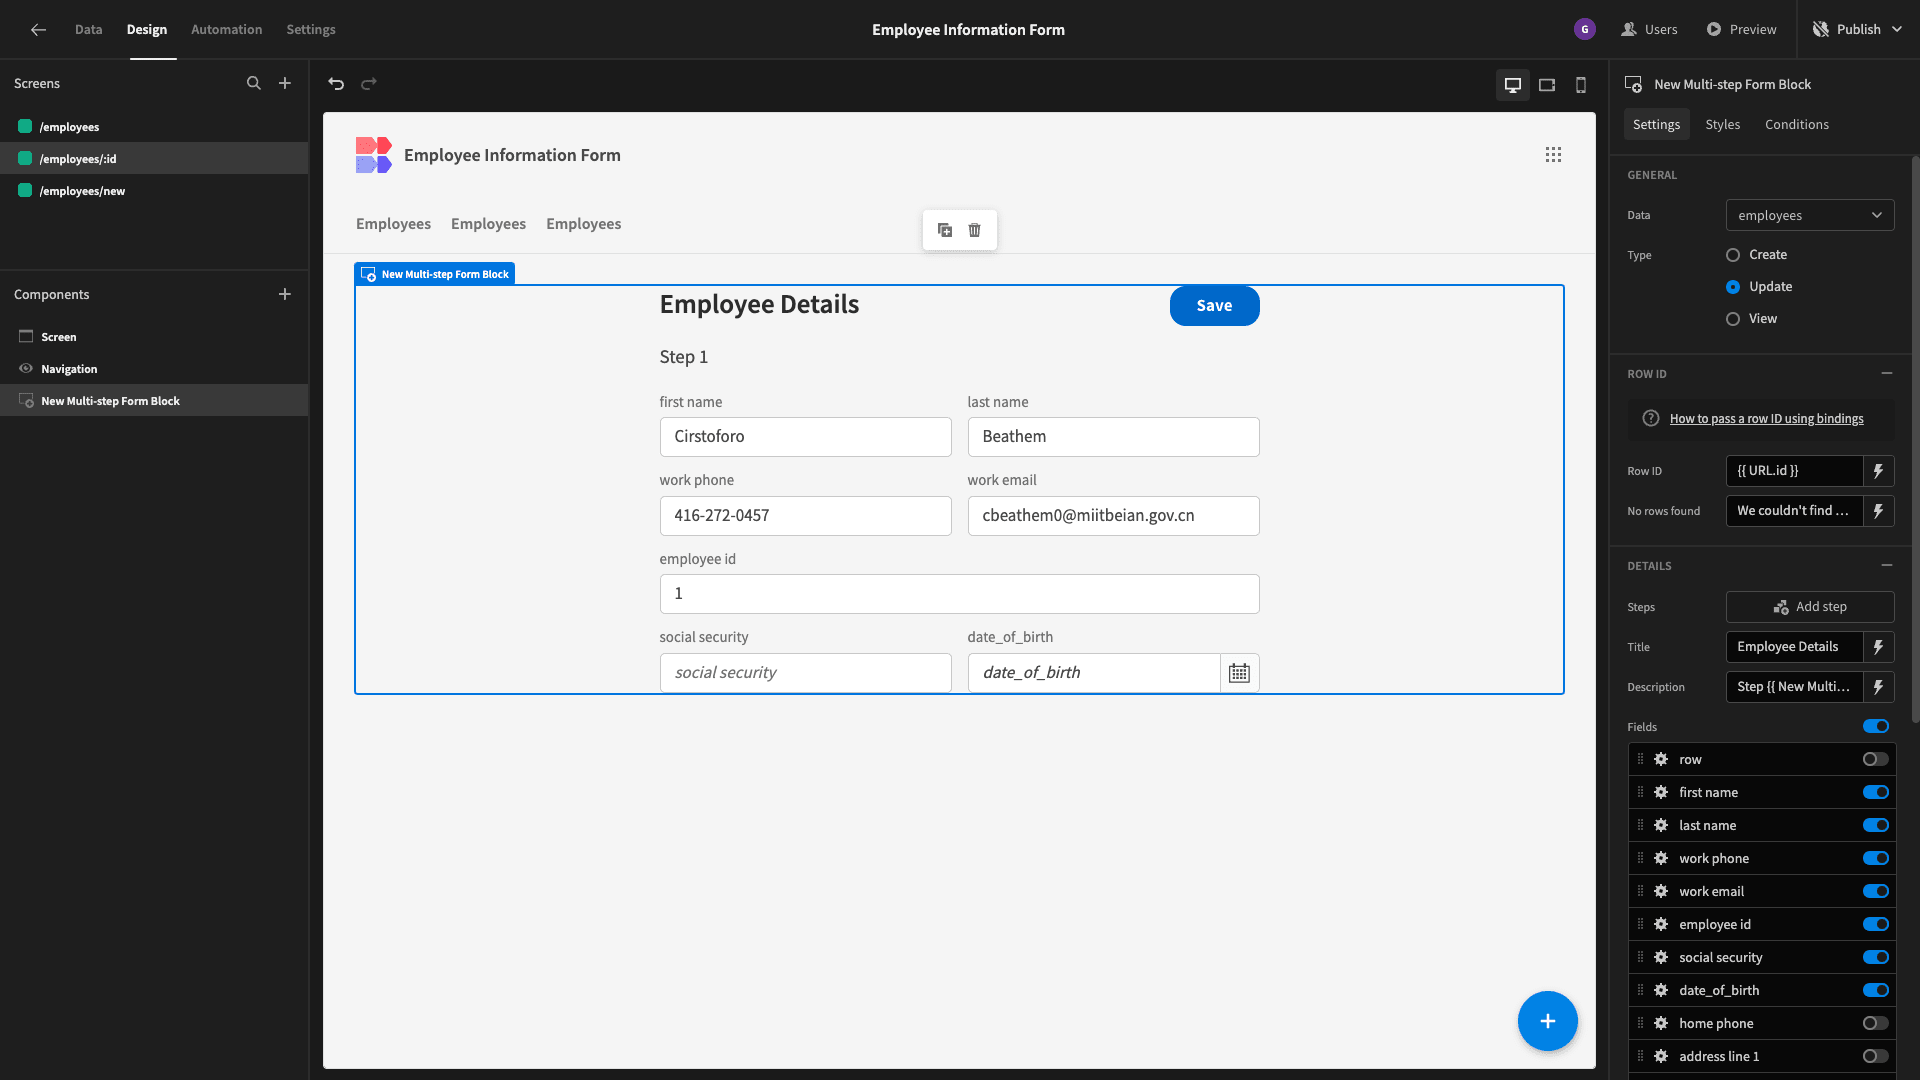
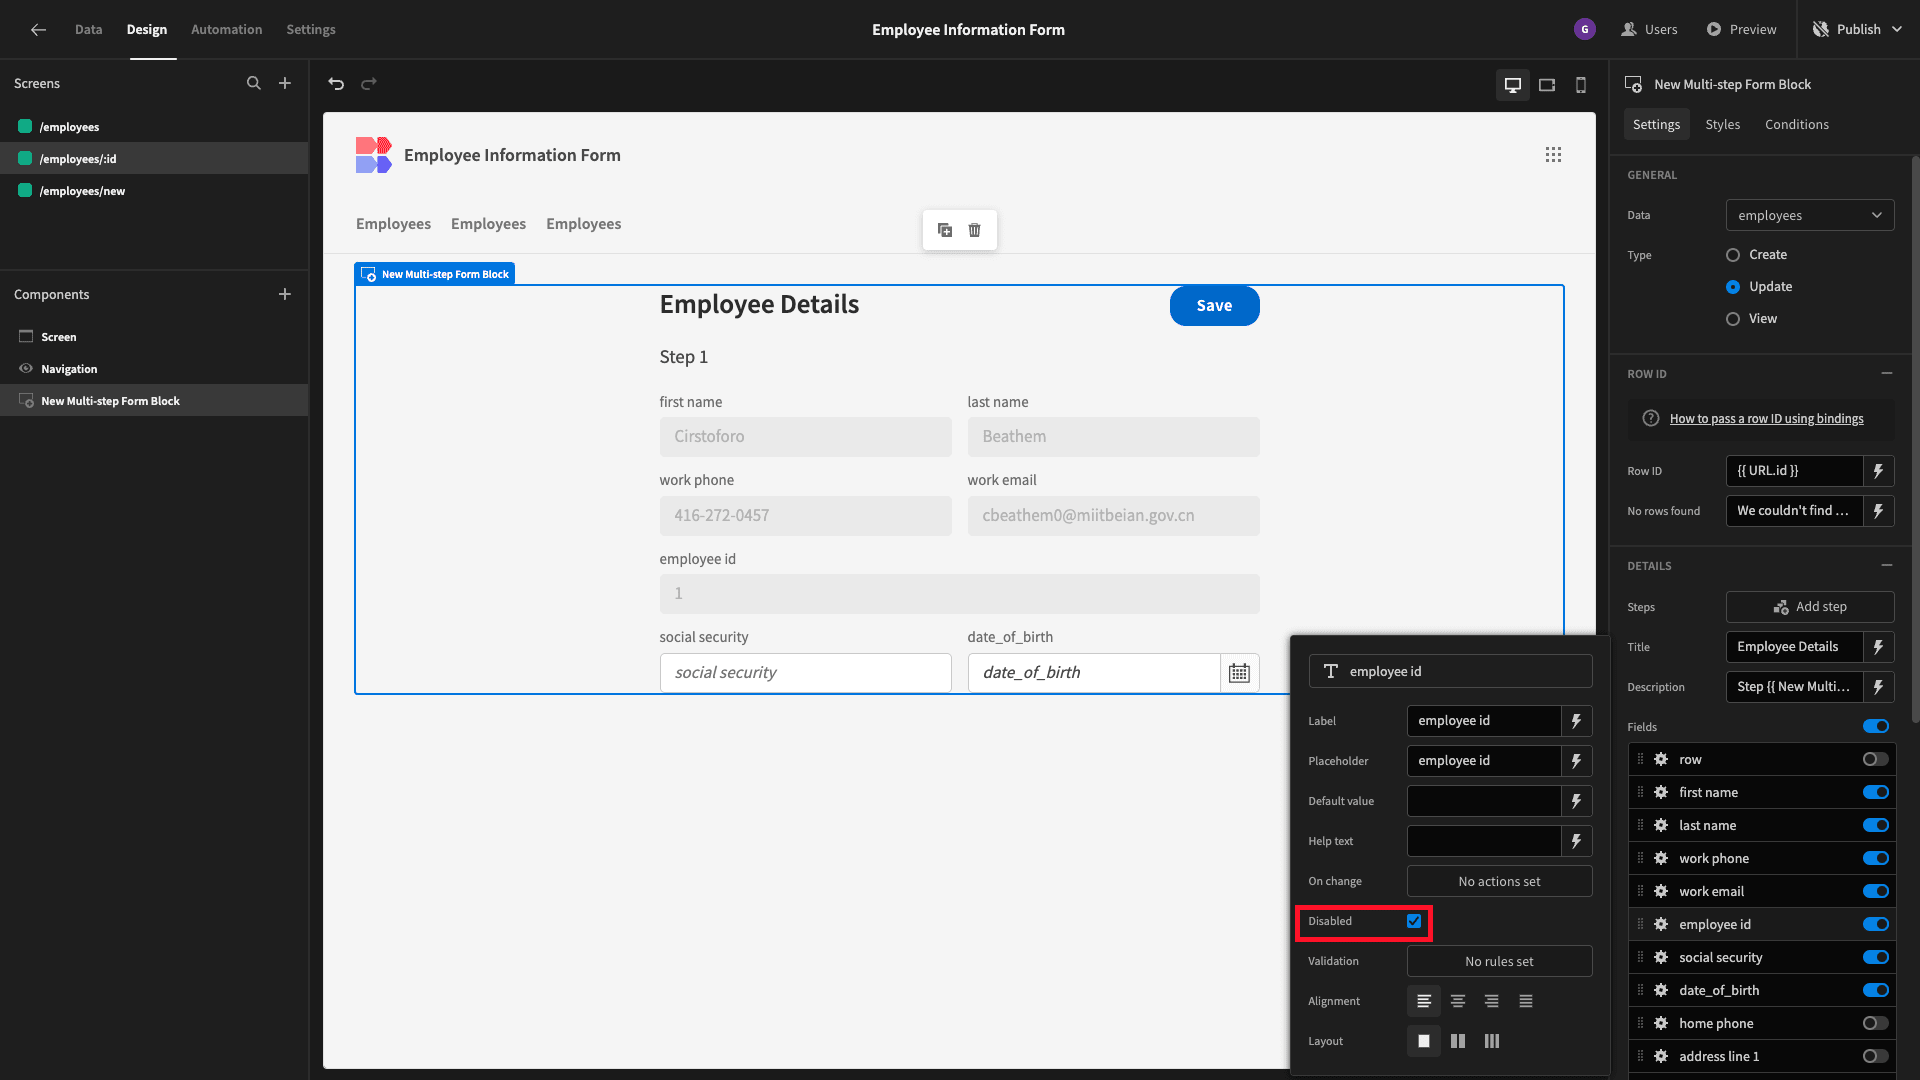
But, we don’t want our on-the-ground colleagues to be able to update their existing fields - just input the new ones. So, under the settings for each of the existing fields, we’ll select the option for Disabled:
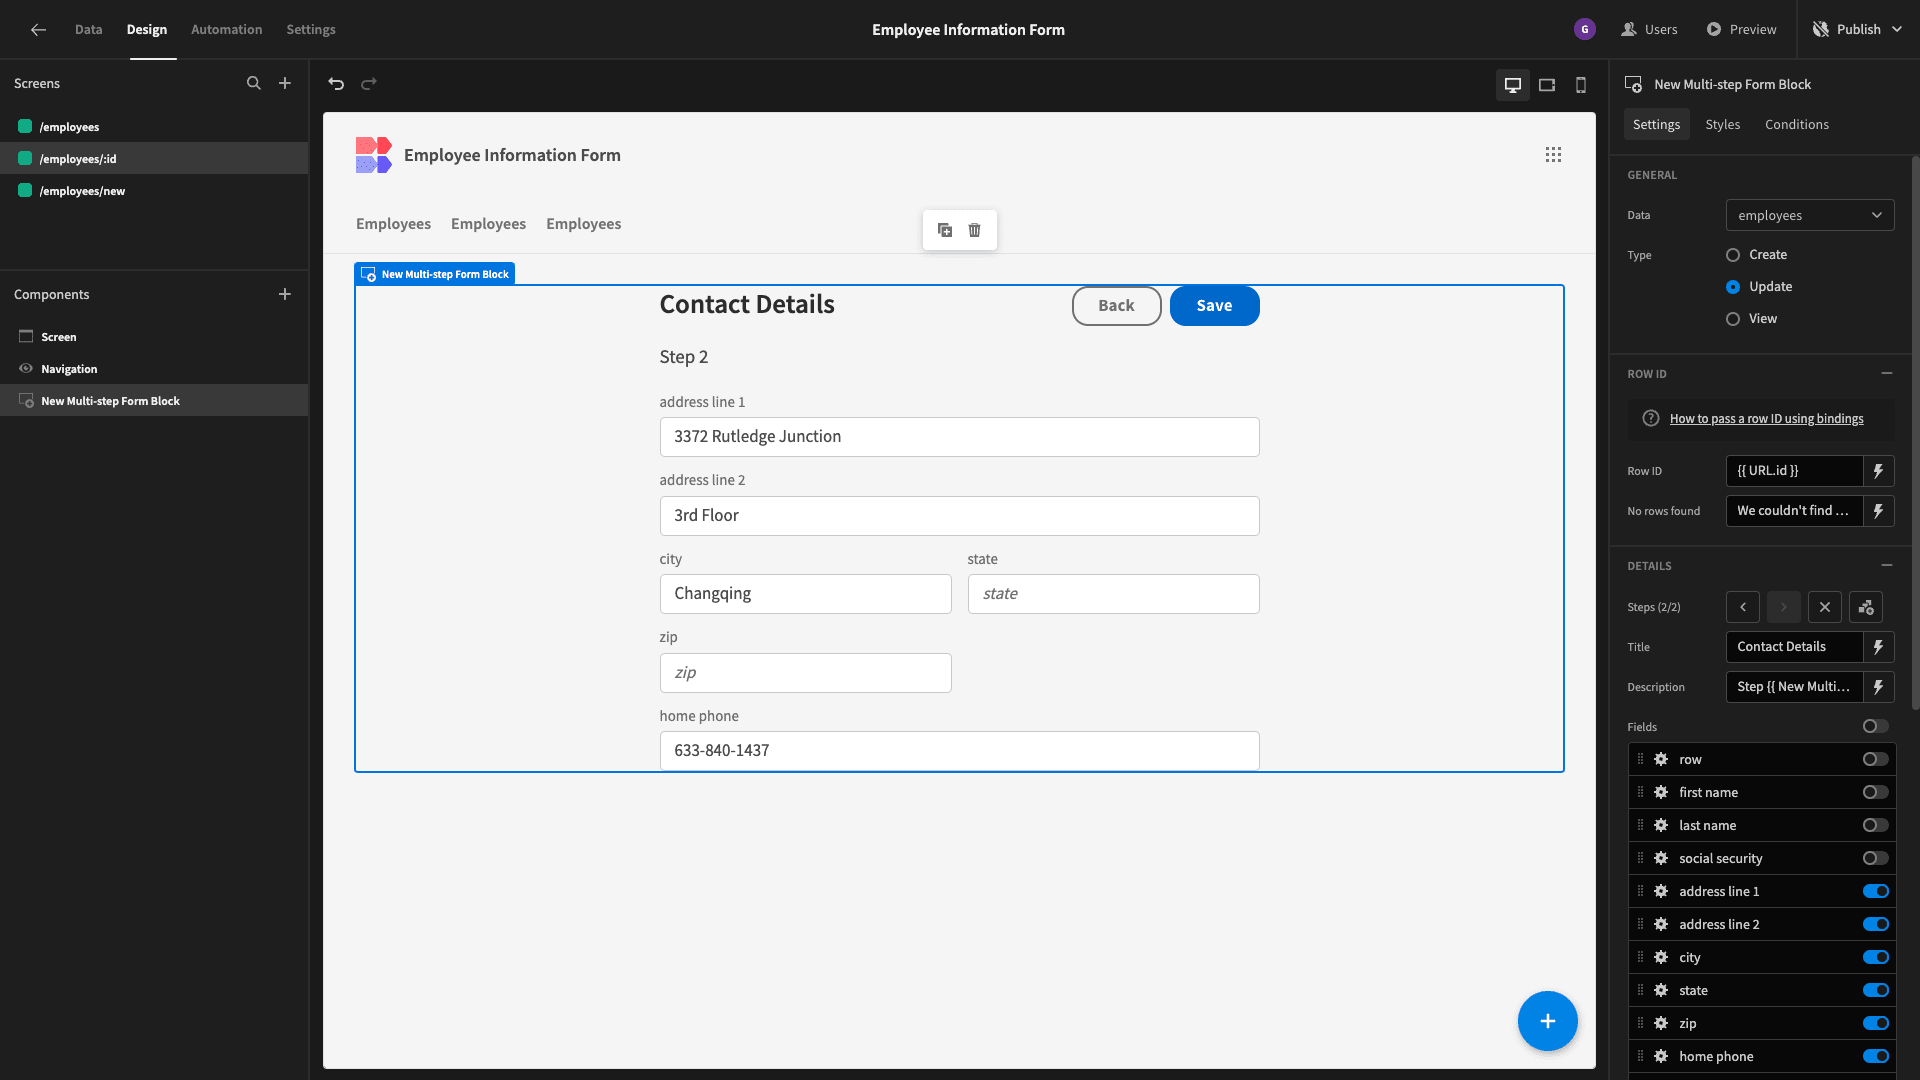
The second step on this form will deal with the employee’s contact information. The attributes we’re including are their address and home phone number:
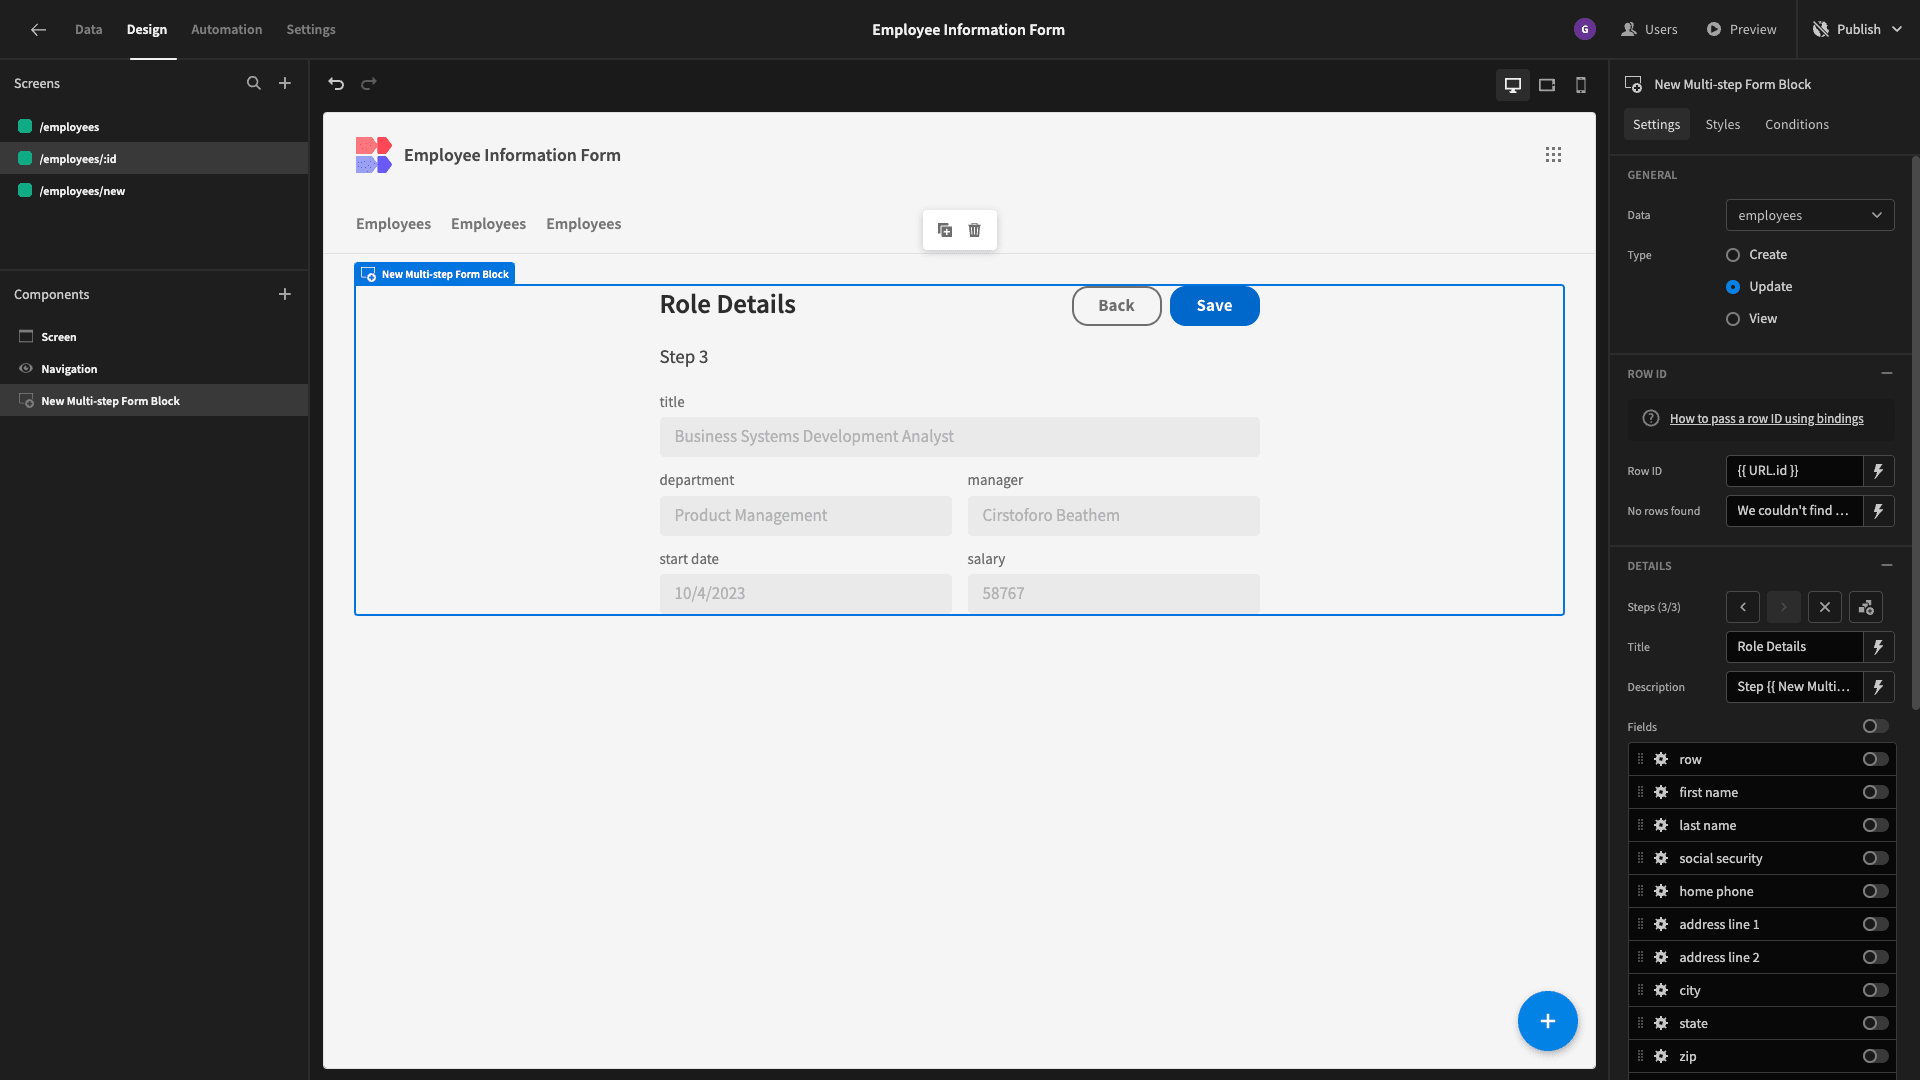
The third step on this form will contain all of the existing role details - but this time we’re setting each of the fields to disable, so employees can only read the values:
Our employee information form’s fourth and final step will be used for gathering emergency contact details. So, the attributes we’re including are their emergency contact:
- Name,
- Phone number,
- Relationship to the employee.
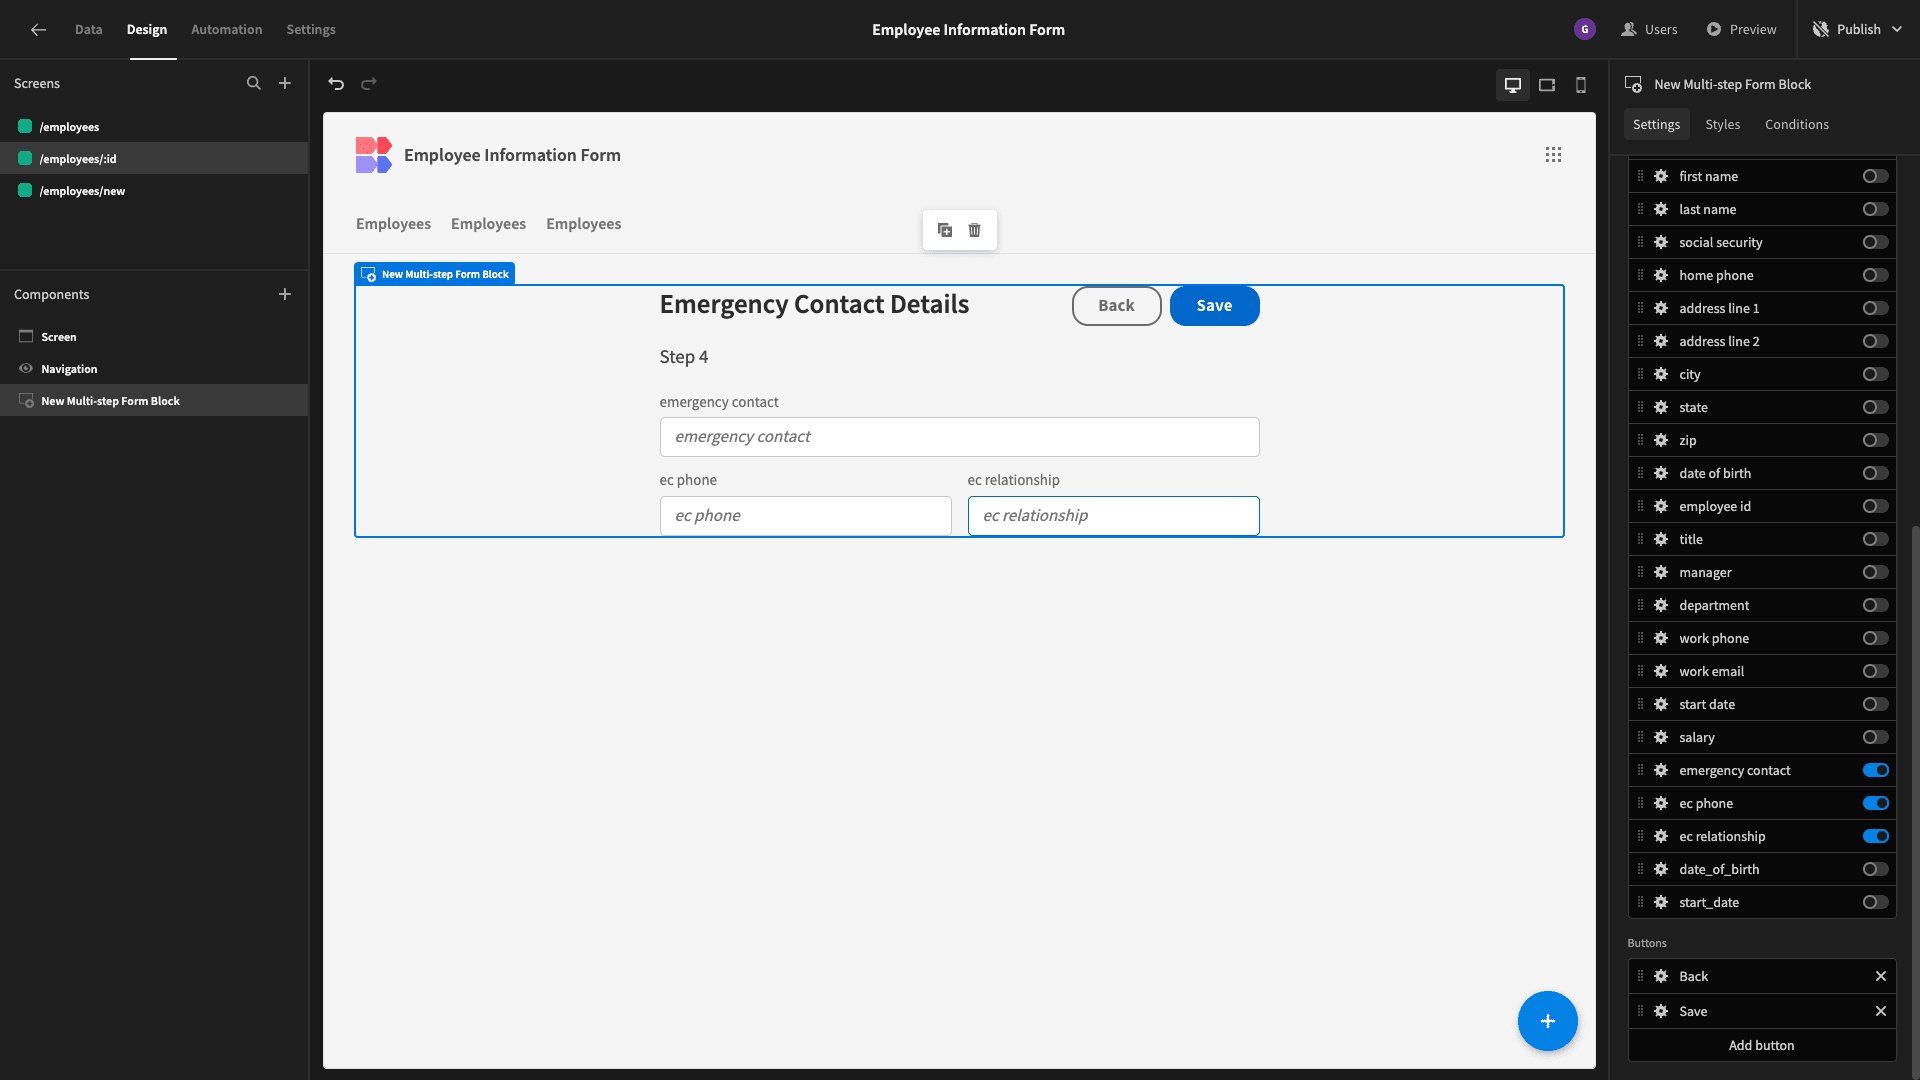
Just like before, we’ve also set the size to large and the button position to top. We’ll make a couple of extra tweaks in the coming sections, but that’s our form UI itself done for now.
5. Roles, security, and navigation
Remember, the beauty of Budibase isn’t just that we can build professional form UIs. Additionally, it’s that we can build advanced forms that support our existing internal workflows and processes.
As we said at the outset, our employee information forms are intended for two distinct groups of users.
Budibase has built-in role-based access control, which we can implement at the level of queries, screens, or individual components. Each screen has a dropdown menu where we can assign the minimum role required to access it.
We’re setting our table screen and our first form UI to require a Power role or above:
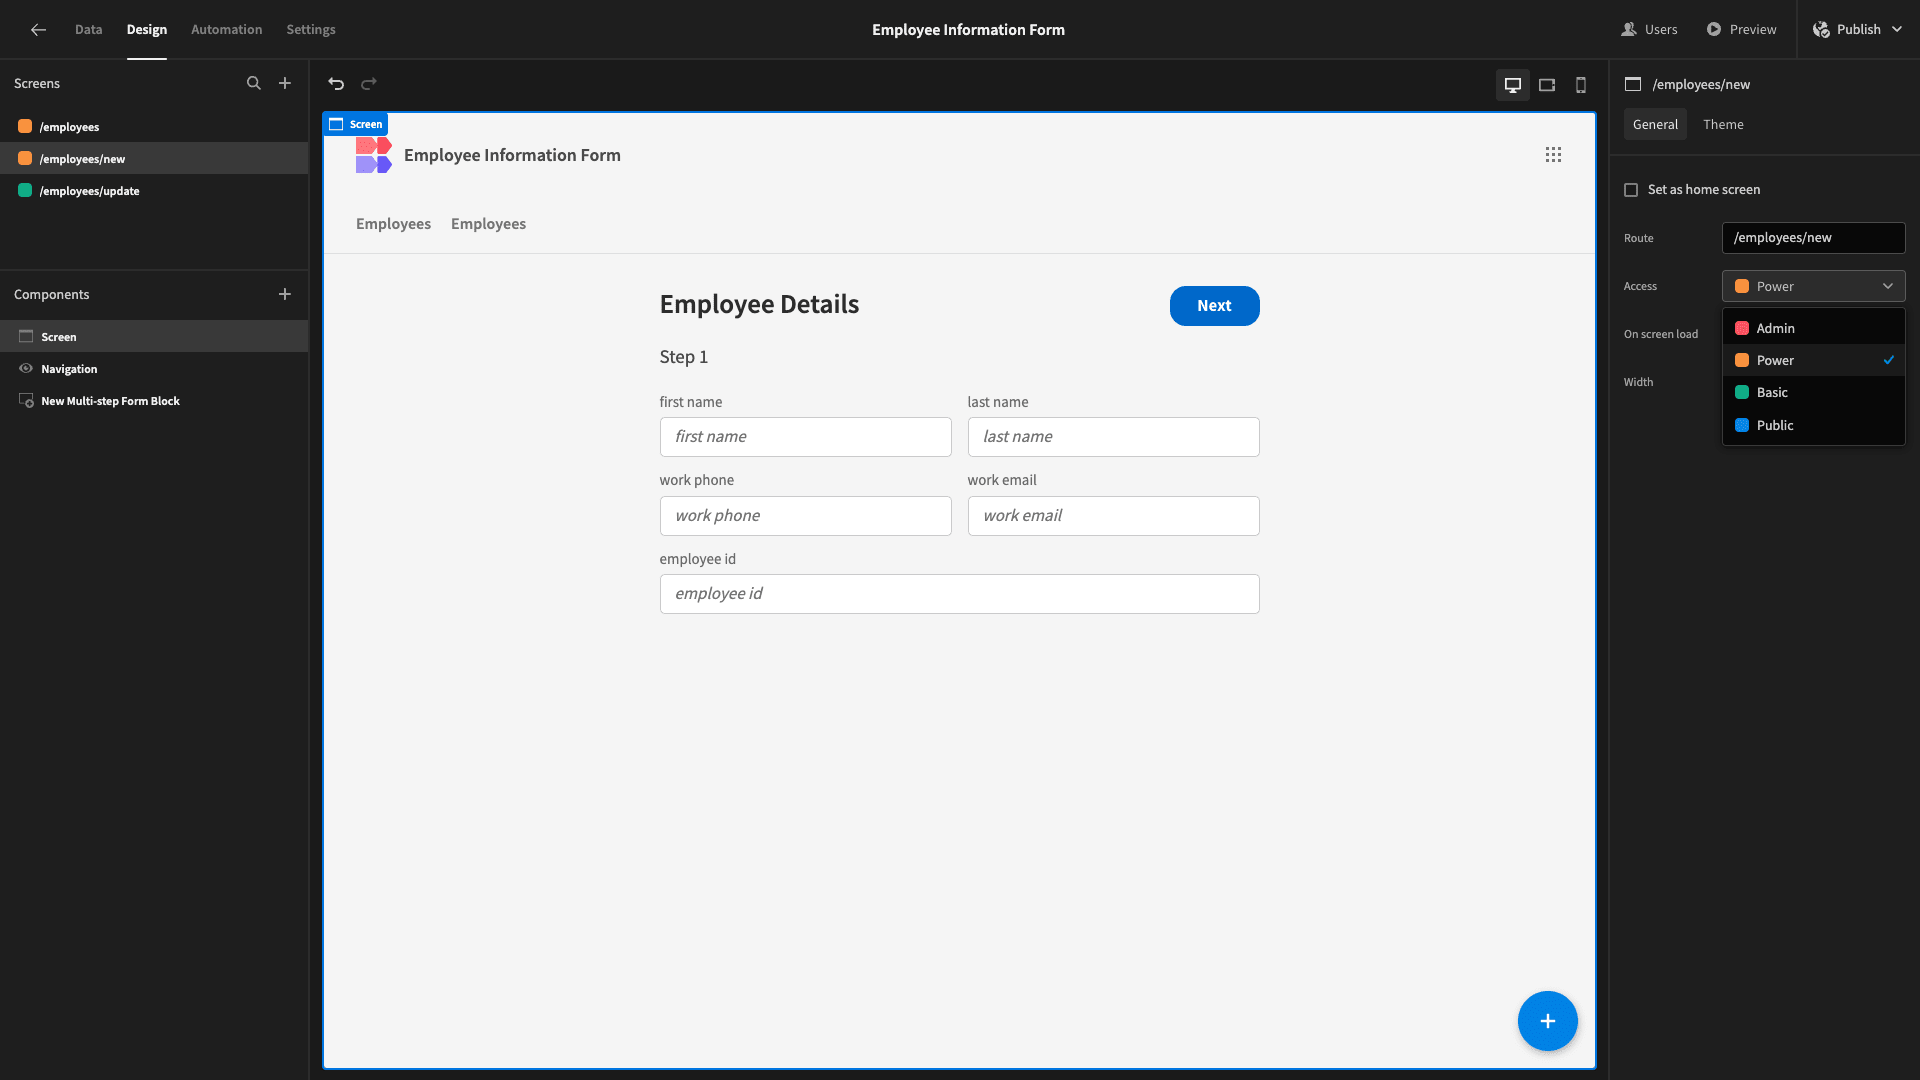
We’ll leave the access role for our update form as Basic.
But, we only want each individual employee to have access to the form that’s appropriate for them. We can’t have our colleagues accessing each other’s salaries and social security numbers.
The first thing we need to do is link our employee table to Budibase’s internal Users table. Budibase offers a special User data type for internal and SQL tables for doing this. We’ll add a User column to our MySQL table.
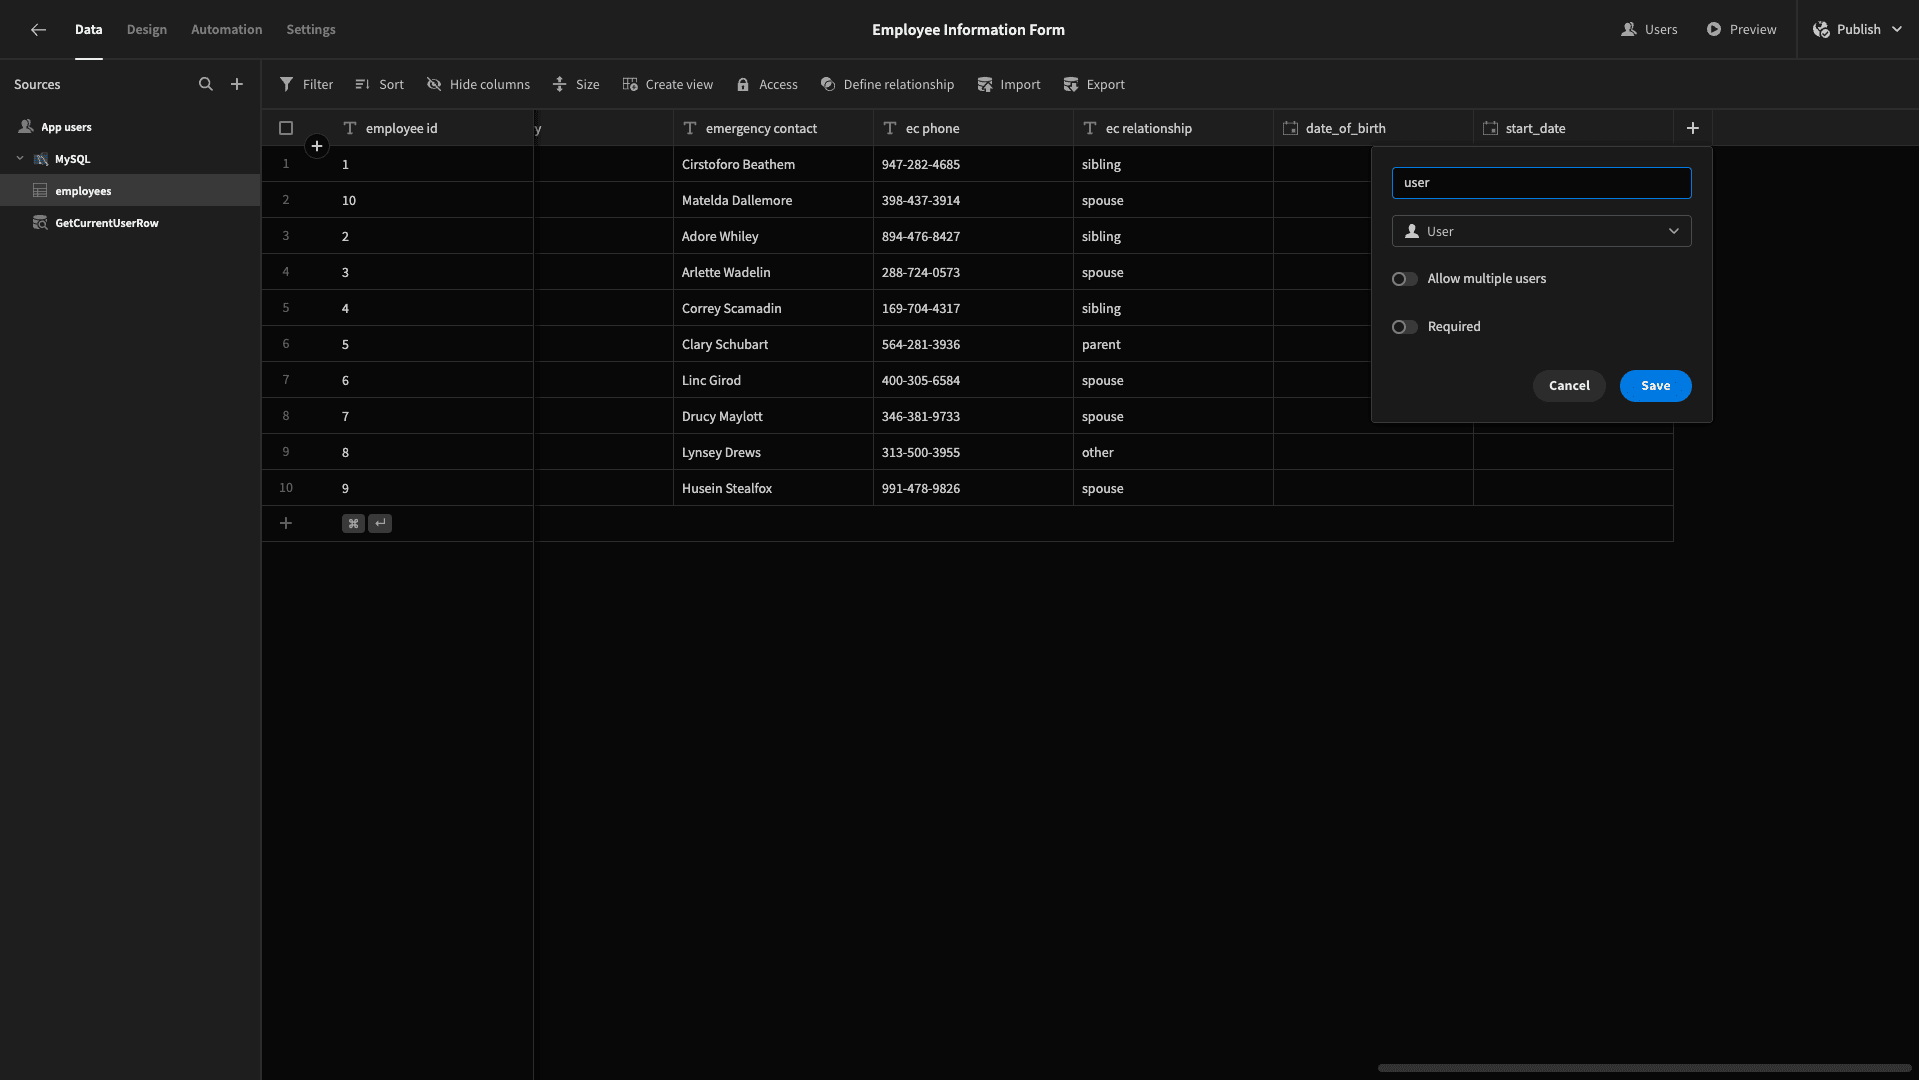
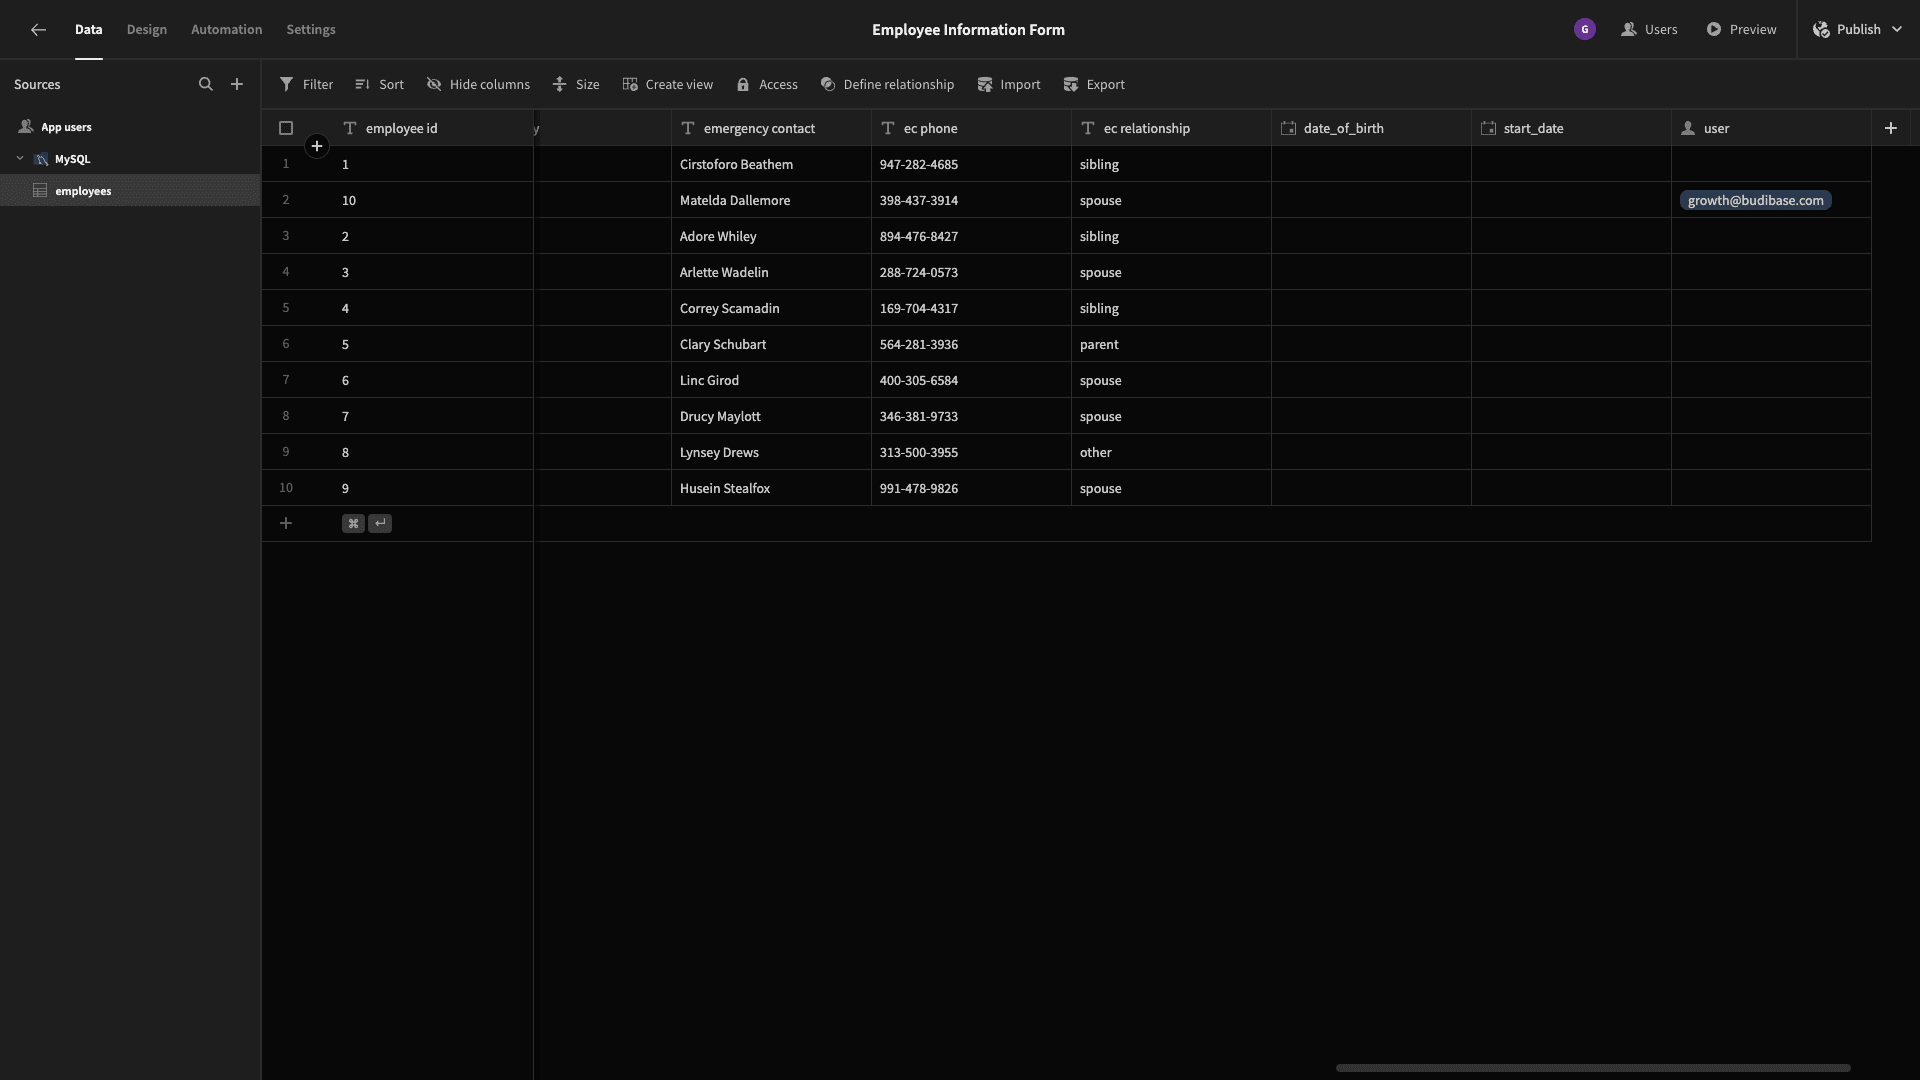
Then, we’ll assign ourselves as the user on one of our rows for the sake of testing:
Now, head back to the Update form.
We’re going to add a data provider component and then nest our multi-step form block inside of this:
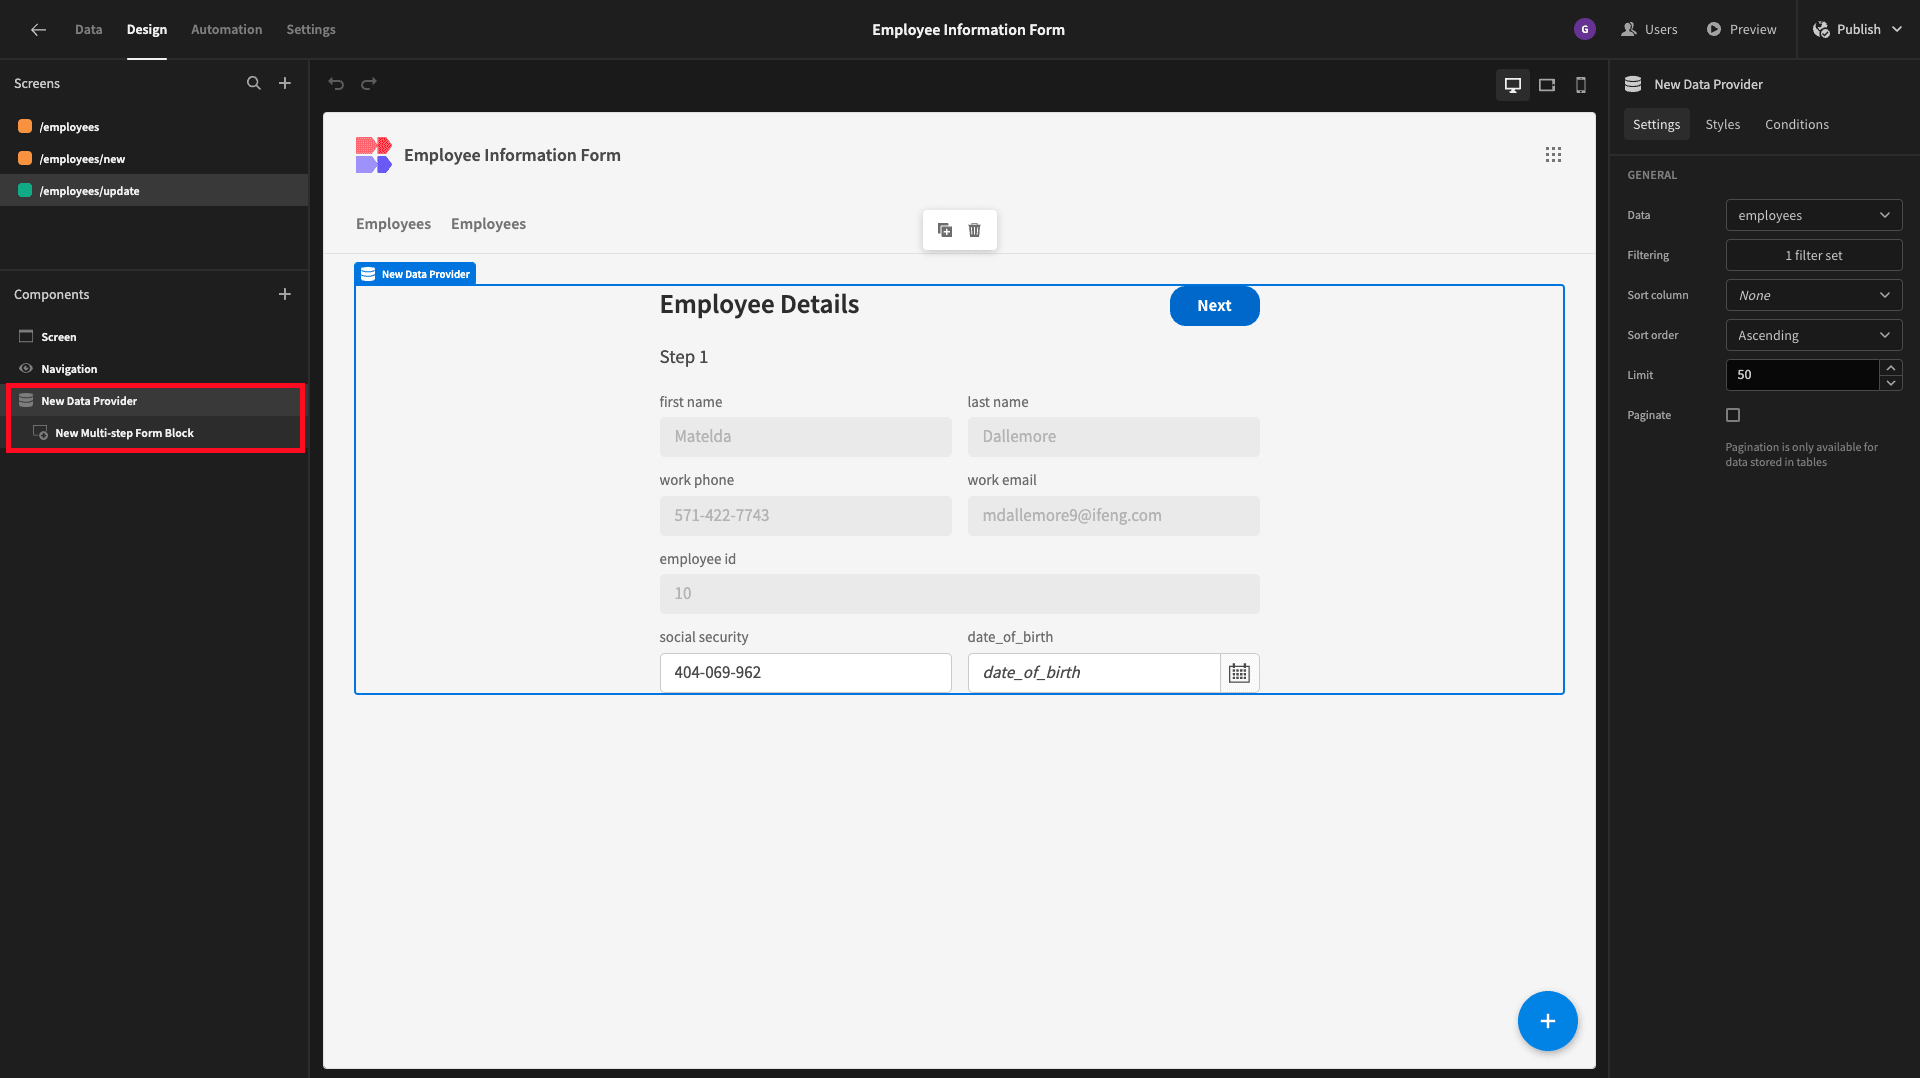
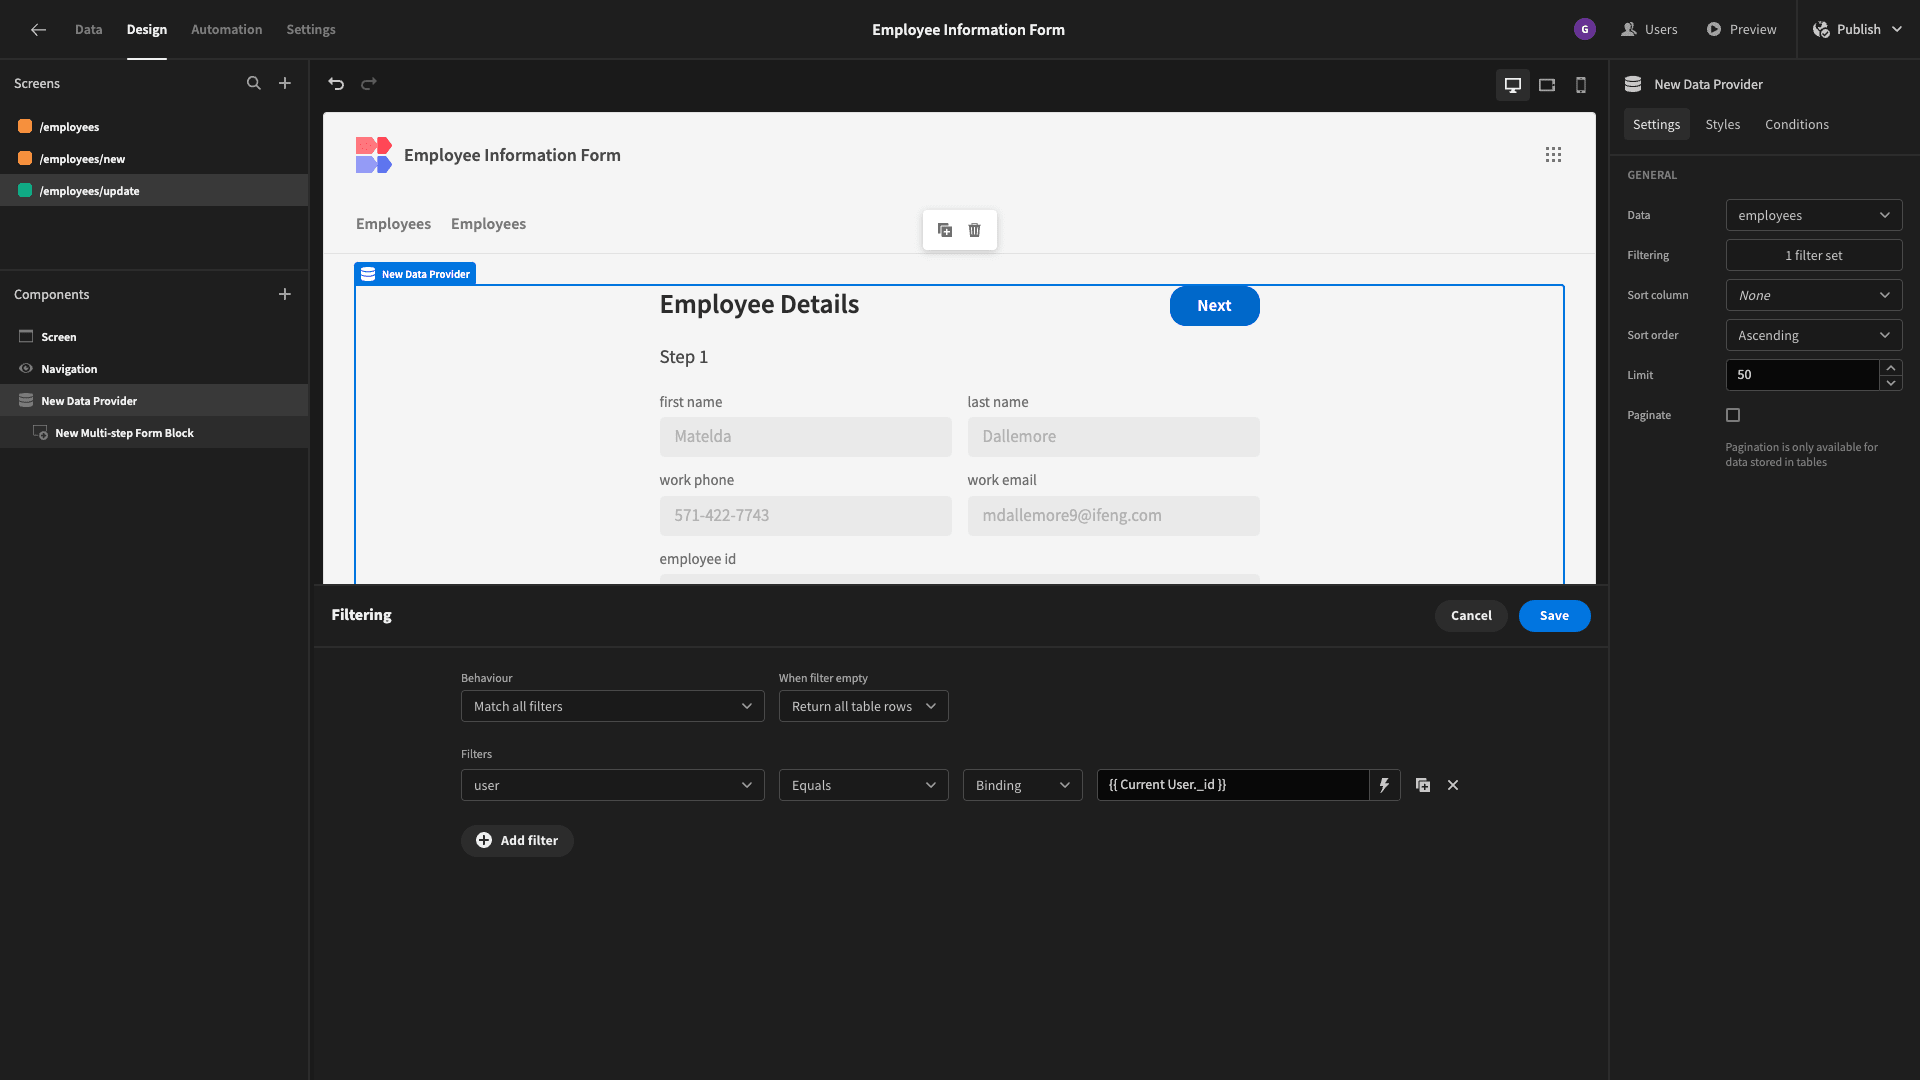
Our data provider retrieves the employees table and then makes the attributes stored within it accessible to nested components. We’ve added a filter expression so that it only returns rows where the User column matches the _id attribute of the current user.
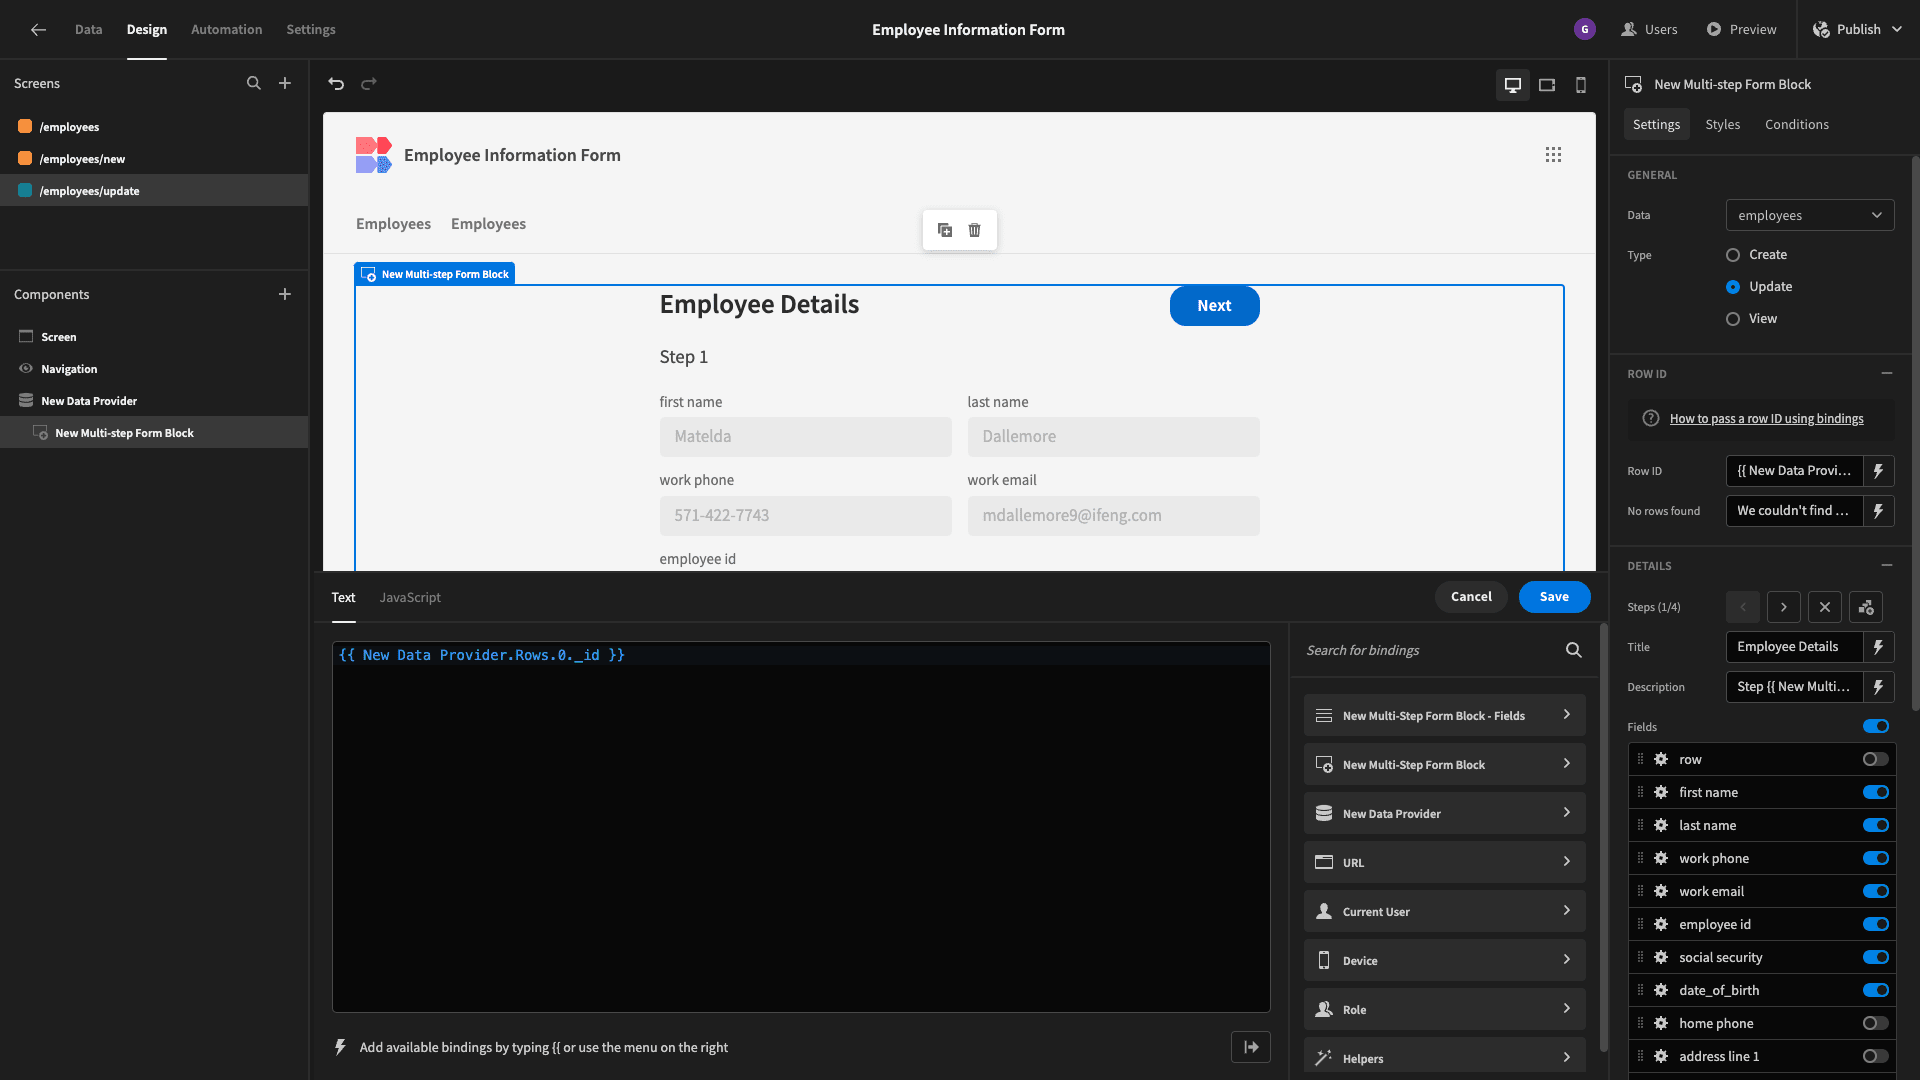
Lastly, we’ve set the Row ID attribute for our multi-step form block to the ID the data provider outputs, using the following handlebars expression:
1{{ New Data Provider.Rows.0._id }}Now, when we access the update form, we’re shown the row that we’ve added ourselves as the corresponding user for:
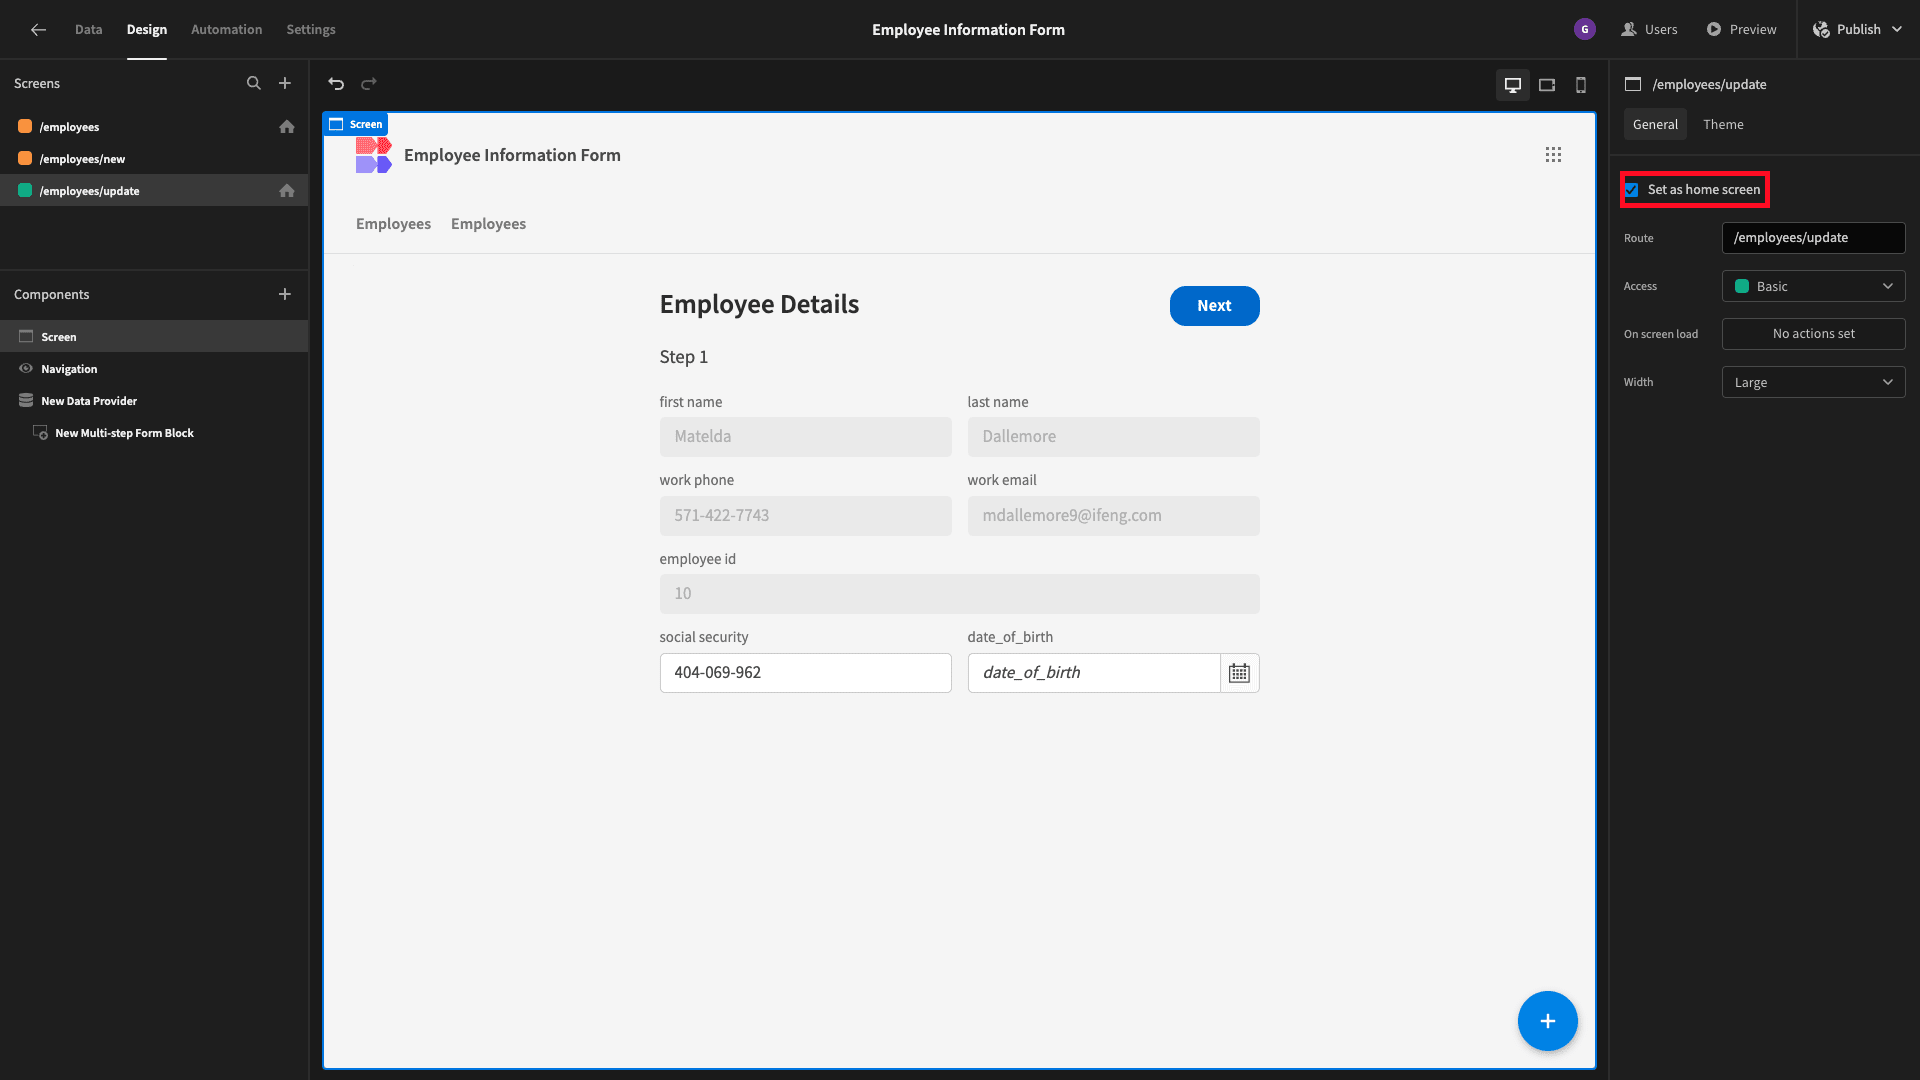
The last thing we’ll do in this section is tidy up our in-app navigation.
First, we’ll set /employees and /employees/update as the home screens for their respective roles.
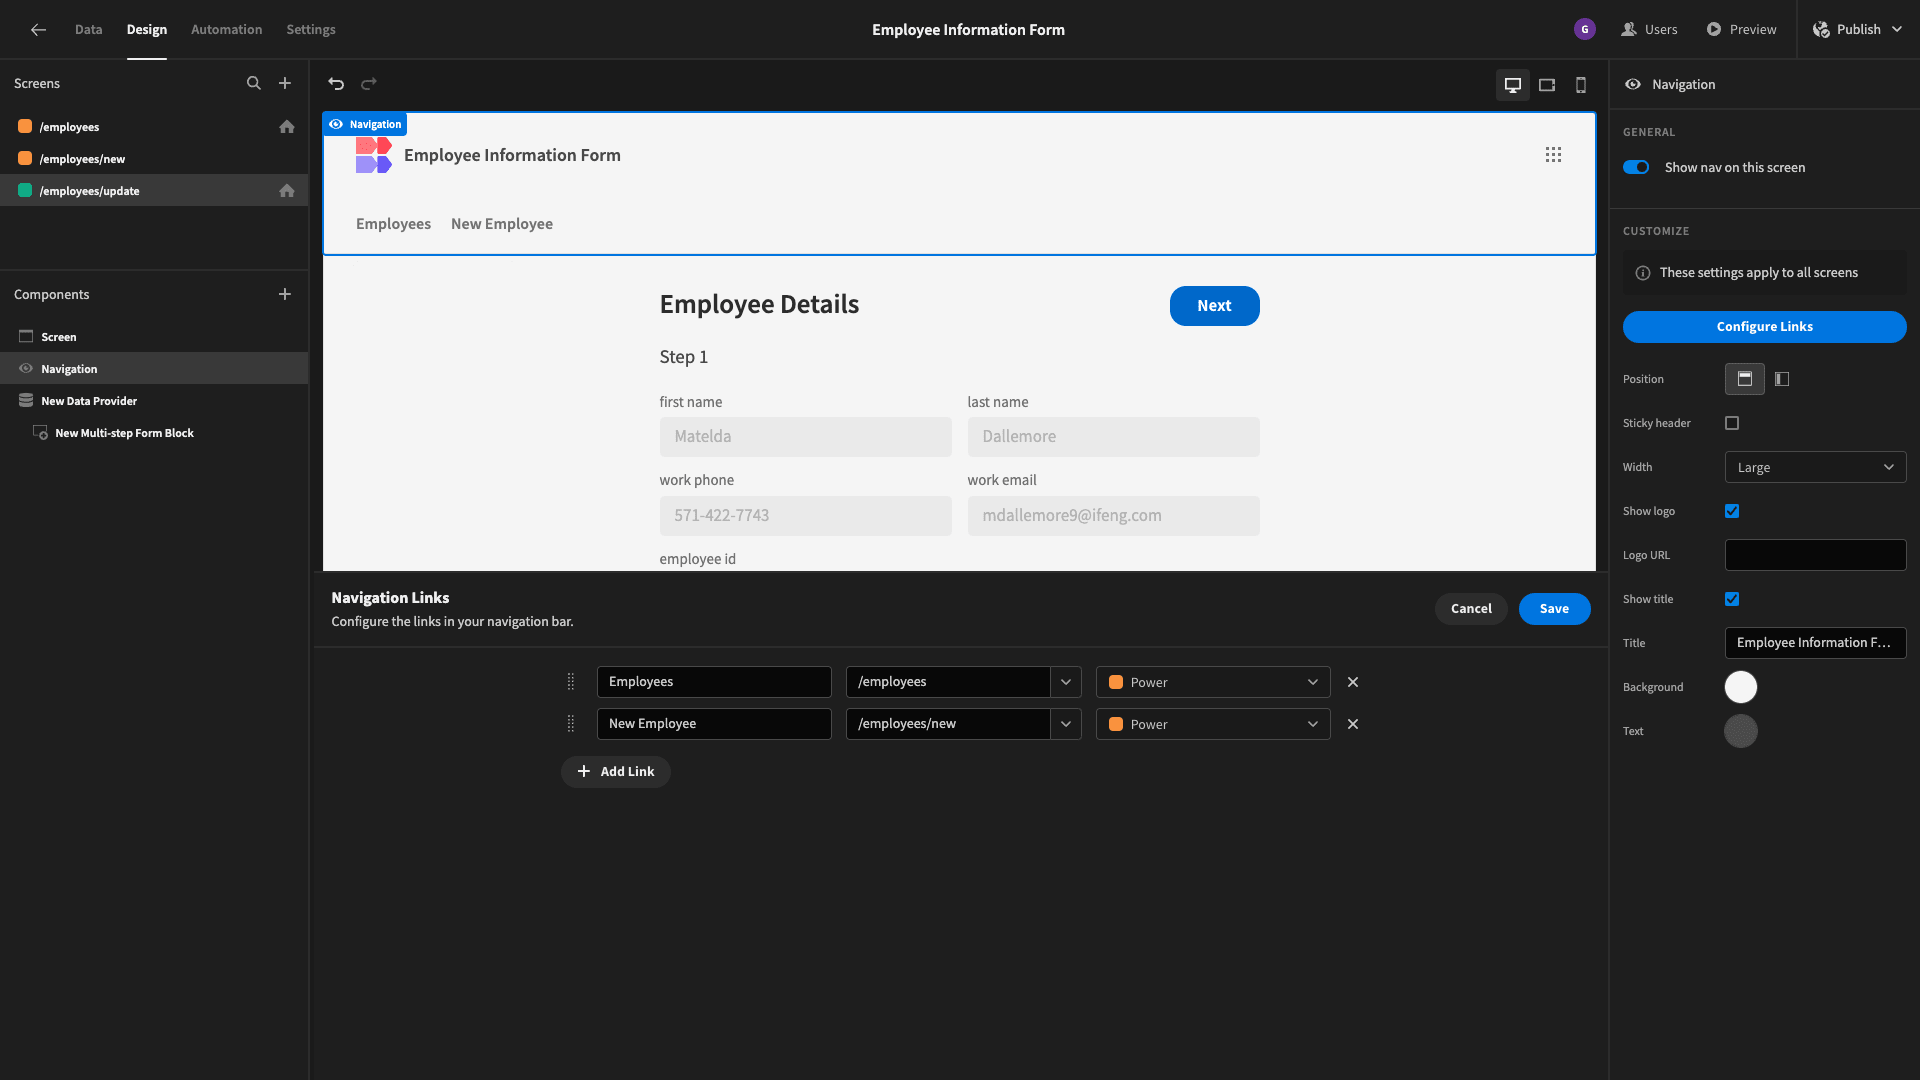
We’ll also edit our navigation bar so that it only shows /employees and /employees new - both of which are only visible to Power users. Basic users won’t see any nav options:
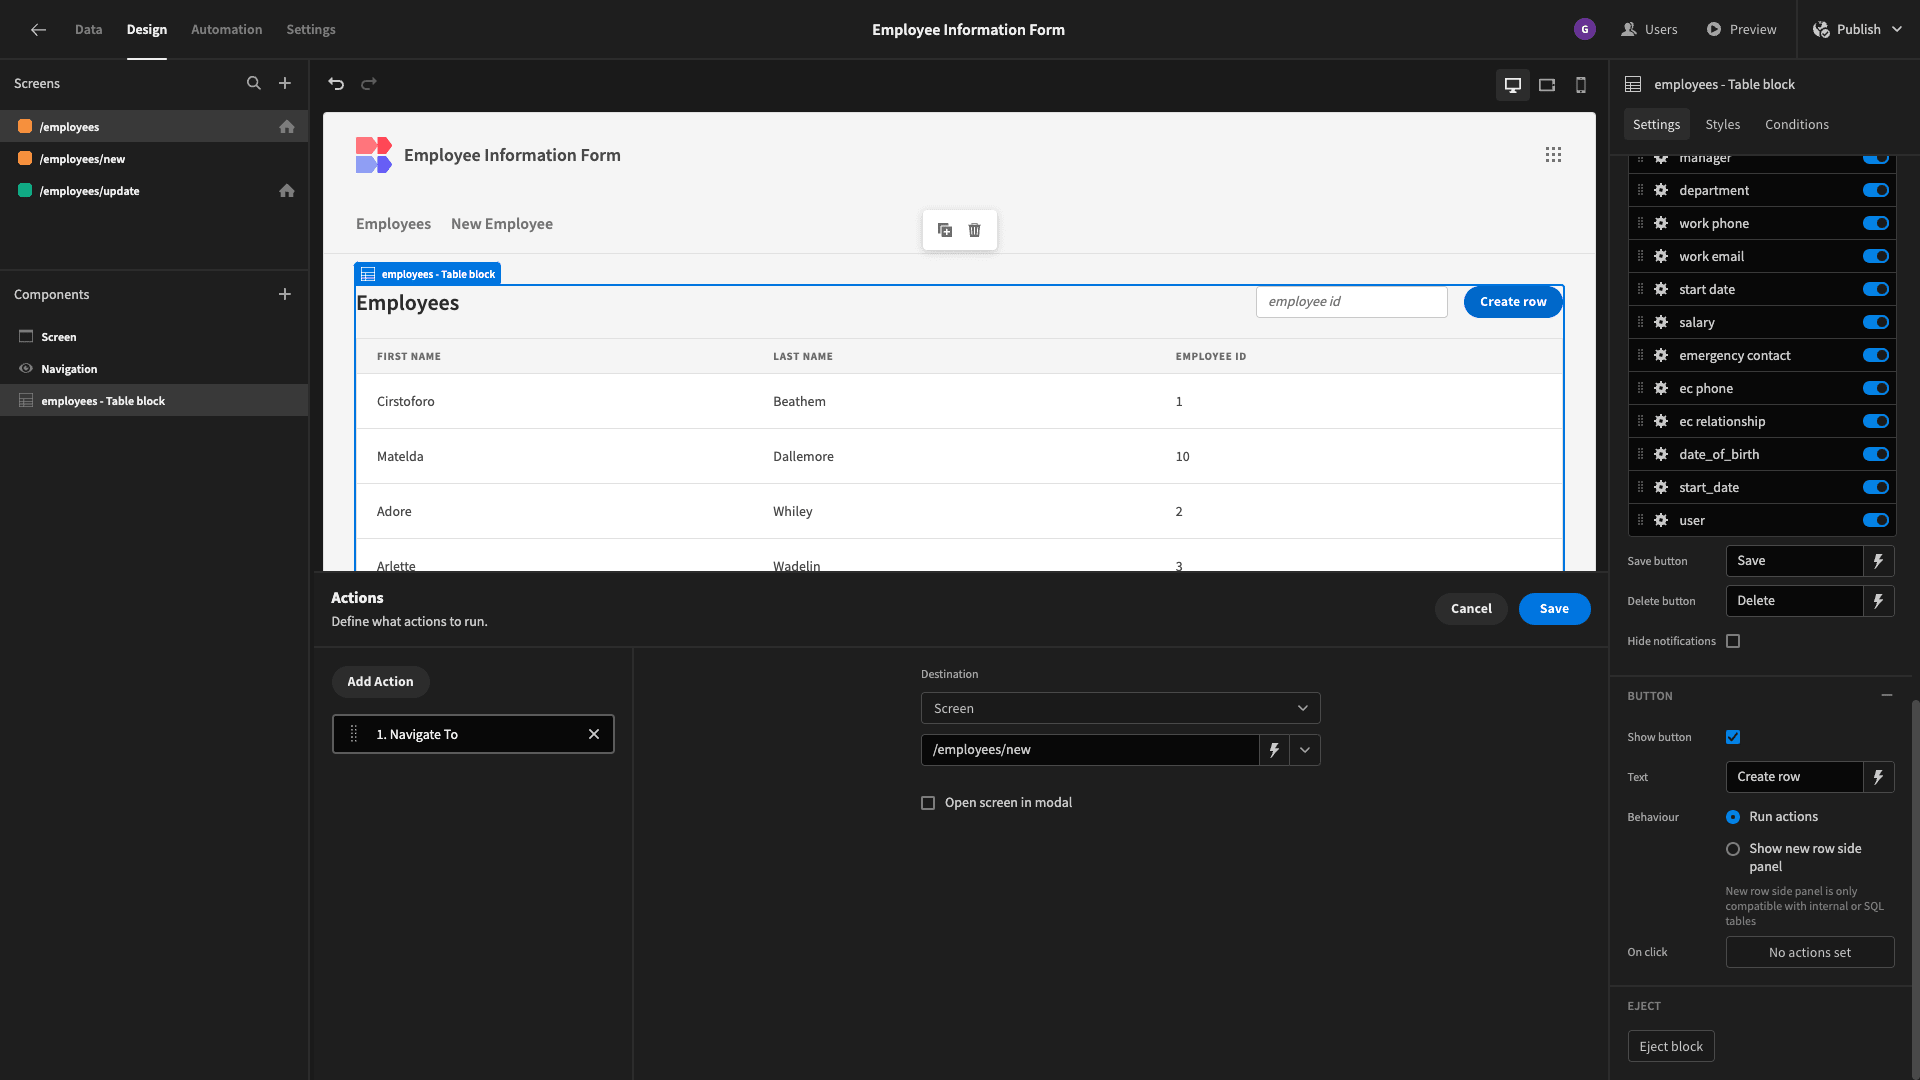
We’ll also set our Create Row button on our table UI so that it navigates to /employees/new.
We can add a similar action to the save button on the new row form - directing users back to the Table screen when they complete the form.
6. Design tweaks and publishing
Lastly, we’re going to make a few final design tweaks to our employee information forms before we push them live.
First of all, we’ll change the theme to Light, under the screen menu:
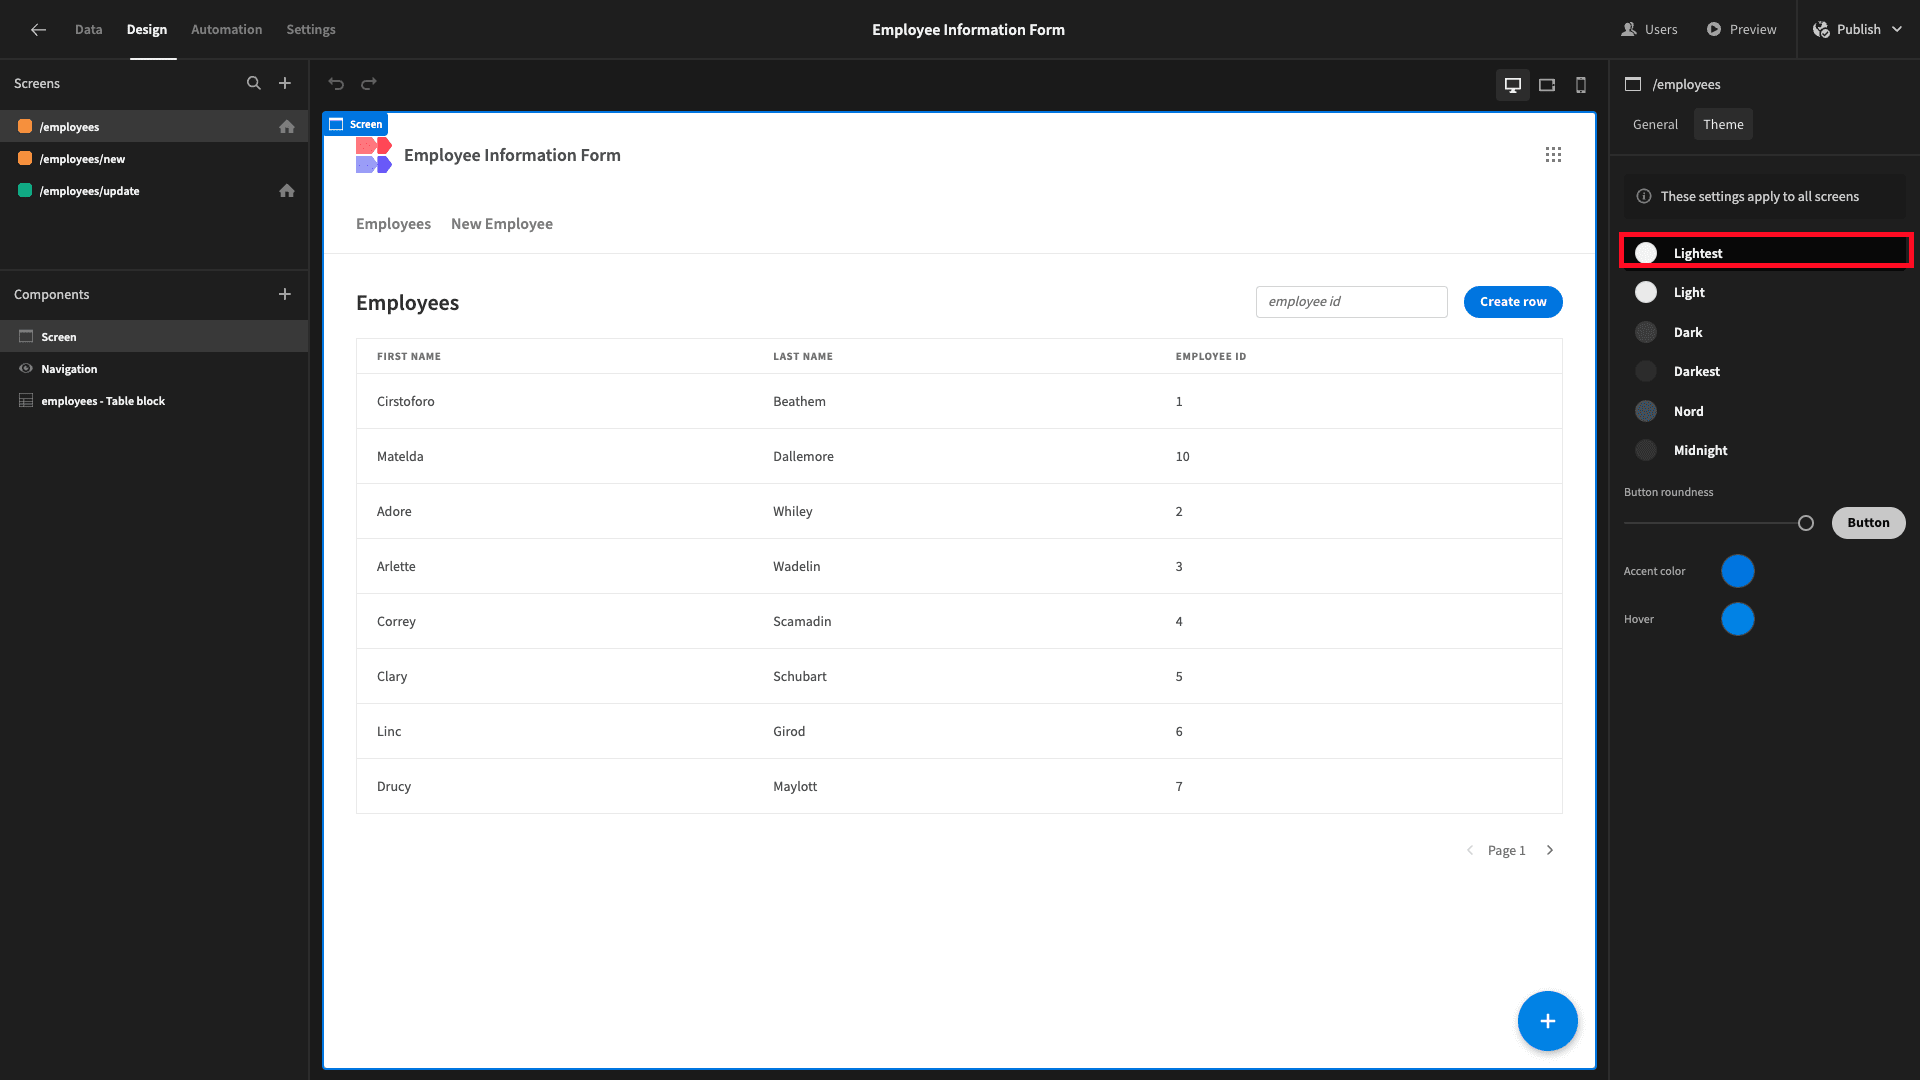
If we wanted to, we could also alter the style of our button components here.
When you’re ready, hit Publish to push your employee information form live.
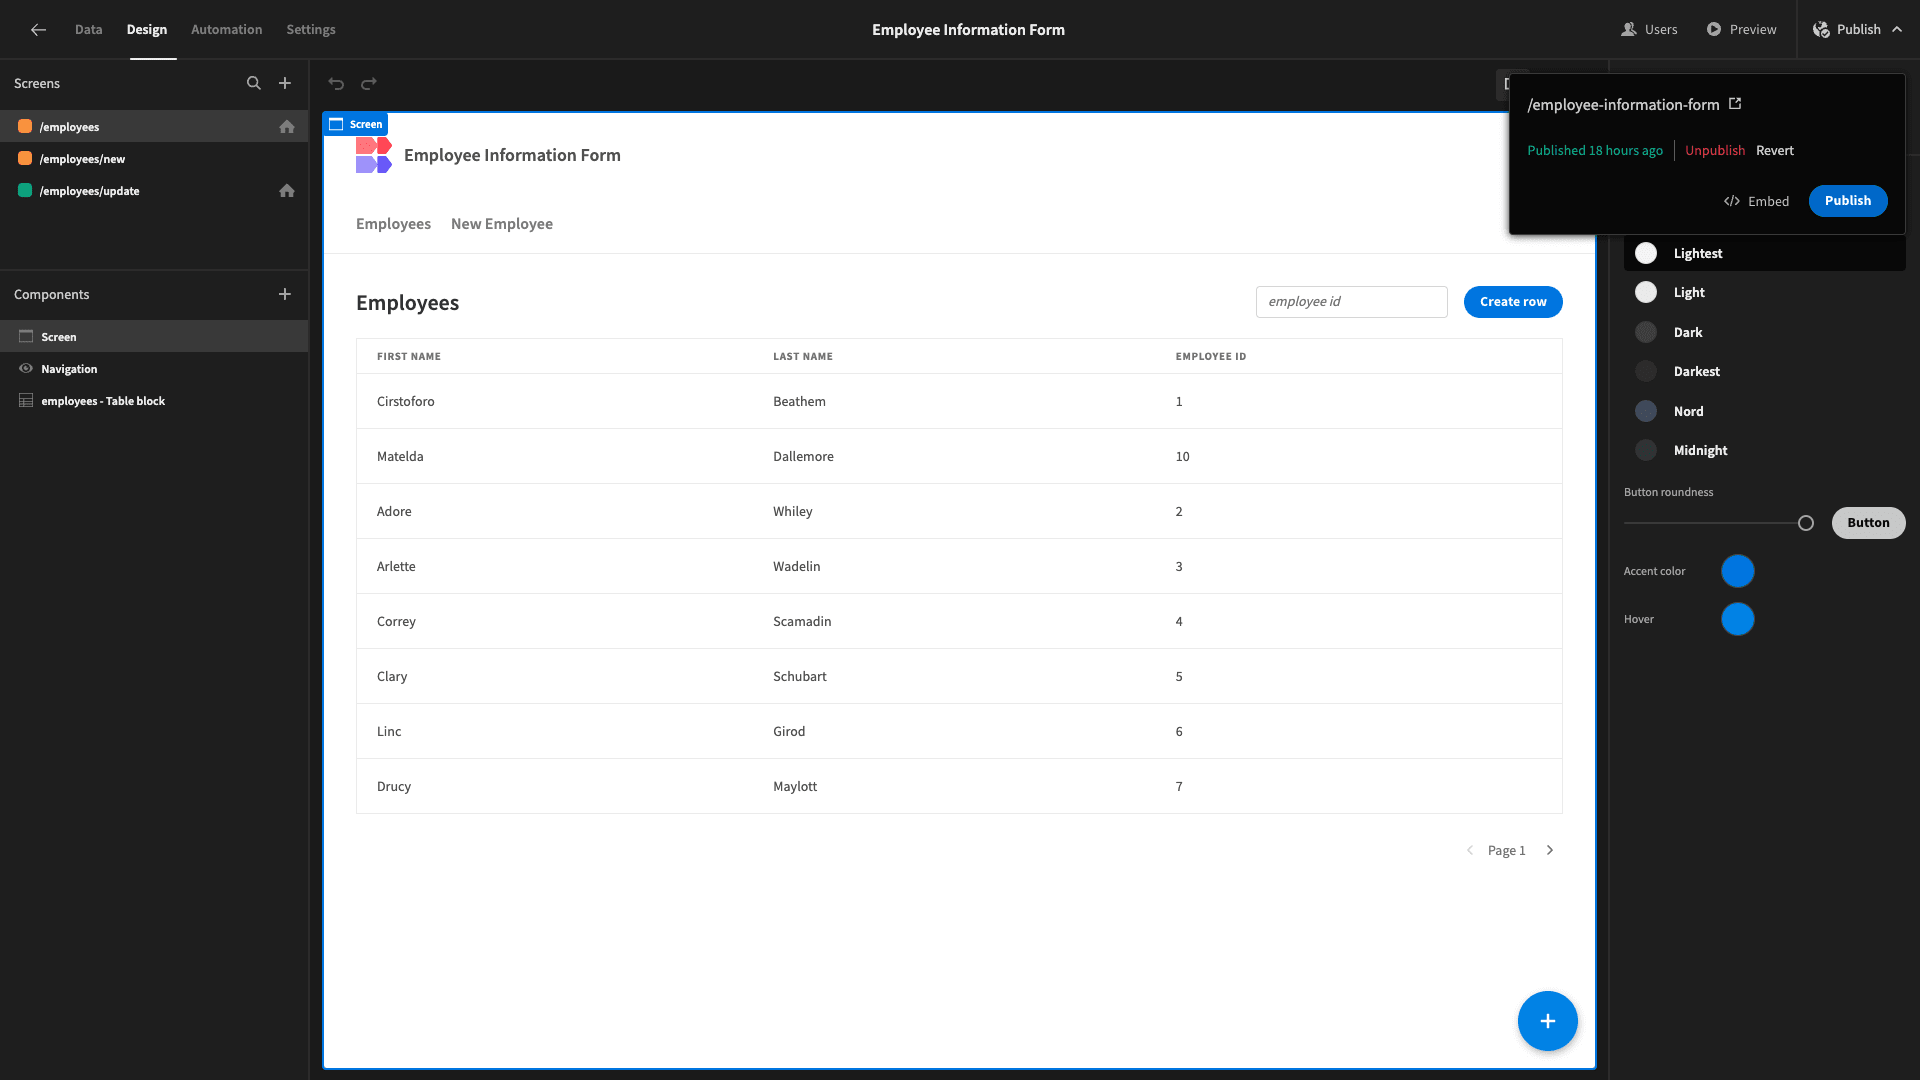
Here’s what this will look like in situ:
And that’s it!
Take a look at our digital forms page to find out more about what Budibase is capable of.